Operation–Quick Start
18
The page in which you select the scene name will
appear.
Step 5.
Use the [VALUE] dial to select a name for the
scene. For a list of the available names, refer to “Scene
Name” on the separate leaflet.
Step 6.
After you have made your selection, press the
OCTAVE SHIFT/CURSOR [
®
] key to move to the next
page.
Step 7.
This page asks you for confirmation. To save the
scene, press the [ENTER] key.
When the scene has been saved, the main display will
indicate “Complete” and you will return to Play mode.
If you decide to cancel mid-way through the Save
procedure, press the [EXIT] key.
5.
Managing scene sets on your computer
You can use the included librarian software to manage and edit sets of the
twelve scenes saved in the microKONTROL.
Data transfer to and from the
librarian software is
performed in the Scene mode
DUMP page. (
☞
p.53)
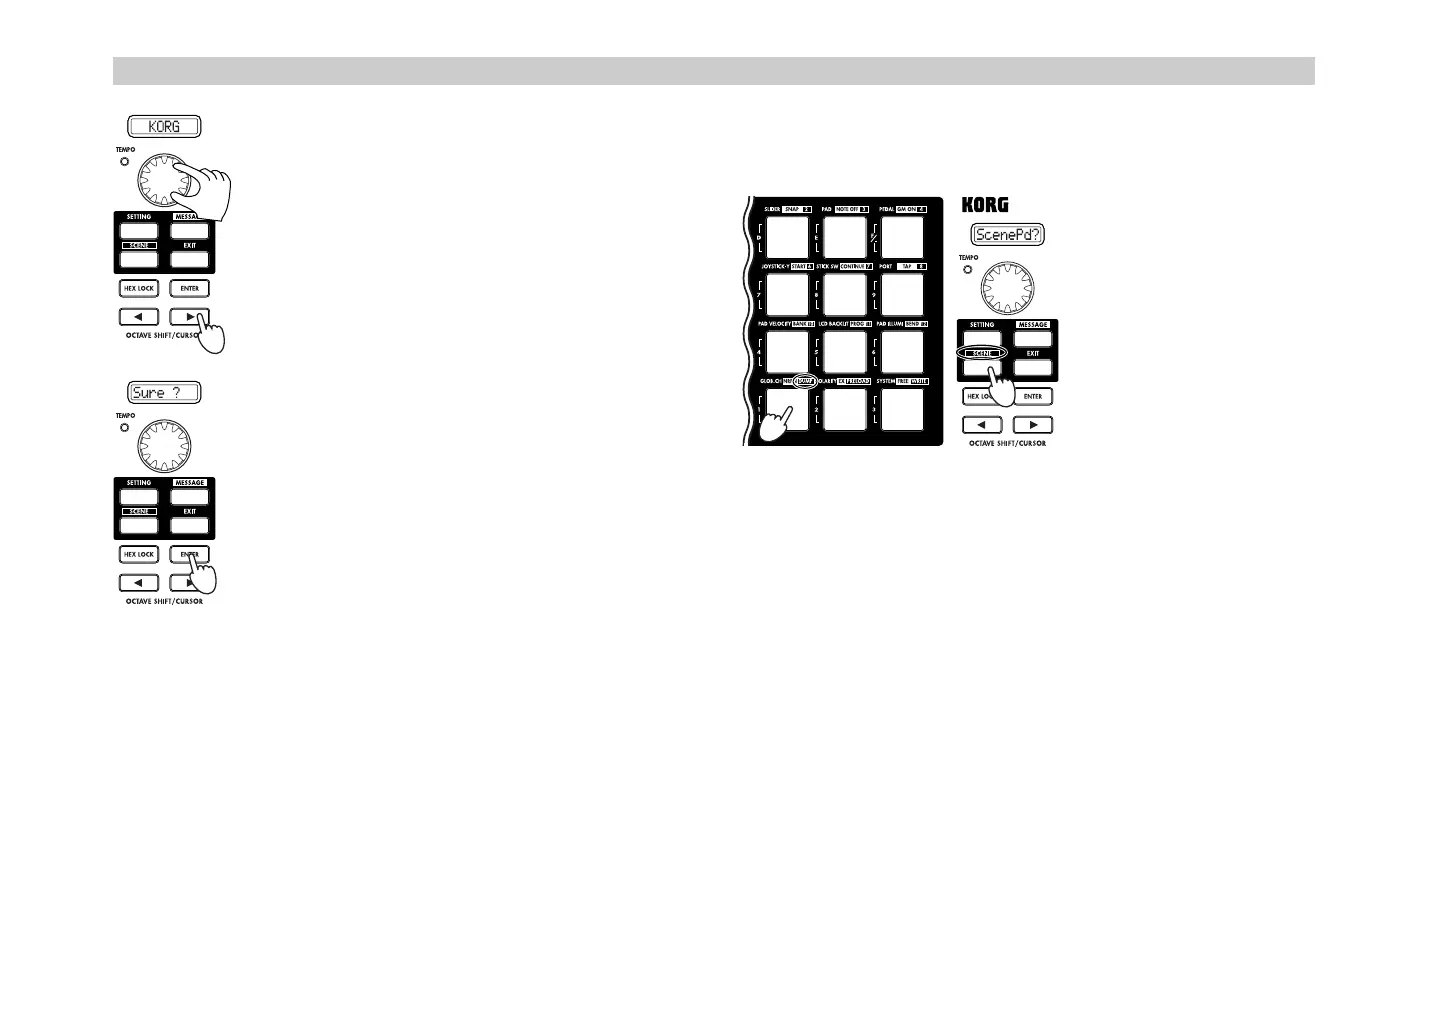
Steps 1-2.
Hold down the
[SCENE] key (the main
display will indicate
“ScenePd?”) and press the
pad marked DUMP.
You will enter the DUMP
page.
Start up the microKONTROL librarian software, and press the “Receive”
button to load the scene set from the microKONTROL’s memory.
Then press the “Save” button to name the scene set and save it as a file. A file
you create in this way can be loaded into the microKONTROL whenever
needed.
For more details, see “Using the Librarian software” (
☞
p.57).
6
5
7
1
2
$+ !"