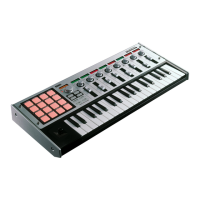
Operation–Setting mode
24
Setting mode
In Setting mode you can set both the Scene parameters (the assignment of
each controller, etc.) and the Global parameters (overall settings for the
entire microKONTROL).
Setting mode is divided into sixteen pages.
Hold down the [SETTING] key (the main display shows “MenuPad?”) and
press one of the pads listed below to move to the corresponding page of
parameter settings.
If you hold down the [EXIT] key and press the [SETTING] key, the main
display will show “MenuPad?” and the microKONTROL will wait for you
to select a page (“mode lock”). You can press a pad to select a page from this
state as well.
Scene parameter settings
Pad [1] through pad [8] access pages for setting Scene parameters. After you
edit these settings, you will need to save them in Scene mode.
Global parameter settings
Pad [9] through pad [16] access pages for setting Global parameters. These
settings are saved automatically when you exit the page or select a different
scene.
If the microKONTROL is operating on batteries and the batteries have
run low, you will not be able to save Global parameters.
About the OCTAVE SHIFT/CURSOR keys, [ENTER] key, and [EXIT]
key
In Setting mode, the OCTAVE SHIFT/CURSOR [
√
]/[
®
] keys act as cursor
keys to move between parameters.
When you hold down the [SETTING] key and press a pad to enter a page in
this mode, the key(s) will light green to indicate the direction(s) in which
you can move. You cannot move in a direction whose key is dark or lit red.
You can return to the first page by holding down the [
®
] key and pressing
the [
√
] key.
: You can move toward the right to another parameter
: You can move toward the left to another parameter
When you arrive at the last page, the [ENTER] key will blink. Press the
[ENTER] key to apply the setting and return to Play mode. If you press
[ENTER] before you arrive at the last page, your settings up to that point
will be applied and you will return to Play mode.
Press the [EXIT] key if you decide to discard your changes before pressing
[ENTER].
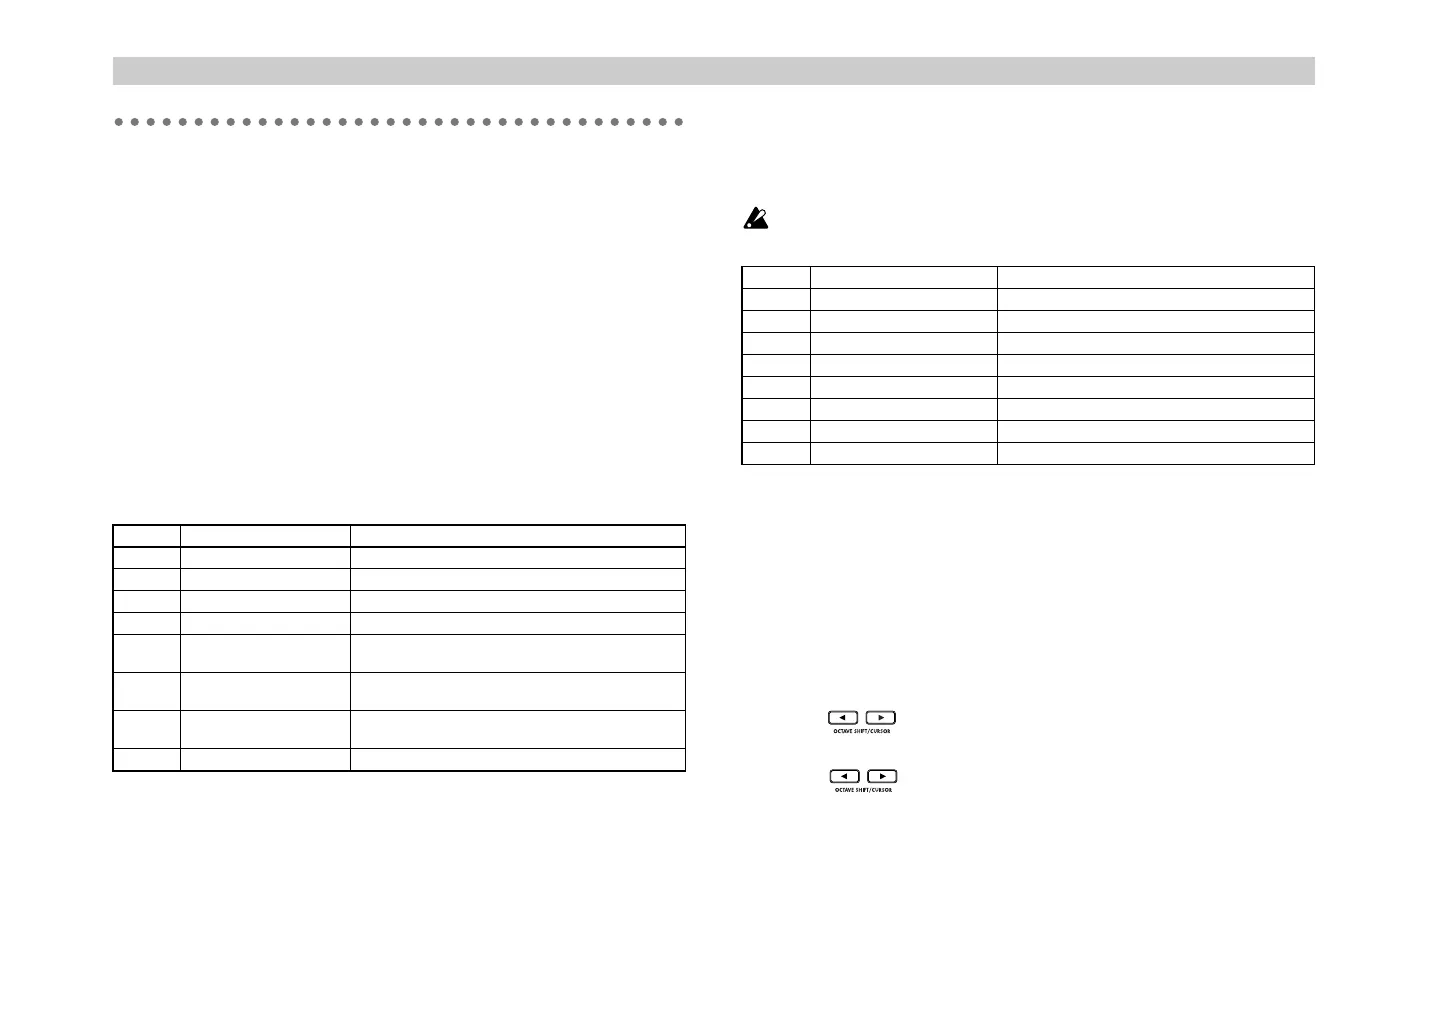
Pad No. Page Content
Pad [1] Encoder assignment Assign messages to encoders (
☞
p.25)
Pad [2] Slider assignment Assign messages to sliders (
☞
p.27)
Pad [3] PAD assignment Assign messages to pads (
☞
p.28)
Pad [4] Pedal assignment Assign a message to a connected pedal (
☞
p.29)
Pad [5] JoyStick –X assignment
Assign messages to the left/right direction of the
joystick (
☞
p.31)
Pad [6] JoyStick –Y assignment
Assign messages to the forward/backward direction
of the joystick (
☞
p.35)
Pad [7]
Joystick switch assign-
ment
Assign a message to the joystick switch (
☞
p.35)
Pad [8] USB-MIDI Port setting Make USB-MIDI port settings (
☞
p.36)
Pad No. Page Content
Pad [9] Keyboard Velocity setting Select the velocity curve of the keyboard (
☞
p.38)
Pad [10] PAD Velocity setting Specify the pad velocity (
☞
p.39)
Pad [11] LCD Backlit setting Make backlight settings for the display (
☞
p.39)
Pad [12] PAD Illumination setting Specify the illumination of the pads (
☞
p.40)
Pad [13] Transpose setting Transpose the keyboard (
☞
p.40)
Pad [14] Global MIDI Channel setting Set the global MIDI channel (
☞
p.41)
Pad [15] Polarity setting Specify the polarity of a connected pedal (
☞
p.41)
Pad [16] System setting Specify the initial values of the encoders (
☞
p.41)
(Green)(Red)
(Green) (Red)
%' !"