Operation–Setting mode
34
Assigning different MIDI messages to the +X and –X
directions
Here’s how to assign different MIDI messages to the –X and +X directions of
the joystick. You can assign aftertouch, velocity, or a control change (CC#).
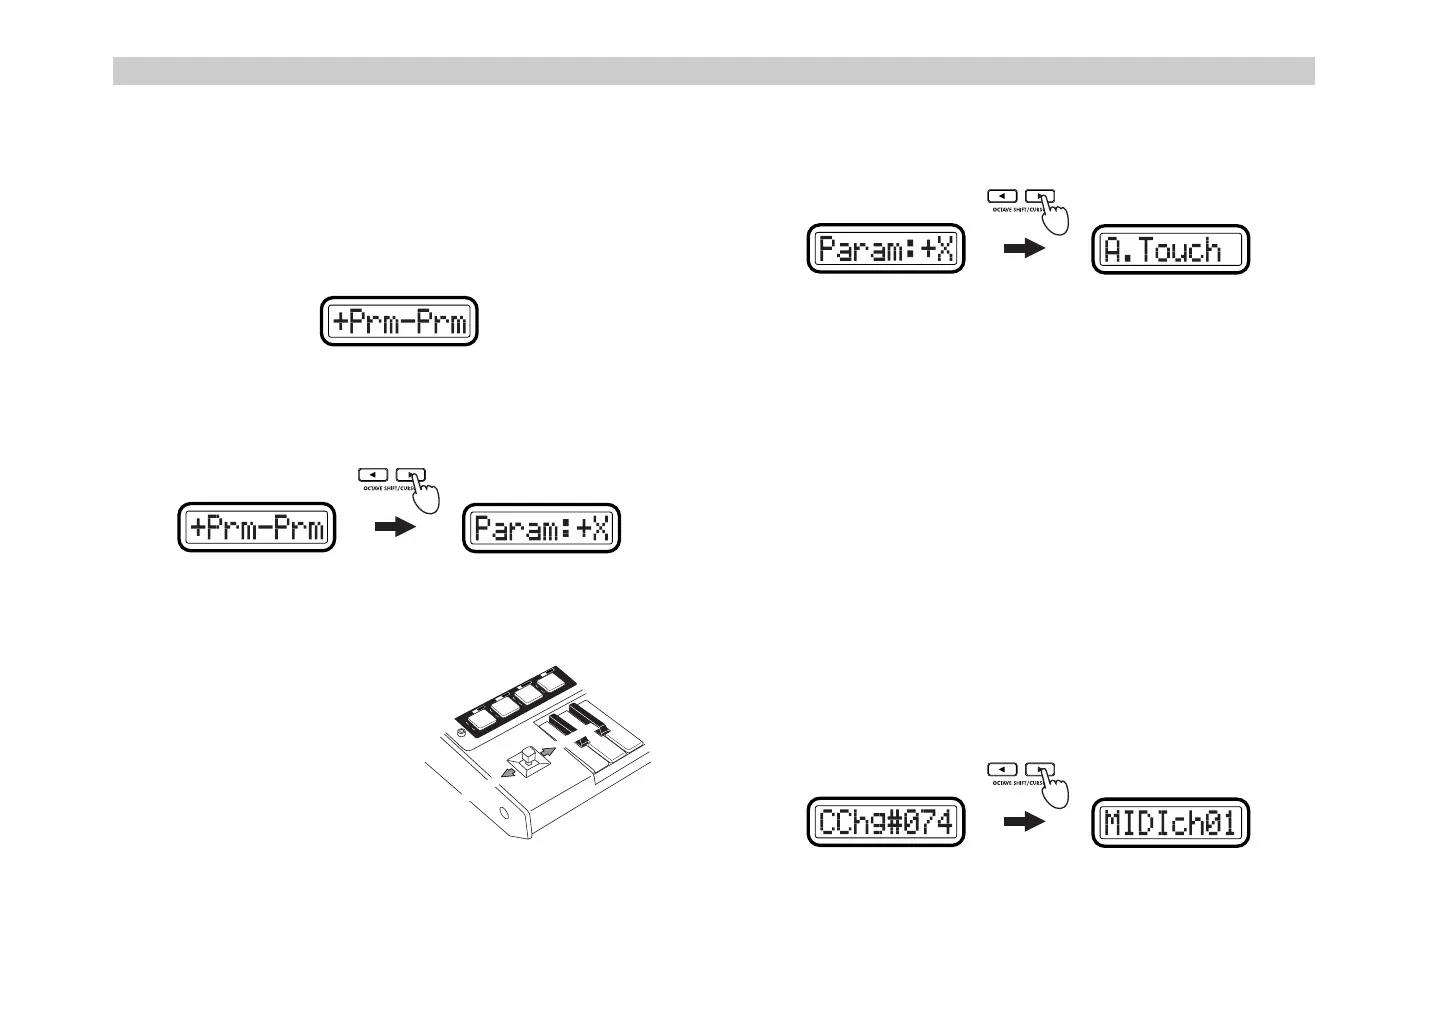
1
Hold down the [SETTING] key and press pad [5] to enter the Joystick
–X assignment page, and choose
+Prm–Prm
for “Assignment Select.”
2
Press the OCTAVE SHIFT/CURSOR [
®
] key to proceed to “+X/–X
Select” (select the direction that you want to assign).
3
Use the [VALUE] dial to select whether you will assign the +X
direction or the –X direction.
Param: –X
Assign the –X direction.
Param: +X
Assign the +X direction.
4
Press the OCTAVE SHIFT/CURSOR [
®
] key to proceed to “Message
Select” (selecting MIDI message).
5
Use the [VALUE] dial to select the MIDI message you want to assign.
NoAssign
No MIDI message will be assigned to the joystick range you are
assigning. If you select
NoAssign
, the setting will be updated when
you press the [ENTER] key.
☞
Step 8
A.Touch (AfterTouch)
Keyboard aftertouch will be assigned. If you select
A.Touch
, you can
also select the type of aftertouch.
☞
p.32
“Assigning aftertouch”
Velocity
Assign keyboard or pad velocity. If you select
Velocity
, you can also
select the type of velocity.
☞
p.33
“Assigning velocity”
CtrlChg# (Control Change)
Assign control change. If you select
CtrlChg#
, you can also select the
control change number.
☞
p.33
“Assigning a control change”
6
Press the OCTAVE SHIFT/CURSOR [
®
] key to proceed to “MIDI
Channel” (specify the MIDI channel).
(Green)(Red)
T
R
A
N
S
P
O
S
E
0
1
2
3
R
P
N
V
A
L
U
E
G
L
O
B
.
C
H
N
R
P
N
D
U
M
P
S
Y
S
T
E
M
F
R
E
E
W
R
I
T
E
C
L
O
C
K
E
X
P
R
E
L
O
A
D
Param
: -X
Param
: +X
&' !"