4. Touch the [Config.] button. Touch to select an entry.
All the available countdowns appear in a numbered list without a
time specification.
5. Select a number field.
Only the fields not assigned to a countdown are available for
selection.
6.
Touch the button.
A window containing the name Countdown and the previously
selected number appears.
7. Touch the [Duration] field.
A manual input field opens.
8. Enter the duration of the countdown.
9. Press [OK] to confirm.
10.
Press the button to start the countdown.
The time countdown is displayed in the window.
11. You can leave the window open or switch to the home window
The time countdown is displayed on the [Countdown] tile in the
home window.
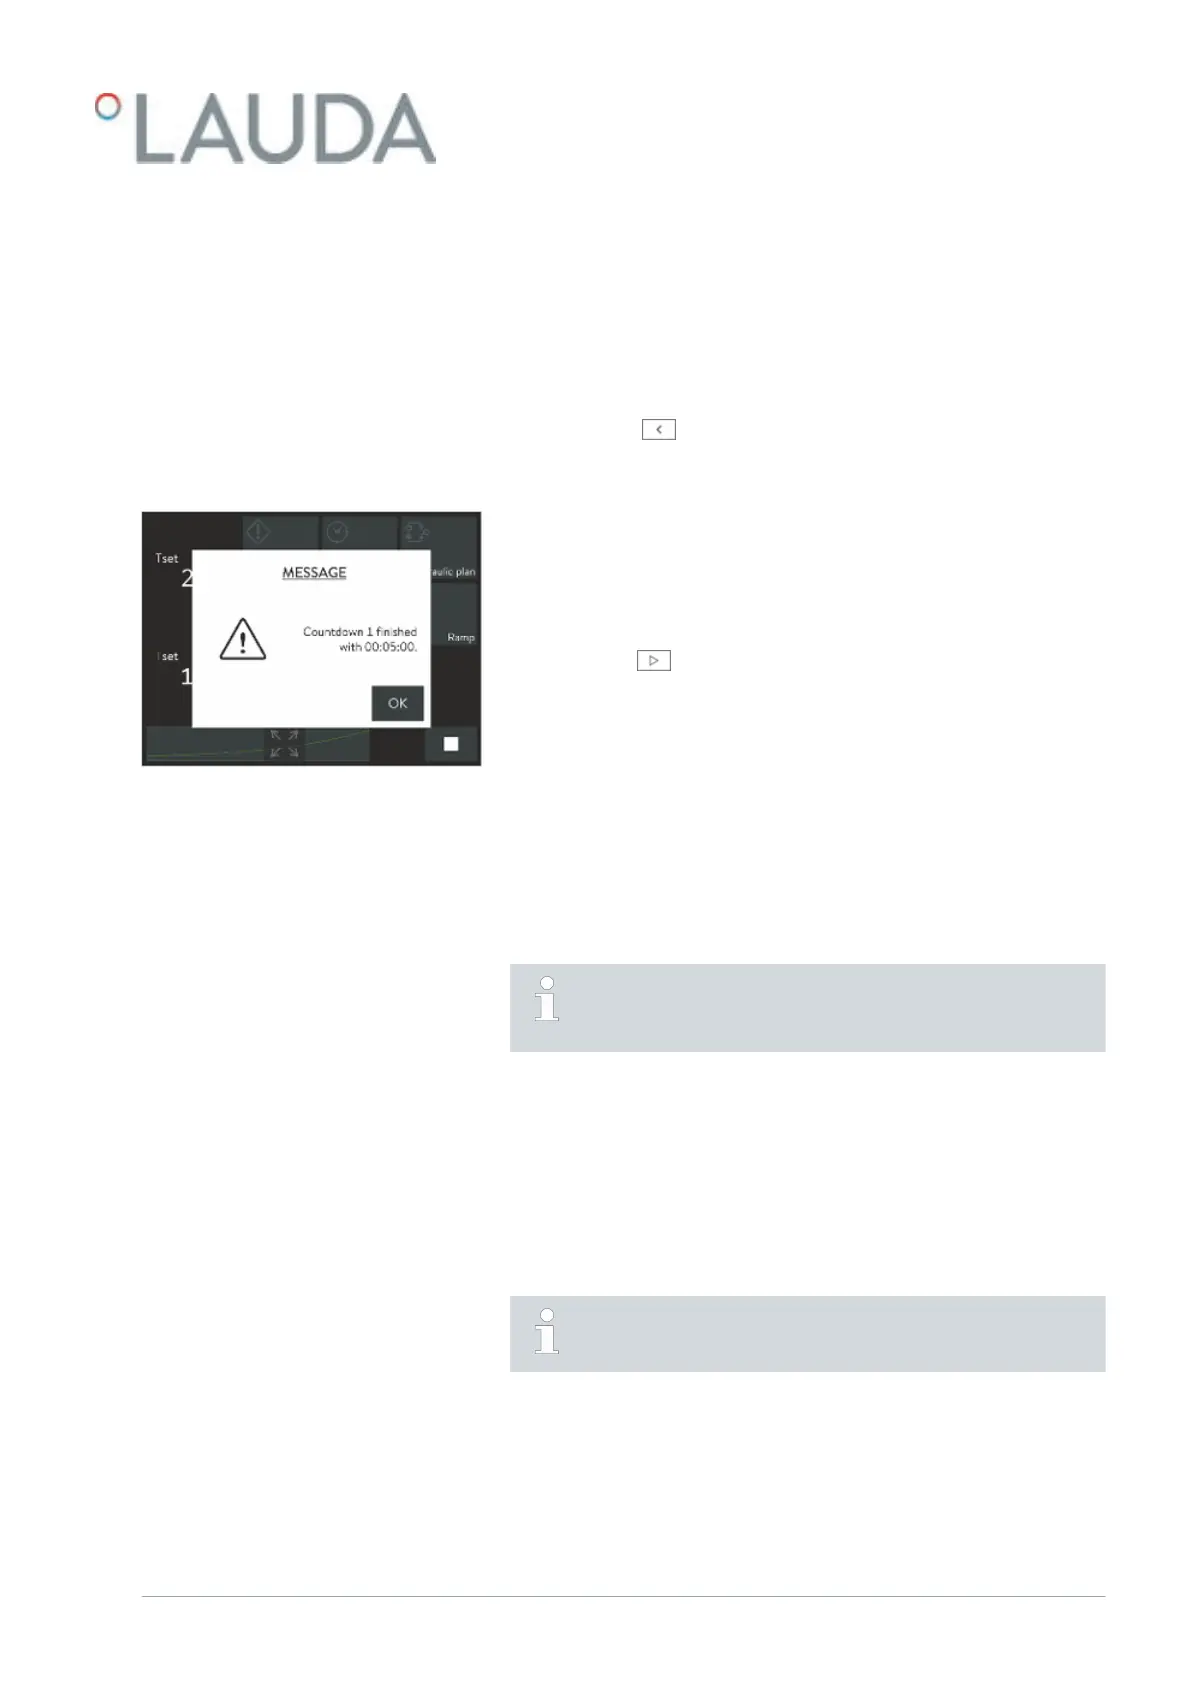
12. When the countdown ends, a corresponding message appears.
Then press [OK] to confirm.
6.12 Calibrating the temperature probe
A calibrated reference thermometer with the desired level of accu-
racy is necessary. Otherwise you should not change the calibration
of your constant temperature equipment.
If, when checking the temperature in a steady state, you discover a constant
temperature deviation of T
int
or T
ext
from the reference thermometer, this
can be equaled out via the Calibration
menu point.
With the menu point Oset (1-point comparison), the characteristic of the
temperature switch is adjusted in parallel by the input value.
With the menu point 2-point calibration (2-point comparison), the charac-
teristic of the temperature switch is adjusted and the slope of the character-
istic is changed.
It is possible to change the temperature values T
int
and T
ext
within a
range of ±3 K respectively.
Fig. 70: Countdown finished
V6 PRO bath thermostats and circulation thermostats 109 / 156