6-20 LeeBoy Model 8616 Conveyor Paver
Operation
Power Crown (Option)
1. Use Power Crown Switch to adjust positive/negative
crown as needed.
Power Crown Assembly
Figure 6-19
1 - Selector Valve
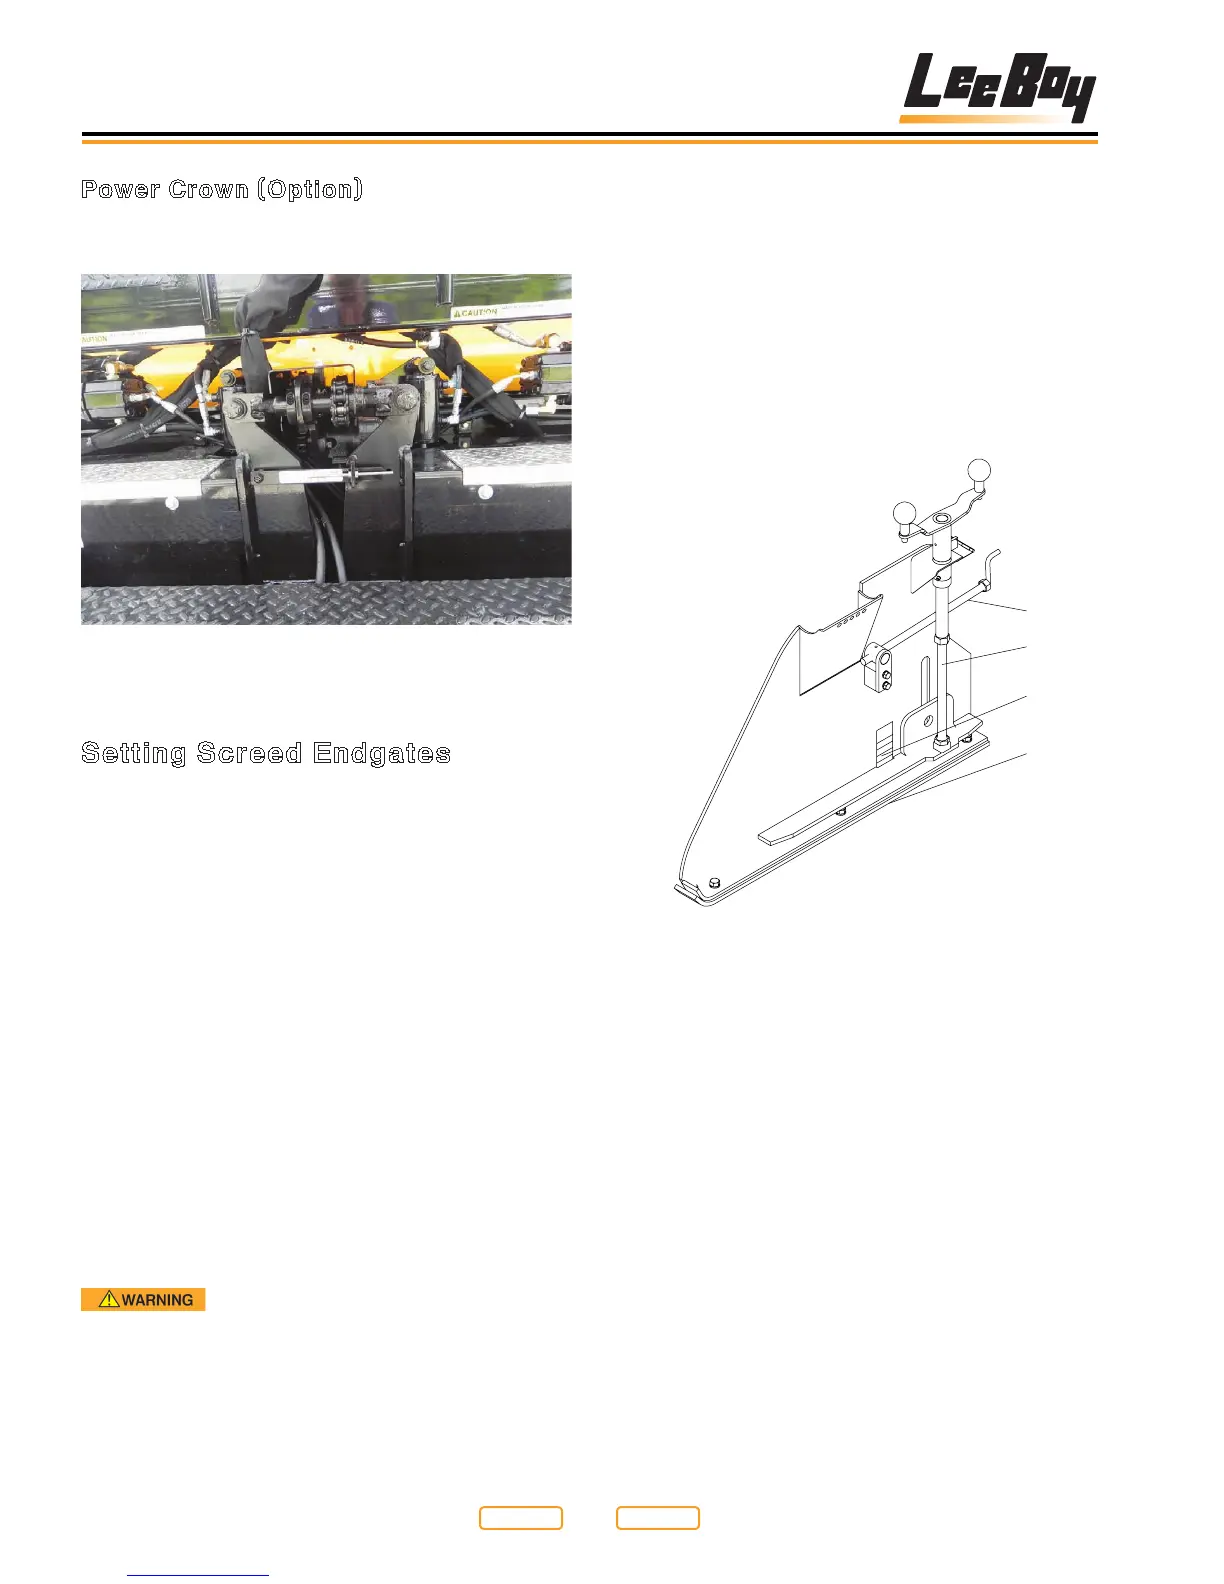
Setting Screed Endgates
1. Ontherstpass,turntheendgatedepthscrew
(Figure 6-20,1) to lower the endgate until it is about
0.25 in. (6.35 mm) below the screed.
NOTE: Most operators run endgates within 0.25 in. (6.35
mm)ofush.
2. Turn the tilt screw (Figure 6-20,2) on the endgate
so the front of the endgate tilts down slightly when
the screed is lifted. This will allow the endgate to set
itself to grade.
NOTE: When paving, never let the endgate carry the
weight of the screed. This will cause screed
compaction to vary.
3. During operation, if the endgate starts to dig in at
front, adjust the tilt screw so the endgate tilts back.
4. When making a joint, the endgate must be set to
whereittsushwithbottomofscreed.
NOTE: Keep runners clean. When making a joint, spray
cleaning solvent on runners (Figure 6-20,4).
Fire Hazard! Never spray cleaning
solvent or release agent on or near a screed heating
element that is hot or being heated or on or near any
open ame or ignition source. Cleaning solvent and
release agent could ignite causing serious personal
injury.
5. Ontherstpass,leaveabout6-8in.(15-20cm)of
unrolled asphalt where the joint is being made.
6. In laying a joint, if the joint looks too high or too low,
adjusttheightscrewonthescreedaboutone(1)
turn at a time and allow 4 - 5 ft. (1.2 - 1.4 m) of travel
to correct itself.
NOTE: Too much adjustment up or down may cause
rising and falling effect in the paved material.
7. If making a cold joint, set endgate down about 1/4 in.
(6.35 mm); this will give a nice, even edge.
1
2
3
4
Endgates
Figure 6-20
1 – Depth Screw
2 – Tilt Screw
3 – Depth Gauge
4 - Runner
Return to
Last Viewed
Return to
Thumb Index