7-8 LeeBoy Model 8616 Conveyor Paver
Maintenance
50-Hour (Initial) or Weekly
Routine Maintenance
1. Check hydraulic oil and add if necessary.
• To ll, remove top of return lter, located on top of
reservoir, and pour through. If you have an air or
hydraulic pump, you can ll at charge lter. (Remove
cap and ll.)
The LeeBoy Model 8616 Conveyor
Paver hydraulic system requires clean, contaminant-
free oil (see Specications in Section 4). Take
care when working with the hydraulic system to
ensure it is completely clean.
2. Adjust conveyor chains (see Conveyor Drive Chain
Adjustment in Section 7). After adjustment,
drag chains should be about 1/2” (13 mm) from rear
square tubing of main frame. Do not let chains run
more than 2” (51 mm) below main frame sides.
3. Check auger chains, lubricate and adjust.
4. Check all battery connections and remove any
corrosion that is present. (Check cables daily.)
5. Check air cleaner, if the engine is equipped with a
dry type element.
Improperly serviced air cleaners
quickly wear out engines. In just a few hours a small
amount of dirt will wear out a set of piston rings.
Refer to your engine operator’s manual for service
information.
6. Perform any other engine preventive maintenance
as described in the engine operator’s manual.
7. Change engine oil and lters. Use drain hose on
right side of paver where access hole is located.
8. For both sides of the screed, lubricate all grease
ttings on the ight screw, the tting on the depth
screw, and the ttings on the ange bearings
located on top of the extension screed (Figure 7-1).
Grease nuts on extension screws.
9. Blow dust from generator unit.
10. Anytime the LeeBoy Model 8616 Conveyor Paver
has been repainted or the safety labels have been
removed, damaged or can not be read, a new set
of labels should be ordered and reinstalled (see
Safety Label Installation in Section 7) for safe
operation.
100-Hour or Monthly Routine
Maintenance
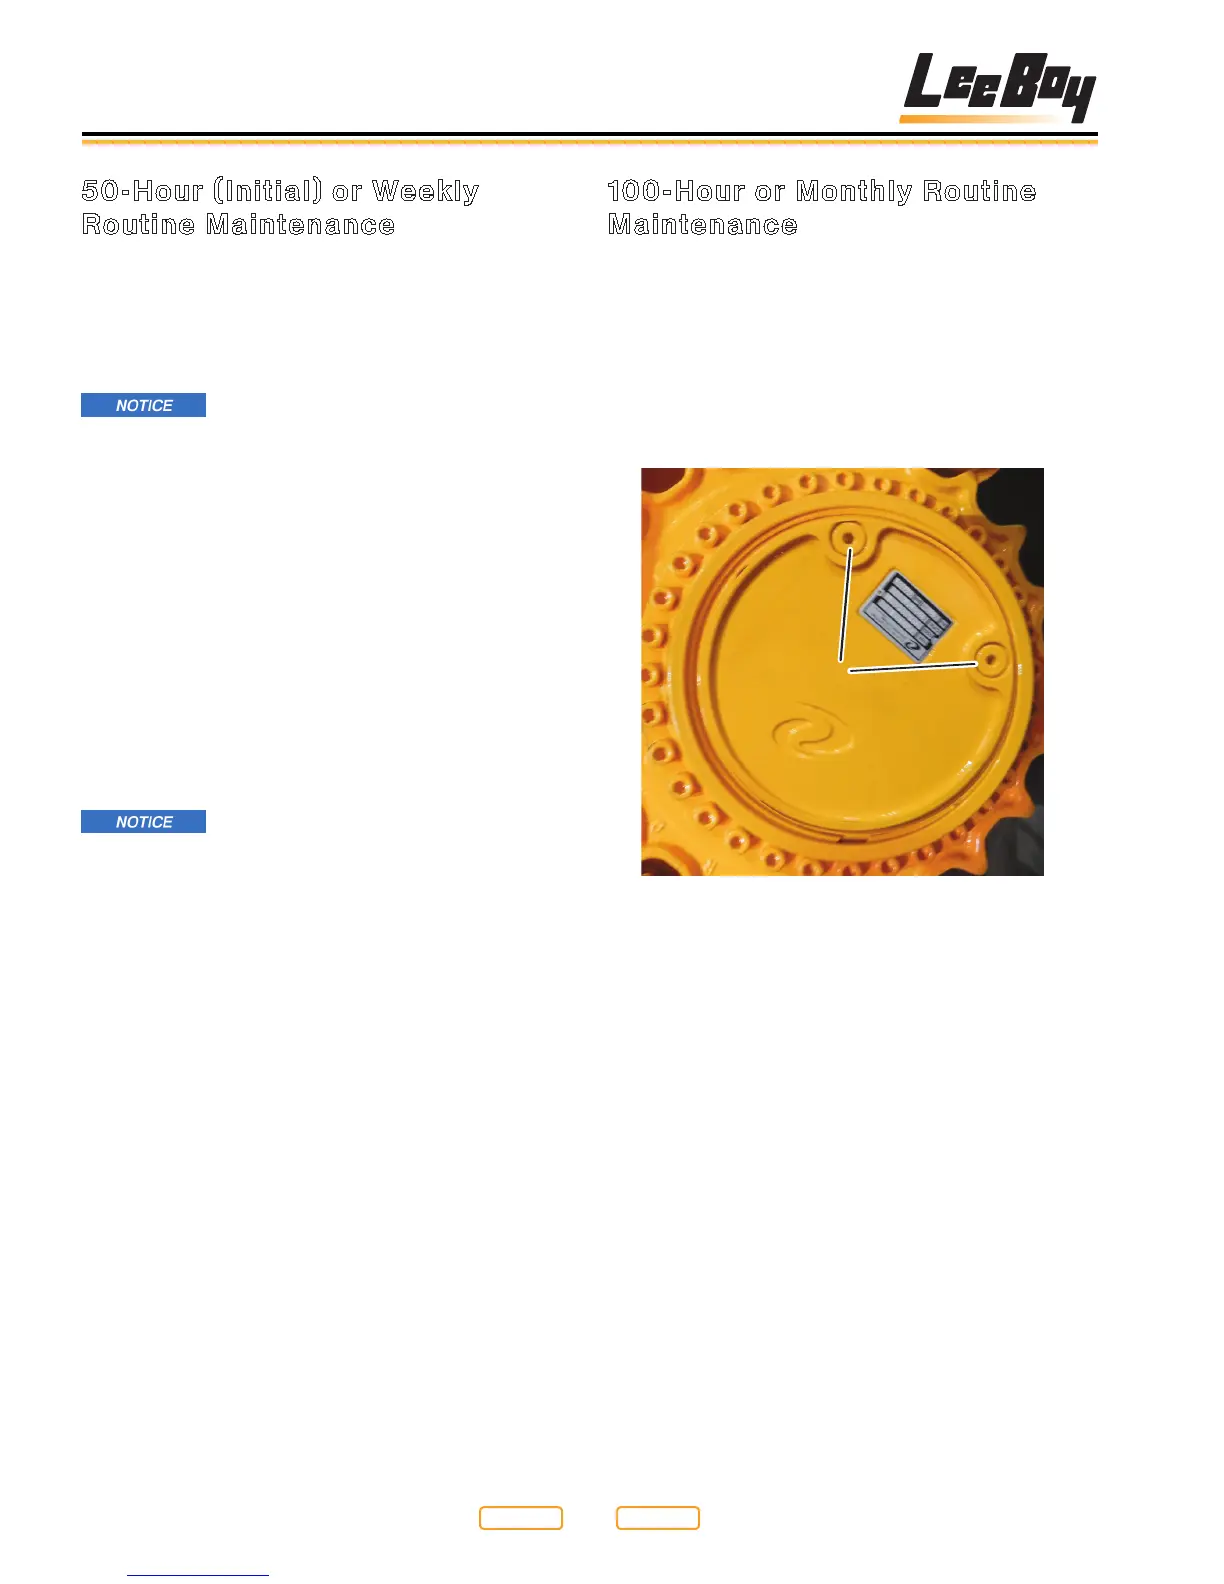
1. Position the torque hub so that either of the plugs
are at the 3 o’clock position. Remove the plug at the
3 o’clock position (Figure 7-4,1). If oil comes out, no
oil is needed. Insert plug and tighten. If oil does not
come out, remove the plug at the 12 o’clock position
and ll torque hub with 80W-90 gear oil until oil
starts to appear at the other hole. Replace both
plugs and repeat process on other torque hub.
1
Torque Hub Location
Figure 7-4
1 - Plugs
2. Replace dry type air lter, if equipped. Refer to your
engine operator’s manual for service information.
3. Change engine oil. To assure complete removal of
contaminants in the oil, perform the oil change while
engine is warm.
4. After draining used oil, clean and reinstall drain
plug and ll crankcase to the full mark with
manufacturer’s recommended oil. Change oil lter at
every other oil change (15W-40 Motor Oil).
5. Change engine oil and lters. Use the drain hose
stored on the right hand side of the machine.
6. Perform any other engine preventive maintenance
as described in the engine operator’s manual.
7. Check and adjust all chains, as required (see
Maintenance Adjustments in Section 7).
Return to
Last Viewed
Return to
Thumb Index