6
LeeBoy Model 8616 Conveyor Paver 6-27
Operation
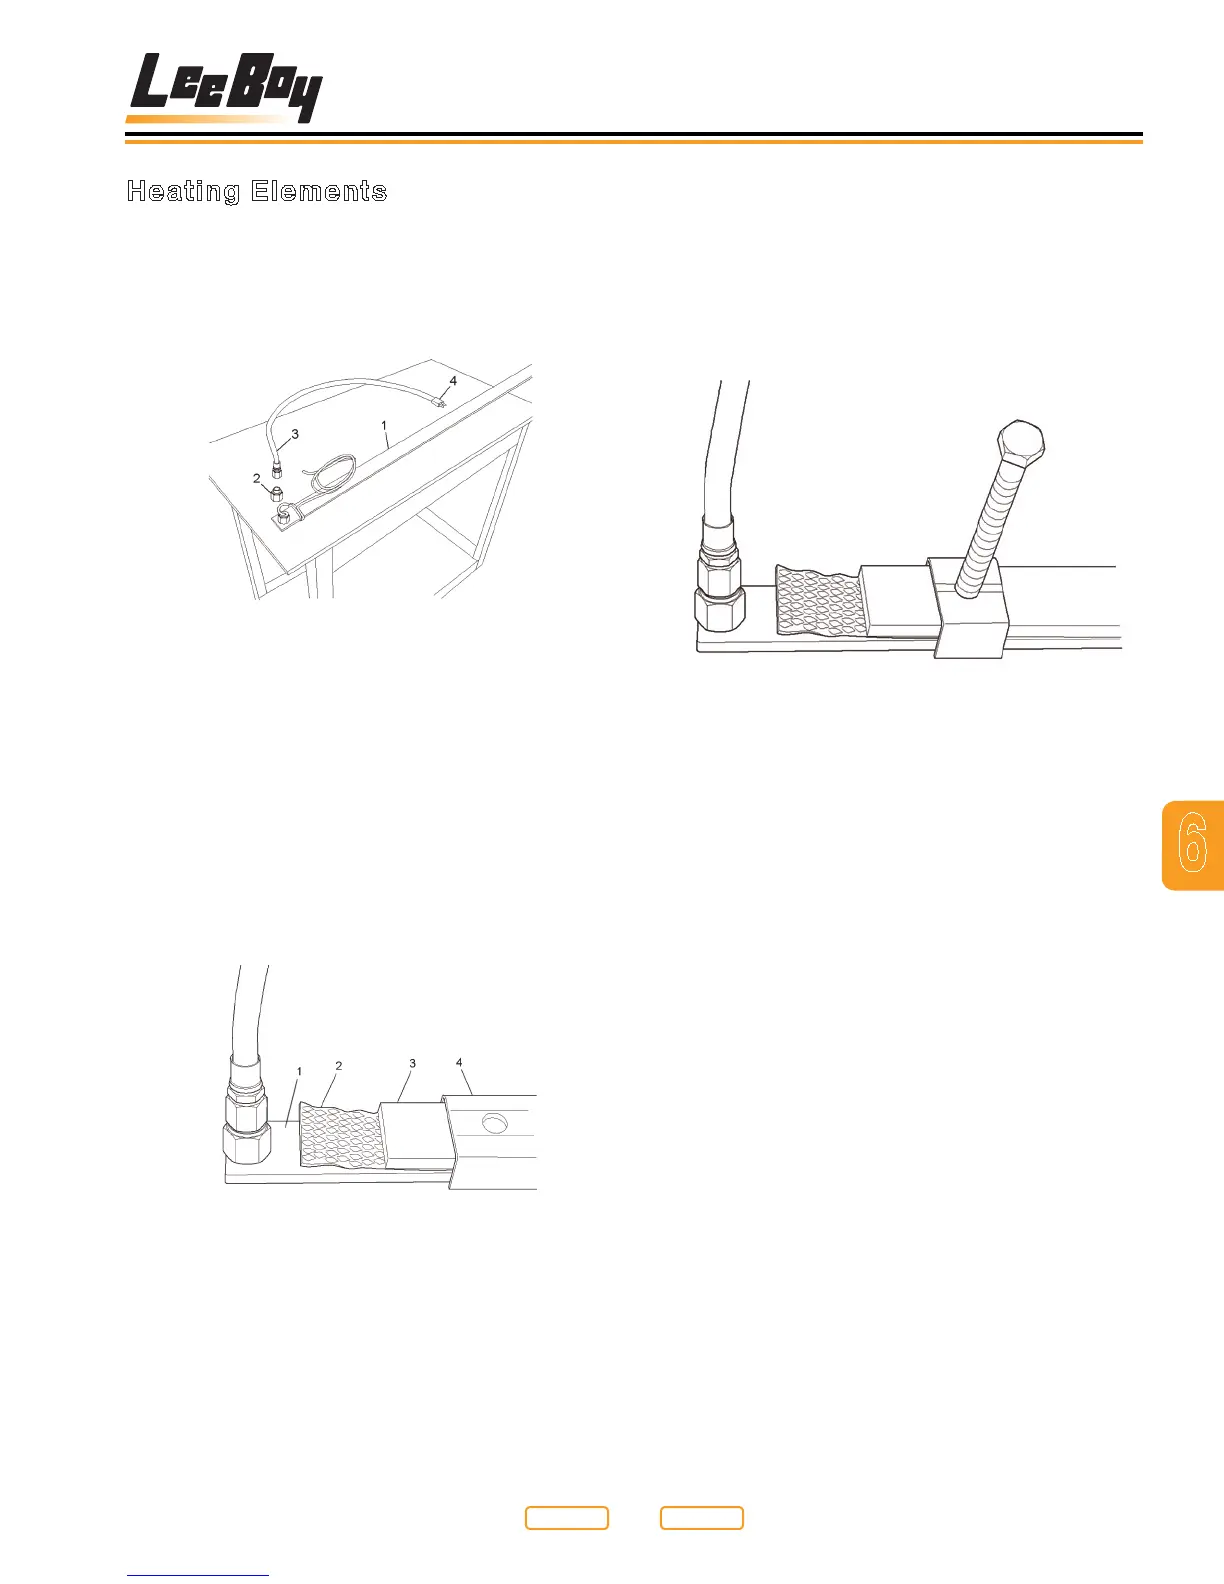
Each element (Figure 6-35,1) used has a thin strip
of insulation (Figure 6-35,2) over it to keep the heat
of the element from escaping. A support bar (Figure
6-35,3) is then laid over the element, and a shield
(Figure 6-35,4) protects the element assembly (Figure
6-35). Each element is clamped down to the screed
platesoastoprovideapositiveandefcientconnection
between the element and the screed plate.
Typical Heating Element Clamp
Figure 6-36
A typical element clamp assembly is shown (Figure
6-36). The clamp setup may vary slightly depending
on your screed size, or whether you are working on the
extension or main screed plates. The principle is the
same with all of the clamps.
Enough pressure should be applied to the element
assemblytosufcientlyholdtheelementtightagainst
the screed plate surface. All clamp setups are lockable
with a jam nut on the adjustment screw. After tightening
the clamping stud, lock the clamp by tightening the stud
jam nut. To remove an element, loosen all the clamping
studs over the element, and then the element can be
removed from the frame through the access provided at
the outer end of the screed. The extension elements are
accessed by removing the top cover from the extension
screed plate. The extension elements are accessed by
removing the top cover from the extension screed plate.
Heating Elements
Next in your system are the screed heating elements
themselves.Eachelementissizedtotproperlyinyour
screed,andprovidesufcientpowertoheatyourscreed
plate to a temperature that mix will not drag or stick to
the lower surface of the screed plate.
Heating Element Assembly
Figure 6-34
1 - Element
2 - Wire Protector Adapter
3 - Wire Protector
4 - Two Pin Wire Plug
An element assembly consists of four main components.
The element (Figure 6-34,1), the wire protector adapter
(Figure 6-34,2), the wire protector (Figure 6-34,3),
and the two pin wire plug (Figure 6-34,4) at the end of
the element protector (Figure 6-34).
Heating Element Assembly Detail
Figure 6-35
1 - Element
2 - Insulation
3 - Support Bar
4 - Shield
Return to
Last Viewed
Return to
Thumb Index