Diagnostic aids 3-23
7013-XXX
Printhead assembly electronic adjustment
A step-by-step process to align a new printhead.
Note: Before aligning the printhead electronically, first align the printhead mechanically, if needed. See
“Printhead assembly mechanical adjustment” on page 3-24.
1. Enter the Diagnostics menu. See “Diagnostics Menu (Diag Menu)” on page 3-2.
2. Press to enter the Registration menu.
3. Press to print the Quick test page.
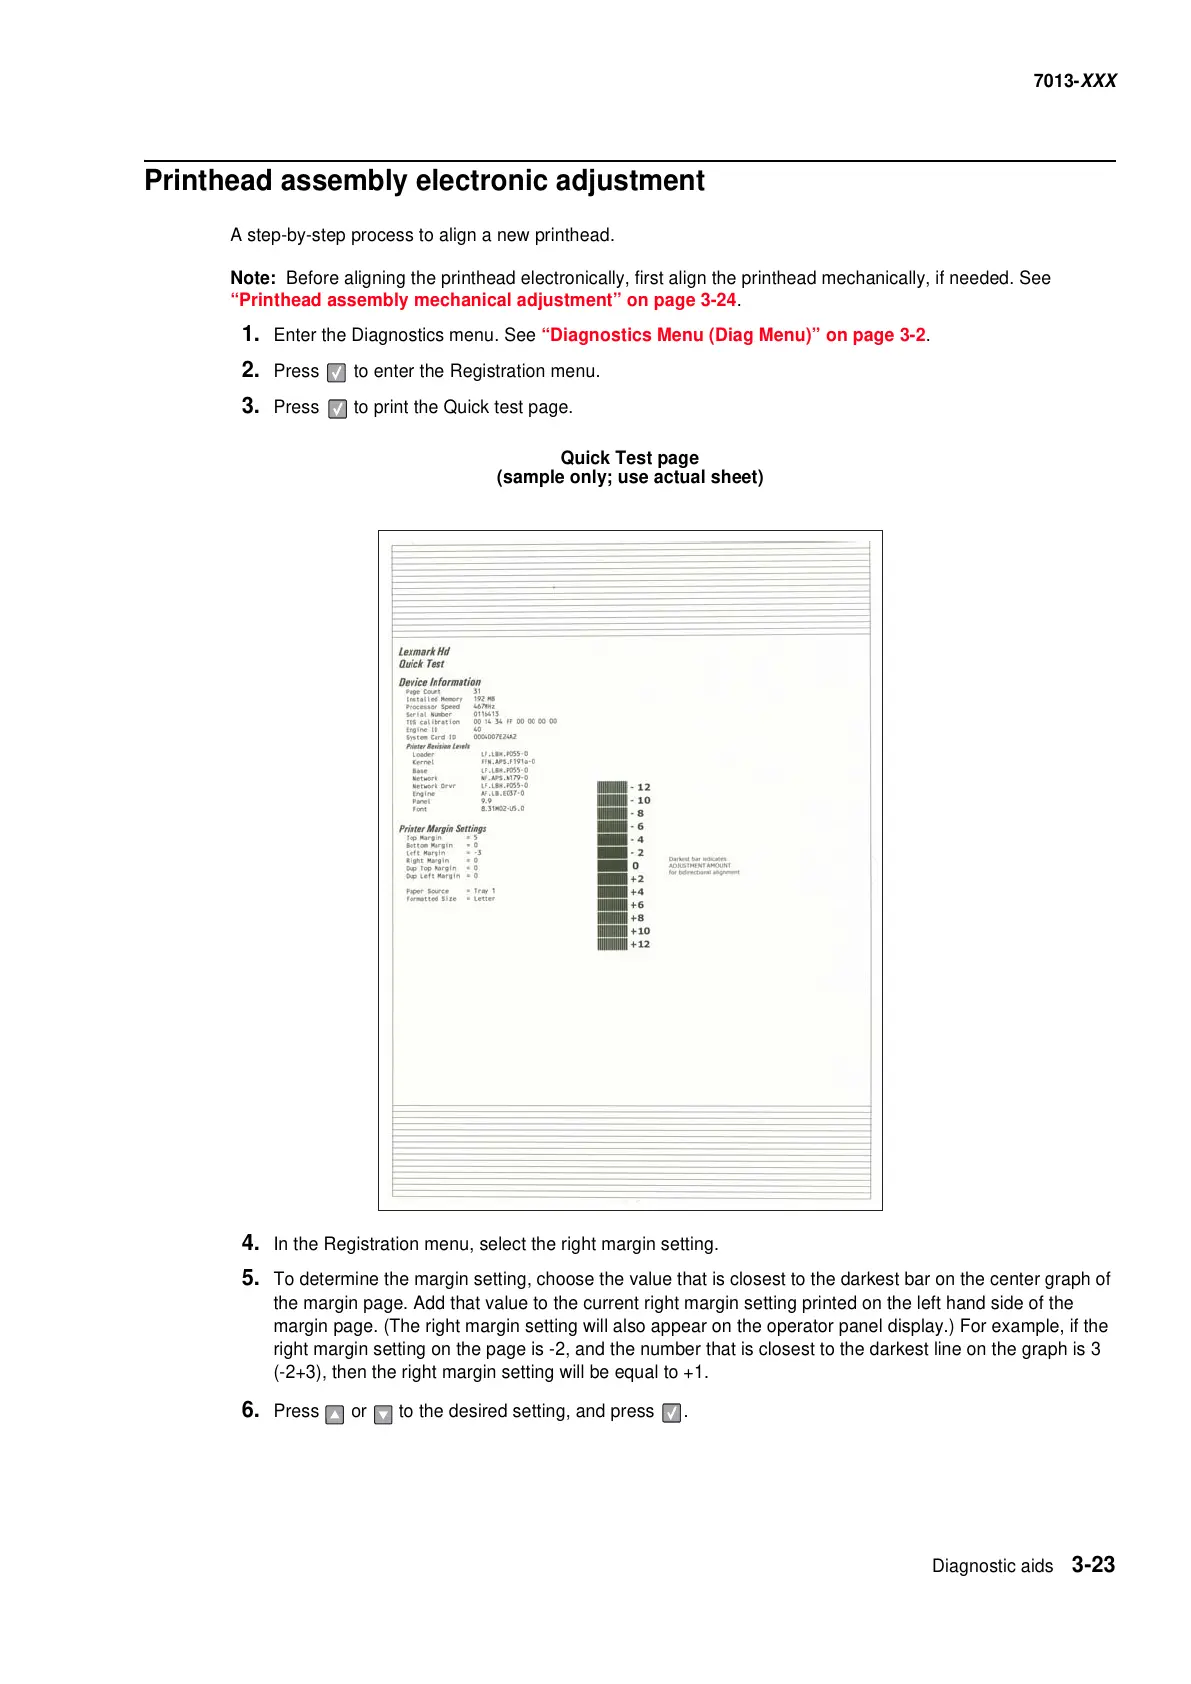
Quick Test page
(sample only; use actual sheet)
4. In the Registration menu, select the right margin setting.
5. To determine the margin setting, choose the value that is closest to the darkest bar on the center graph of
the margin page. Add that value to the current right margin setting printed on the left hand side of the
margin page. (The right margin setting will also appear on the operator panel display.) For example, if the
right margin setting on the page is -2, and the number that is closest to the darkest line on the graph is 3
(-2+3), then the right margin setting will be equal to +1.
6. Press or to the desired setting, and press .