4D-Nucleofector
®
Manual
|
11
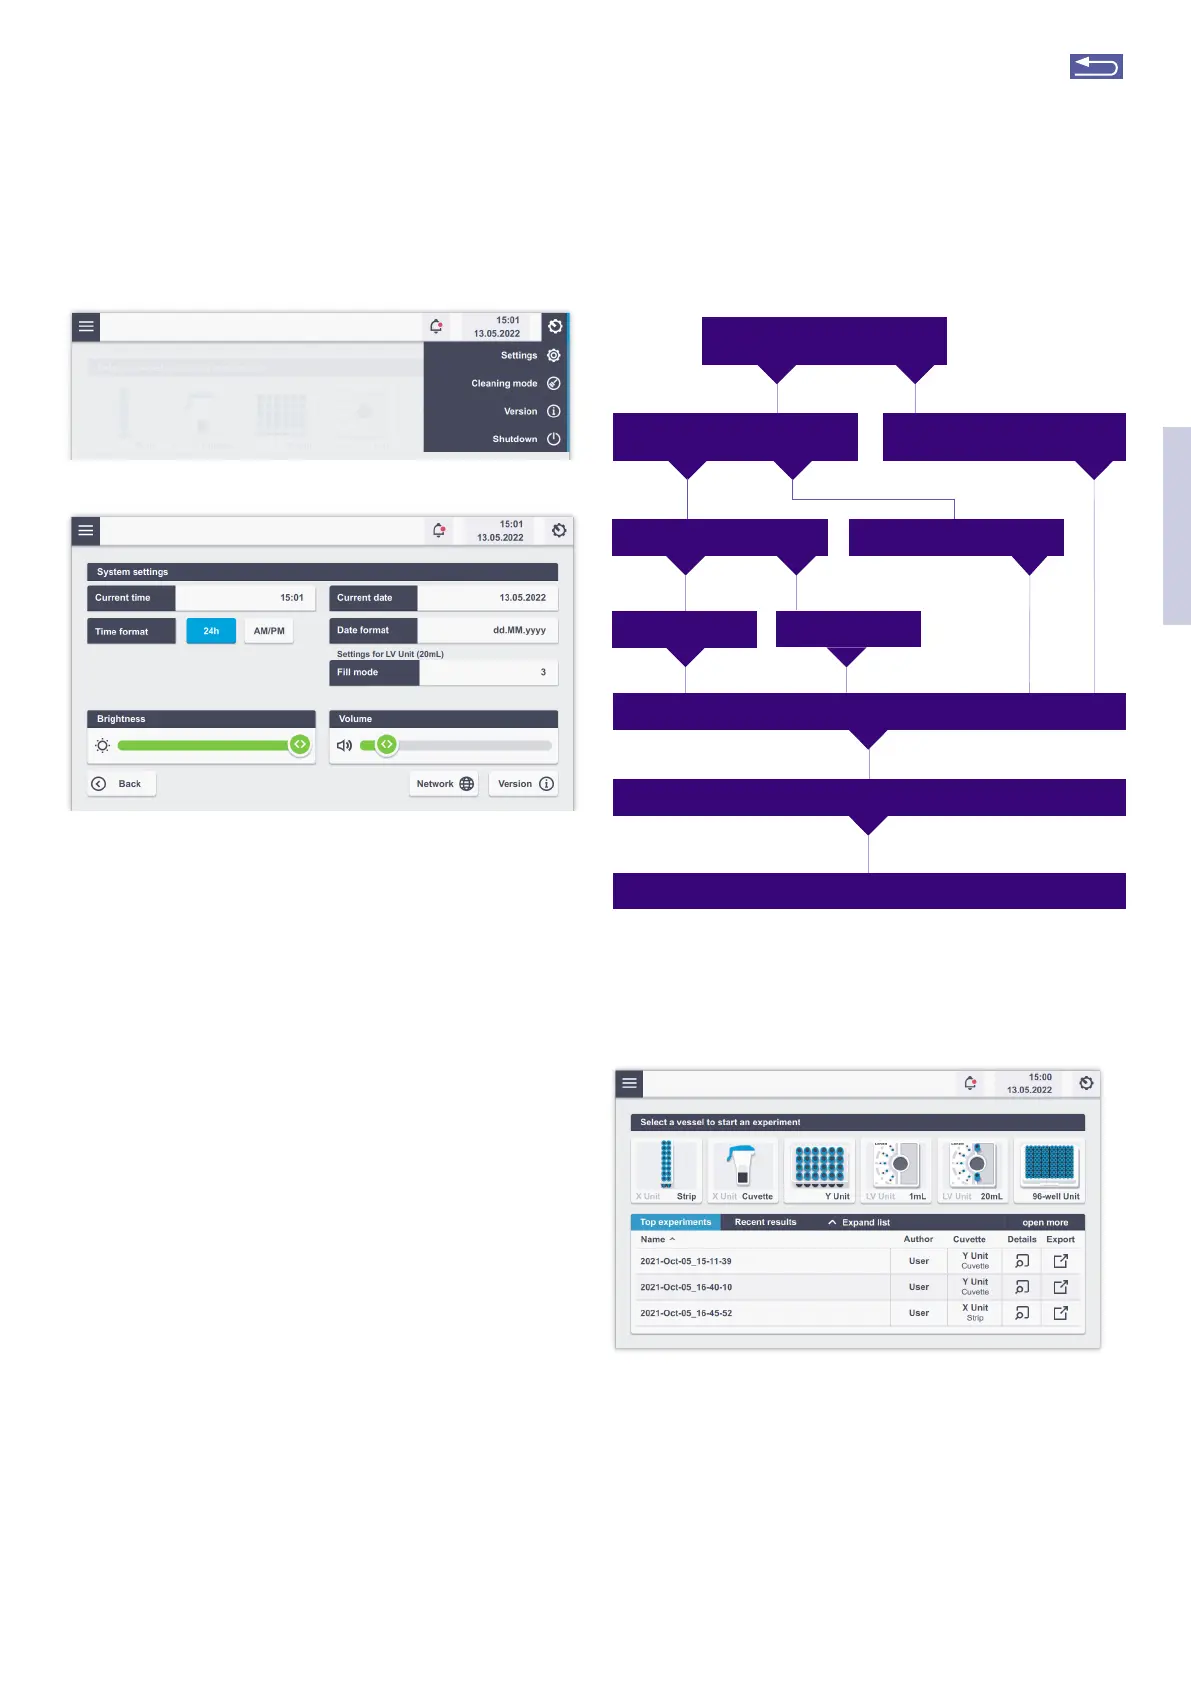
Figure 2.5: System settings screen (A) dropdown menu after tapping on the
gear icon. (B) Settings menu after tapping on “Settings”.
2.7.3 Turning off the 4D-Nucleofector
®
System
For a safe shut down of the system and protection against
damage of interior fragile pats, press the power button at
the front of the Core Unit and tap on “Shutdown” on the
screen. Alternatively, tap on the “Settings” icon (Figure 2.5,
A) and then select “Shut down”. Both ways, the
4D-Nucleofector
®
System will shut down and the transpor-
tation lock will be applied to delicate pats of the system.
Turn off the main power switch at the rear of the device
before relocating or transpoting the system.
Impotant note: A hard shutdown of the system by pressing
the rear power switch of the Core Unit without a previous
software shutdown should be avoided as this may lead to
loss of data.
2.8 General instructions for running a
Nucleofection
®
Experiment
This chapter explains some general features and steps
required to perform a Nucleofection
®
Experiment independ-
ent of the different 4D-Nucleofector
®
Units. The detailed
handling of each unit is described in subsequent chapters
2.9 – 2.12.
A
B
2.8.1 Overview
Figure 2.6: Schematic workflow overview of a typical
Nucleofection
®
Experiment.
2.8.2 Unit and vessel selection
The main screen (Figure 2.7) shows all available vessels for
attached functional units (X, Y, 96-well, and LV Unit)
Figure 2.7: Example of main screen elements, depending on attached mod-
ules, up to three functional modules can be attached to one Core Unit.
By selecting the vessel type a new screen opens where
either a new experiment can be stated or one of the pre-
defined experiments can be loaded. For new experiments,
a name generated with date and time stamp will be sug-
gested. After either changing the name of the experiment
or accepting the suggested name, you can proceed to the
Experimental setup screen by tapping on the green check-
mark (Figure 2.8)
2
Select vessel type
(chapter 2.8.2)
Define new experiment
(chapters 2.9, 2.10, 2.11 or 2.12)
Saved user experiment
Modify
Load predefined experiment
(chapter 2.8.4)
Lonza template
Use as is
Prepare sample according to cell type specific Optimized Protocol
Load samples (chapters 2.9, 2.10, 2.11 or 2.12)
Execute Nucleofection
®
Experiment (chapter 2.9, 2.10, 2.11 or 2.12)
Return to TOC