4D-Nucleofector
®
Manual
|
13
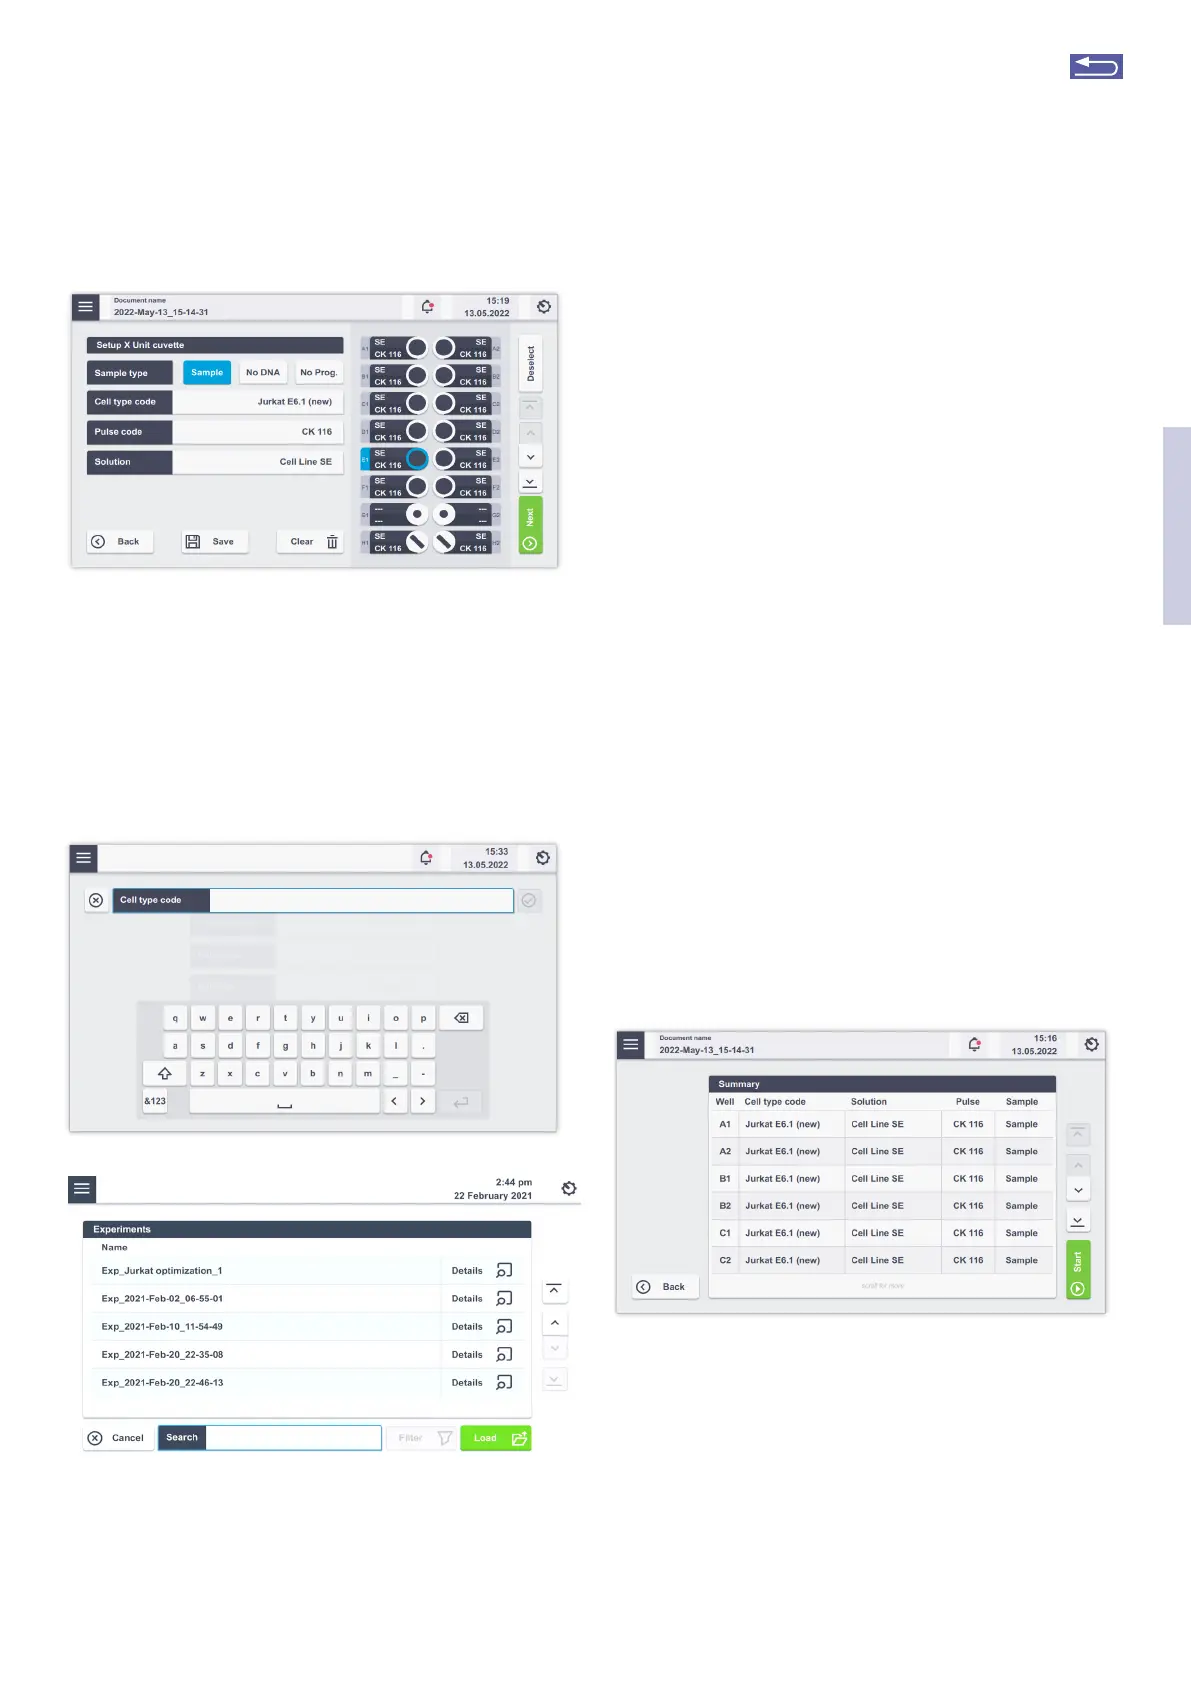
Figure 2.10: Setting up Nucleofection
®
Conditions.
2.8.4 Using a predefined experiment
Besides setting up a new experiment (as described in the
unit-specific chapters), users can also execute or modify
a predefined experiment. A predefined experiment can
either be a ready-to-use template pre-installed by Lonza (i.e.
optimization schemes for X, Y, and 96-well Unit only) or a
previous experiment that was saved by the user.
Figure 2.11: (A) Search for an experiment via name (B) Selection of a pre-
defined experiment
A
B
1. After vessel type selection (see 2.8.2) a screen ap-
pears prompting you to enter an experiment name
(Figure 2.11, A).
2. Selecting “Load” will open a list of experiments for the
selected vessel type (Figure 2.11, B). The list comprises
experiments pre-defined by Lonza (template files;
blue) and all experiments saved by the user (black).
Tapping on “Details” will provide information about
name, vessel type and number of defined vessels.
Choosing an experiment and tapping the “Load” but-
ton will open the experiment.
3. You can load predefined experiments by tapping on
the accordion menu (Figure 2.4 (1) and select “Experi-
ments”. Tapping on “Open” will show you the Experi-
mental set up screen.
4. If you want to modify the settings of a predefined
experiment, click on the well(s) you want to change
and adapt the settings (for unit-specific details, see
chapters 2.9, 2.10, 2.11 or 2.12) once loaded. You can
save the changed experiments under a new name by
pressing “Save”. Alternatively, you are prompted to
change the name once you proceed to the summary
screen (see next step) and then save it. By tapping the
“New” button, you can name the altered experiment
and proceed.
5. To accept all settings, press “Next”.
6. The summary screen appears (Figure 2.12) listing the
settings for each well-defined and the drawer will
open.
7. Load the samples (for unit-specific details, see chap-
ters 2.9.1, 2.10, 2.11 or 2.12) and press ”Stat”.
Figure 2.12: Summary screen after setup.
2
Return to TOC