4D-Nucleofector
®
Manual
|
33
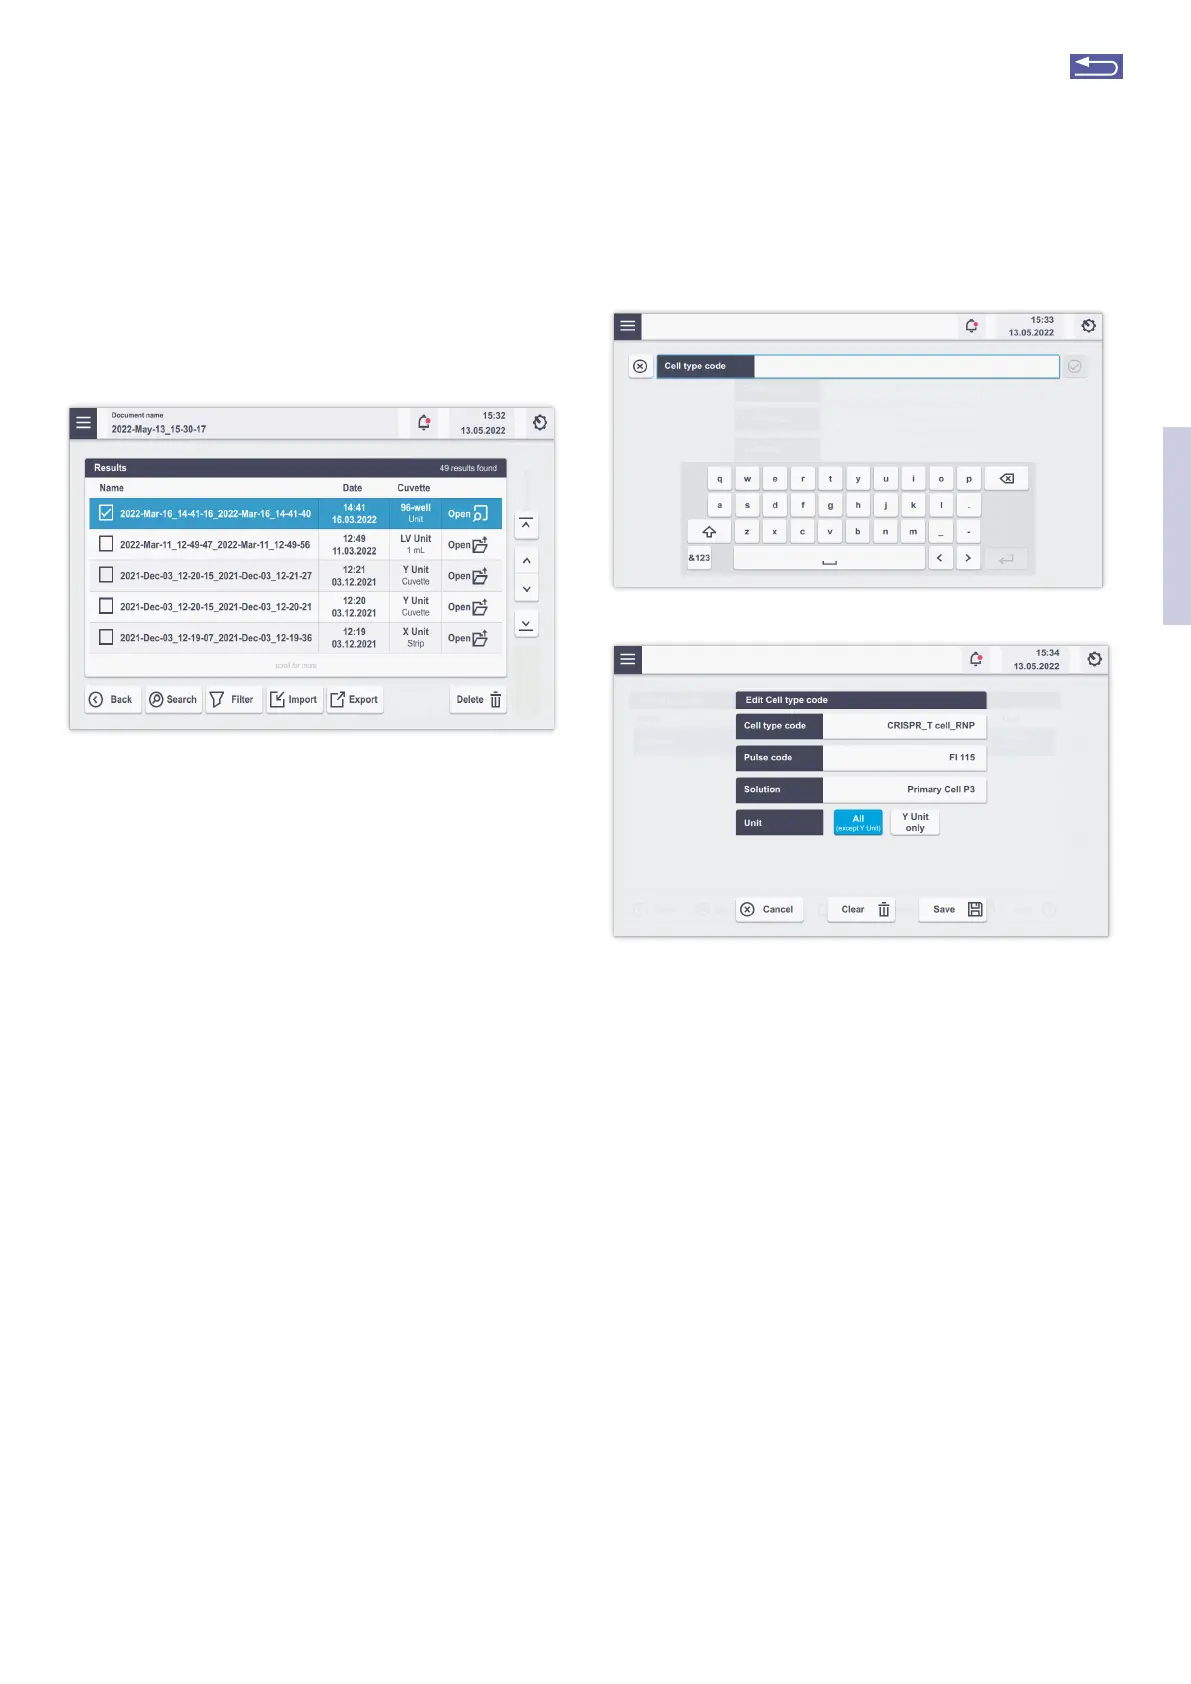
2.13.2.2 Results
This menu will display a list of all generated result files and
allow you to manage them. Result files are listed in chrono-
logical order with the latest results (date) at the top.
Figure 2.46: Result screen. All saved results are displayed. Scroll the list to
find the result or use the arrows on the right. Tapping on “View” will display
the experiment result.
To open existing result files just select the file you would like
to open and press “Open”. To store result files on a USB stick
or transfer them into the PC Editor Software (see chapter
2.14.3) for printing, inset the USB device into the USB pot
on the front of the Core Unit and press “Expot” (Figure
2.46).
2.13.2.3 Custom Cell type codes
A “Cell type code” encodes a specific combination of
Nucleofector
®
Solution and Nucleofector
®
Pulse Code. In
addition to the available cell type codes that were prede-
fined by Lonza (Lonza optimized conditions), the software
offers the option to add custom Cell type code for choos-
ing a defined combination of a Nucleofector
®
Pulse Code
and Solution that has been identified by a user, e.g., after an
optimization. Custom Cell type codes are included in alpha-
betical order and can be distinguished from Lonza defined
Pulse codes by color:
Blue: Lonza defined Cell type code
Black: Customer defined code
To create a new custom Cell type code or to edit an existing
custom Cell type code execute the following steps:
• Press “New” or select an existing Pulse code and press
“Edit”.
• A screen will open, allowing to select “Pulse code” and
“Solution” field and a “Unit” selection (Figure 2.47, A and
B). Alternatively, a new Cell type code can be saved
directly from the experiment screen (see unit-specific
chapters).
Figure 2.47: (A) Typing the name of the custom Cell Type Code. (B) Overview
of conditions for custom Cell Type Code. Press “Save” to save the conditions,
press “Clear” to stat again.
• Define a name for your custom cell type code by typing,
e.g., the cell name.
• Press “Solution” to display a list of available solutions.
Select the solution most suited for your cell from the list
and confirm your selection with “Apply”.
• Select the Nucleofection
®
Program by typing in the “Pulse
code” — you can determine the best Pulse code by using
one of our optimization kits or simply use the code from
an existing optimized protocol.
• Select the functional units for which the code should ap-
ply (either X, 96-well and LV Unit, or Y Unit).
• Confirm the setting for your custom cell type code pro-
gram by pressing “Save”.
• The custom cell type code can now be selected for an
experiment by pressing the “Cell type code” field during
experiment setup (Figure 2.15).
Custom cell type codes will not be overwritten in the event
an updated program definition file is installed (see chapter
2.13.3).
A
B
2
Return to TOC