4D-Nucleofector
®
Manual
|
25
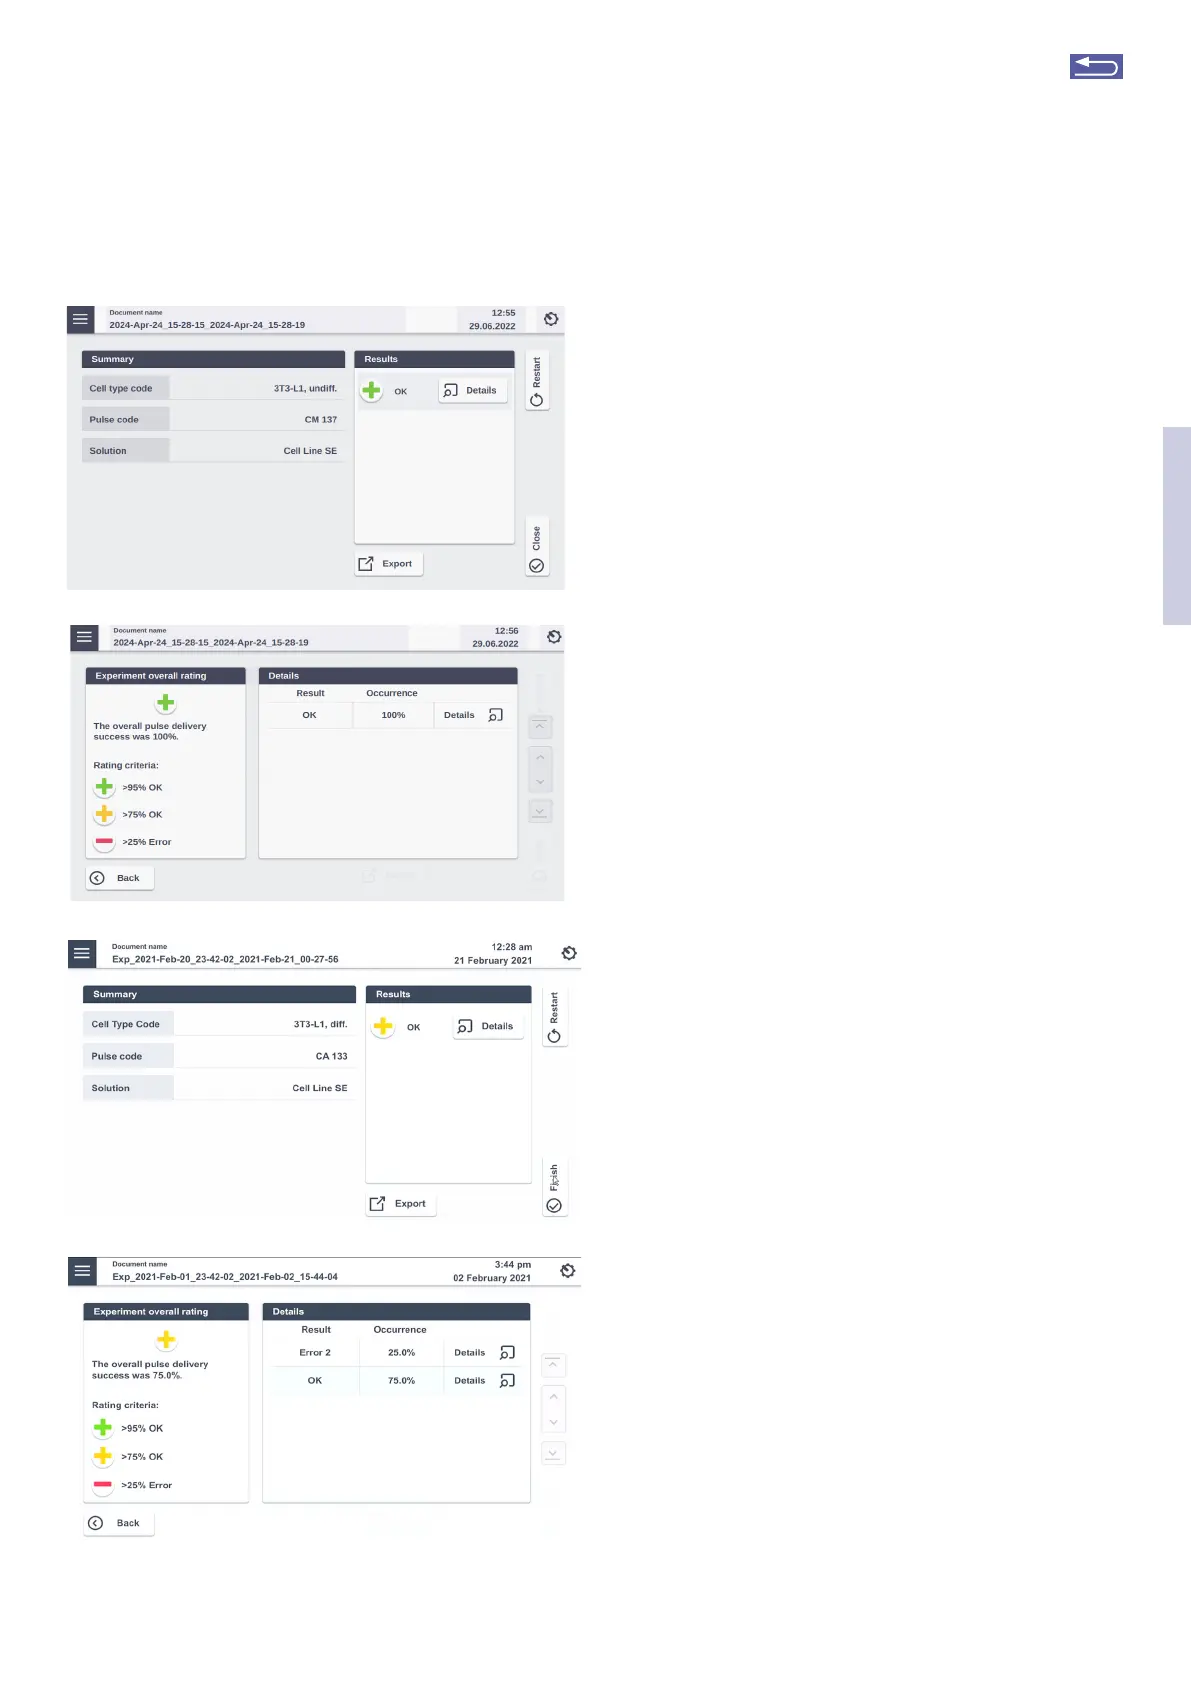
Figure 2.36: Result screens for LV Unit. (A/B) Result screen for no errors in
experiment. (C/D) Result screen for experiment with few errors. Tapping the
“Details” icon will provide futher information on the pulse delivery.
A
B
C
D
If errors occurred you can check for more details by
pressing “Details”. The result details (Figure 2.36 B or D) will
display the type of error and its’ percent occurrence in the
processed volume. For additional information on the error
press “Details”.
6. Once the process is completed take out the car-
tridge by pressing the black levers.
7. Aspirate the transfected sample via the pot (see
figure 2.35, A) and transfer cells into culture.
Optionally you may wash the catridge with medium
to aspirate residual liquid.
8. You can repeat the same experiment by pressing
“Restat”. Press “Finish” to return to home screen.
2.12.2 Using the LV Nucleocuvette
®
Catridge (Scalable
volume)
2.12.2.1 Overview
For running an experiment with the LV Nucleocuvette
®
Catridge the recommended order of steps is:
Step 1:. Stat defining the experiment (see 2.12.2.2)
Step 2: Mount the LV Nucleocuvette
®
Catridge including
all tubes onto the 4D-Nucleofector
®
LV Unit (see
2.12.2.2).
NOTE: In case you prefer establishing the connection of
the LV Nucleocuvette
®
Catridge to the input and output
reservoirs prior to catridge mounting at the device, please
make sure the tubings are clamped at a position close to
the reservoir body to avoid liquid movement.
Step 3: Connect LV Nucleocuvette
®
Catridge and output
LV Reservoir (see 2.12.2.3). Add medium to the
output reservoir, inset it into a 4D-Nucleofector
®
LV Rack and connect it to the outlet tube of the
LV Nucleocuvette
®
Catridge either by manual
connection or by welding (when using the
LV Nucleocuvette
®
Catridge with weldable tubing)
Step 4: Prepare your cell sample and substrate using the
input LV Reservoirs (see 2.12.2.4)
Step 5: Connect the input LV Reservoirs to the LV
Nucleouvette
®
Catridge (see 2.12.2.4)
Step 6: Verify volume settings and execute experiment
(see 2.12.2.4)
NOTE: In case you use bags and not Lonza LV Reservoirs
for sample input and/or collection, please contact Lonza
Scientific Suppot for maximum tube volumes.
2
Return to TOC