30 | 4D-Nucleofector
®
Manual
2.12.2.5 Running the experiment
1. Verify again that the volumes you have entered before
(see 2.12.2.2, step 5) correctly reflects the volumes you
have prepared. If not, adapt volumes again.
2. Upon pressing “Next” a summary of the defined set-
tings will be displayed. Please check for correctness
before pressing “Stat” to initiate the Nucleofection
®
Process.
3. Press “Stat”. The system will remind you to open the
clamps (Figure 2.39, A).
Figure 2.39: (A) Prompt before stating the actual experiment to check tub-
ing and open clamps. (B) Progress of the experiment.
4. Before stating the liquid priming process, the system
performs a calibration step.
5. The progress of the experiment is indicated by a pro-
gress bar (Figure 2.39, B).
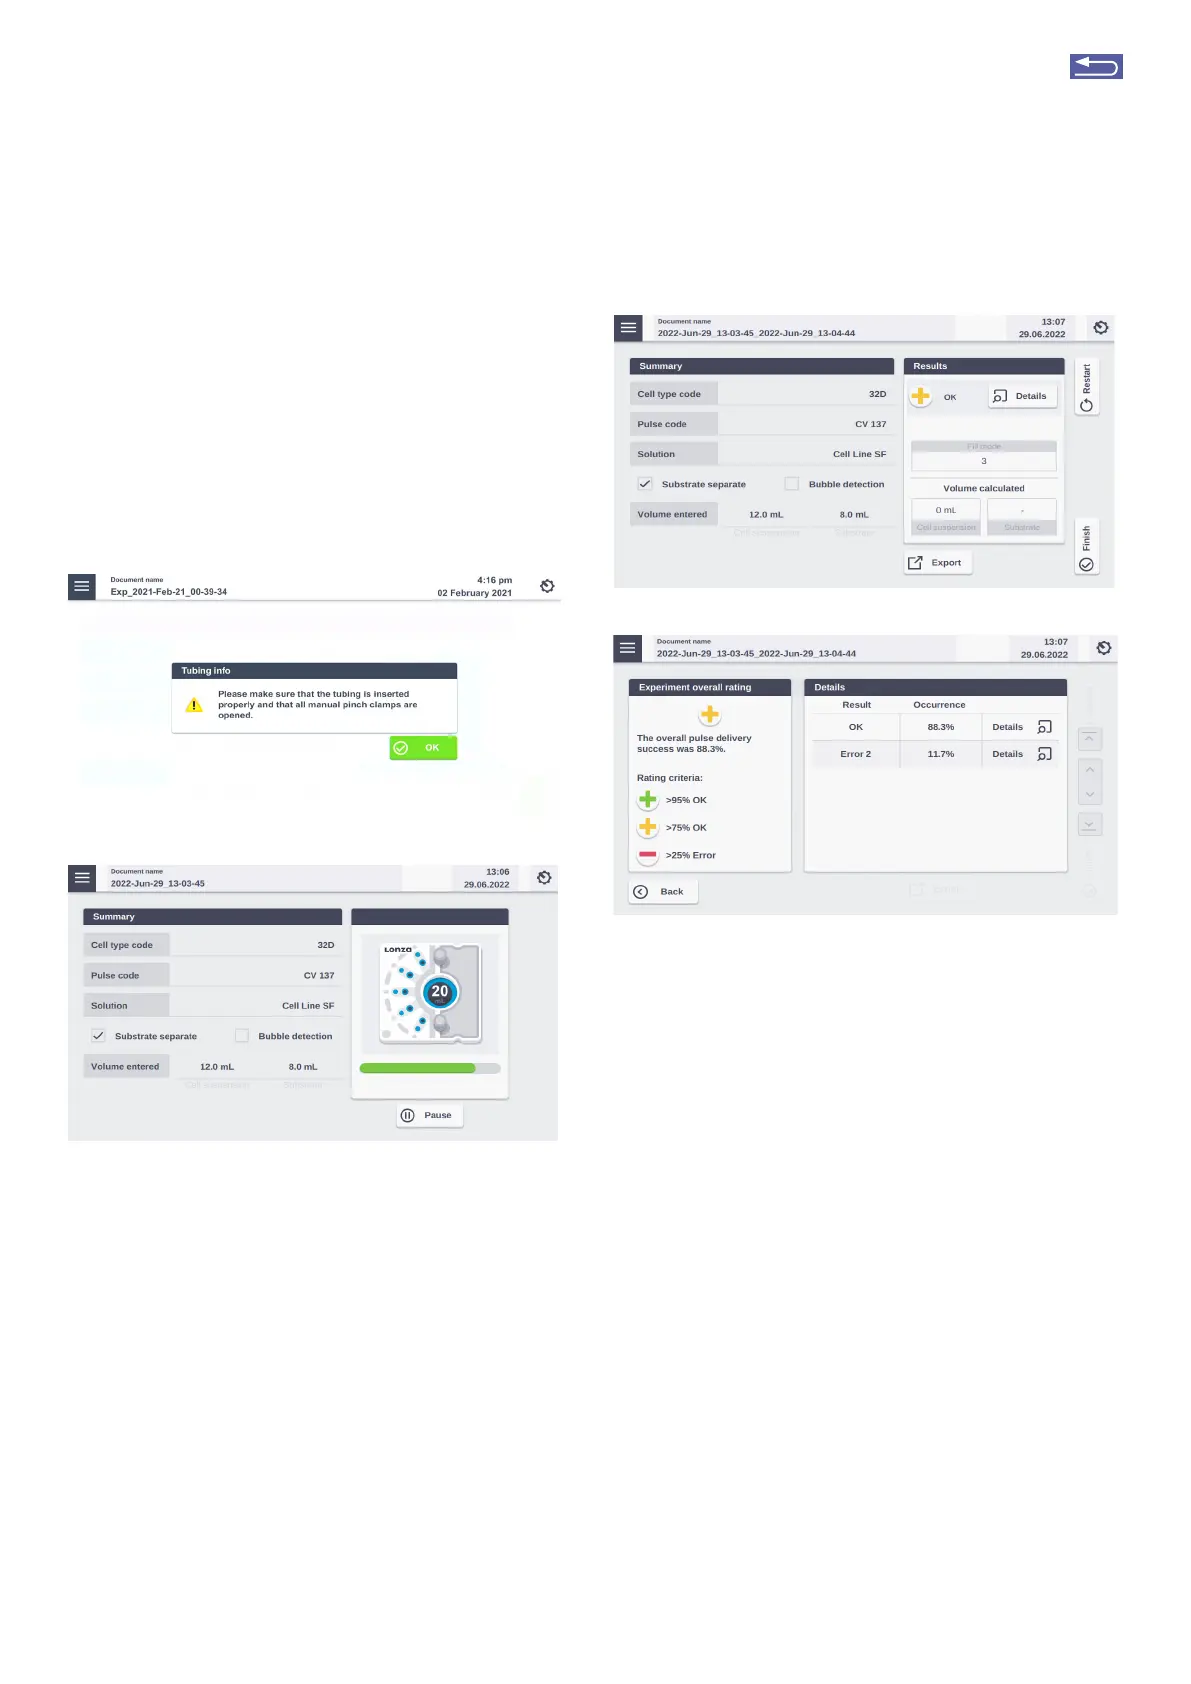
6. Once the required cycles to process the sample are
completed, a Result screen summarizing the Nucleo-
fection
®
Process will be displayed (Figure 2.40, A). Fur-
ther details are displayed when pressing on “Details”
(Figure 2.40 B).
NOTE: The volume calculation may not exactly match the
entered volume as it is just an approximation based on
the number of pump steps and not based on real volume
monitoring. As such, it is dependent on the tubing diameter
which may slightly vary due to raw material variations and/or
tubing tension.
A
B
Figure 2.40: (A) Result screen. (B) Result details after tapping on the “De-
tails” Button (Figure 2.32 A)
7. The result file will be saved automatically by the
system (either as Result + Date + Time or in case you
saved the experiment under an individual name as
“Experiment name + Date + Time) and can be reo-
pened as described in chapter 2.13.2.
8. The overall result is indicated by a color code:
• Green cross for “OK”
• Yellow cross in case of few errors (Figure 2.40, A)
• Red dash in case of multiple errors
If errors occurred you can check for more details by
pressing “Details”. The result details (Figure 2.40, B) will
display the type of error and its’ percent occurrence
in the processed volume. For additional information
on the error, press “Details”.
9. Once the process is complete, disconnect the output
reservoir and transfer transfected cell suspension into
cell culture vessels.
10. Disassemble the tubing, take out the LV
Nucleocuvette
®
Catridge by pressing the black levers
(Figure 2.37, I) and discard it.
11. You can repeat the same experiment by pressing
“Restat”.
A
B
Return to TOC