4D-Nucleofector
®
Manual
|
17
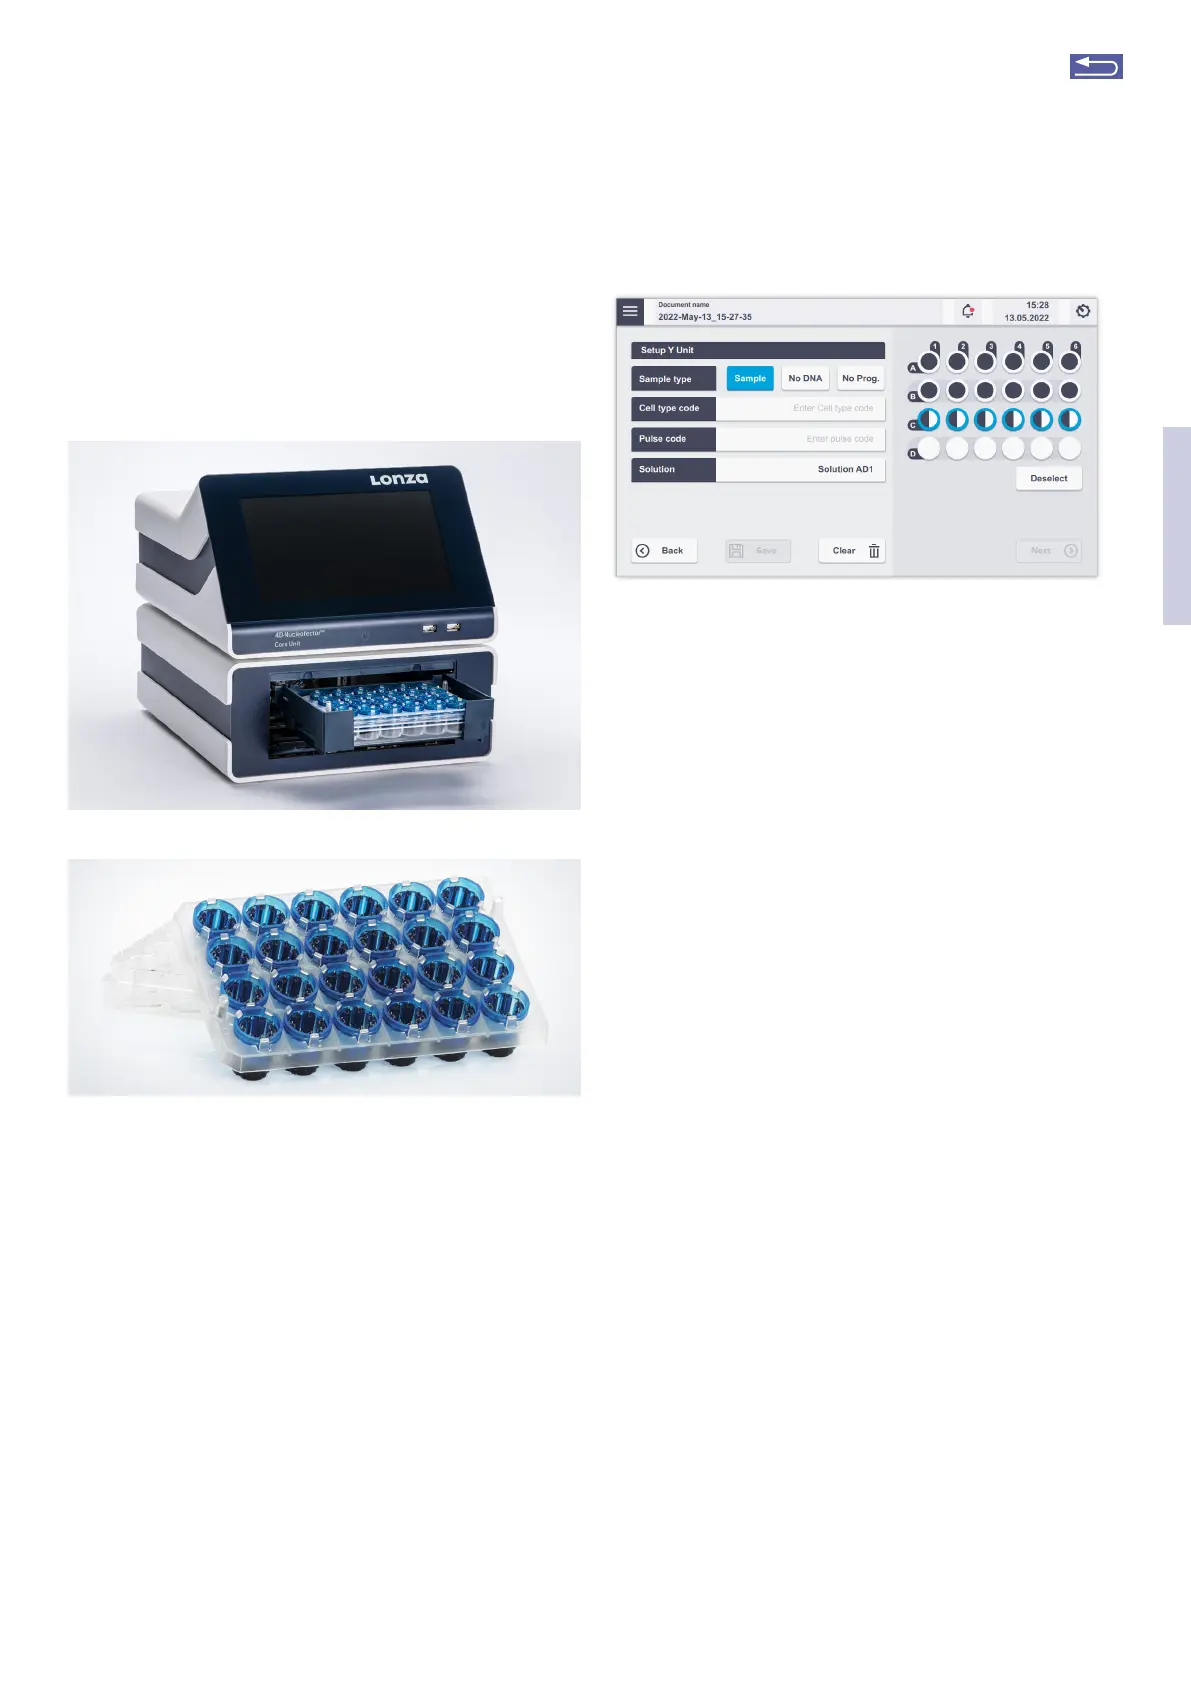
2.10 4D-Nucleofector
®
Y Unit
The Y Unit allows for transfection of cells in adherence. A
specially designed dipping electrode pulses cells plated in a
24-well dish from the top.
Figure 2.20: 4D-Nucleofector
®
Core and Y Unit and Dipping Electrode to use
with the Y Unit.
2.10.1 Defining a new experiment
After selecting a vessel type (see chapter 2.8.2), you can
either select a predefined experiment (see chapter 2.8.4) or
create a new experiment.
If you want to create a new Experiment, you may tap in the
field “Experiment name” and enter a specific experiment
name or accept the suggested name generated with date
and time stamp. Tap on the checkmark button to get to the
Experiment setup screen (Figure 2.21).
A
B
Figure 2.21: Experiment setup screen for 24-well plate in
4D-Nucleofector
®
Y Unit
A screen appears with the title “Setup Y Unit” (Figure 2.21).
1. Select well(s) to define Nucleofection
®
Conditions
By tapping on a well position one sample/well is
selected marked by a blue circle around the well
position. Multiple samples/wells can be selected by
dragging across the wells.
Tapping on additional wells will add more wells to the
pre-selected wells.
Remove a well from your selection by tapping on
the selected well again. Dragging across all selected
wells will deselect them. Dragging across selected
and deselected wells again will toggle your selection.
Alternatively, use “Deselect” to remove all selections.
2. Choose your sample type
Choose “Sample” for substrate-containing samples
that will be pulsed.
Select “No DNA” for samples that do not contain any
substrate (pulse control).
Select “No Prog” for samples with substrate not being
subjected to an electrical pulse (no-pulse control).
3. Enter Cell type code (optional)
Press the field “Cell type code” to choose predefined
Nucleofection
®
Conditions from a cell type list (Figure
2.15, B). A list with all available Cell type codes (defined
by Lonza or custom) will appear. Select the code that
shall be used by scrolling through the menu or stat
typing in the search field (Figure 2.15, C).
To confirm your selection, press “Apply”. If you pick a
preset Cell type code the next two steps do not apply.
2
Return to TOC