18 | 4D-Nucleofector
®
Manual
NOTE: Instead of defining solution and Pulse code via the
Cell type code, both parameters can also be specified inde-
pendently of each other, e.g. if no predefined Cell type code
is available. For adding new Cell type codes, please refer to
chapter 2.13.2.3.
4. Enter Pulse code
Modify the pulse code if necessary by pressing the
“Pulse code” field. A keyboard will appear, enabling
you to change settings. Press the “Apply” field to con-
firm the selection.
5. The solution code can be modified by selecting the
“Solution” field and clicking on the desired solution.
Then press “Apply” to confirm the selection.
Optional: At this stage, you can save your defined ex-
periment or only the pulse-solution code combination
(as a custom Cell type code) by pressing the “Save”
button. Select whether the Cell type code or the ex-
periment will be saved. A keyboard will appear allow-
ing you to define a name (max. length: 26 characters)
for either the Cell type code or the experiment.
Confirm and save the experiment parameters by
pressing “Next” (saves the experiment and opens the
drawer) or “Save” (saves the experiment for later use).
A summary of the defined settings will be displayed.
Before loading samples and pressing “Stat” (see
chapter 2.10.2), please double-check for accuracy.
2.10.2 Loading samples
Figure 2.22: Loading of samples (Y Unit). Watch the orientation of the plate.
(Well A1 is placed in the upper left position).
1. Inset the 24-well Dipping Electrode Array into the
24-well culture plate containing your Nucleofection
®
Samples. Make sure that the dipping electrode array
is inseted in the right orientation.
2. Place the 24-well plate with inseted dipping elec-
trode array into the retainer of the 4D-Nucleofector
®
Y Unit. Well “A1” must be in the upper left position
(Figure 2.22).
3. It is not recommended to re-use dipping electrodes
as this leads to suboptimal transfection efficiencies.
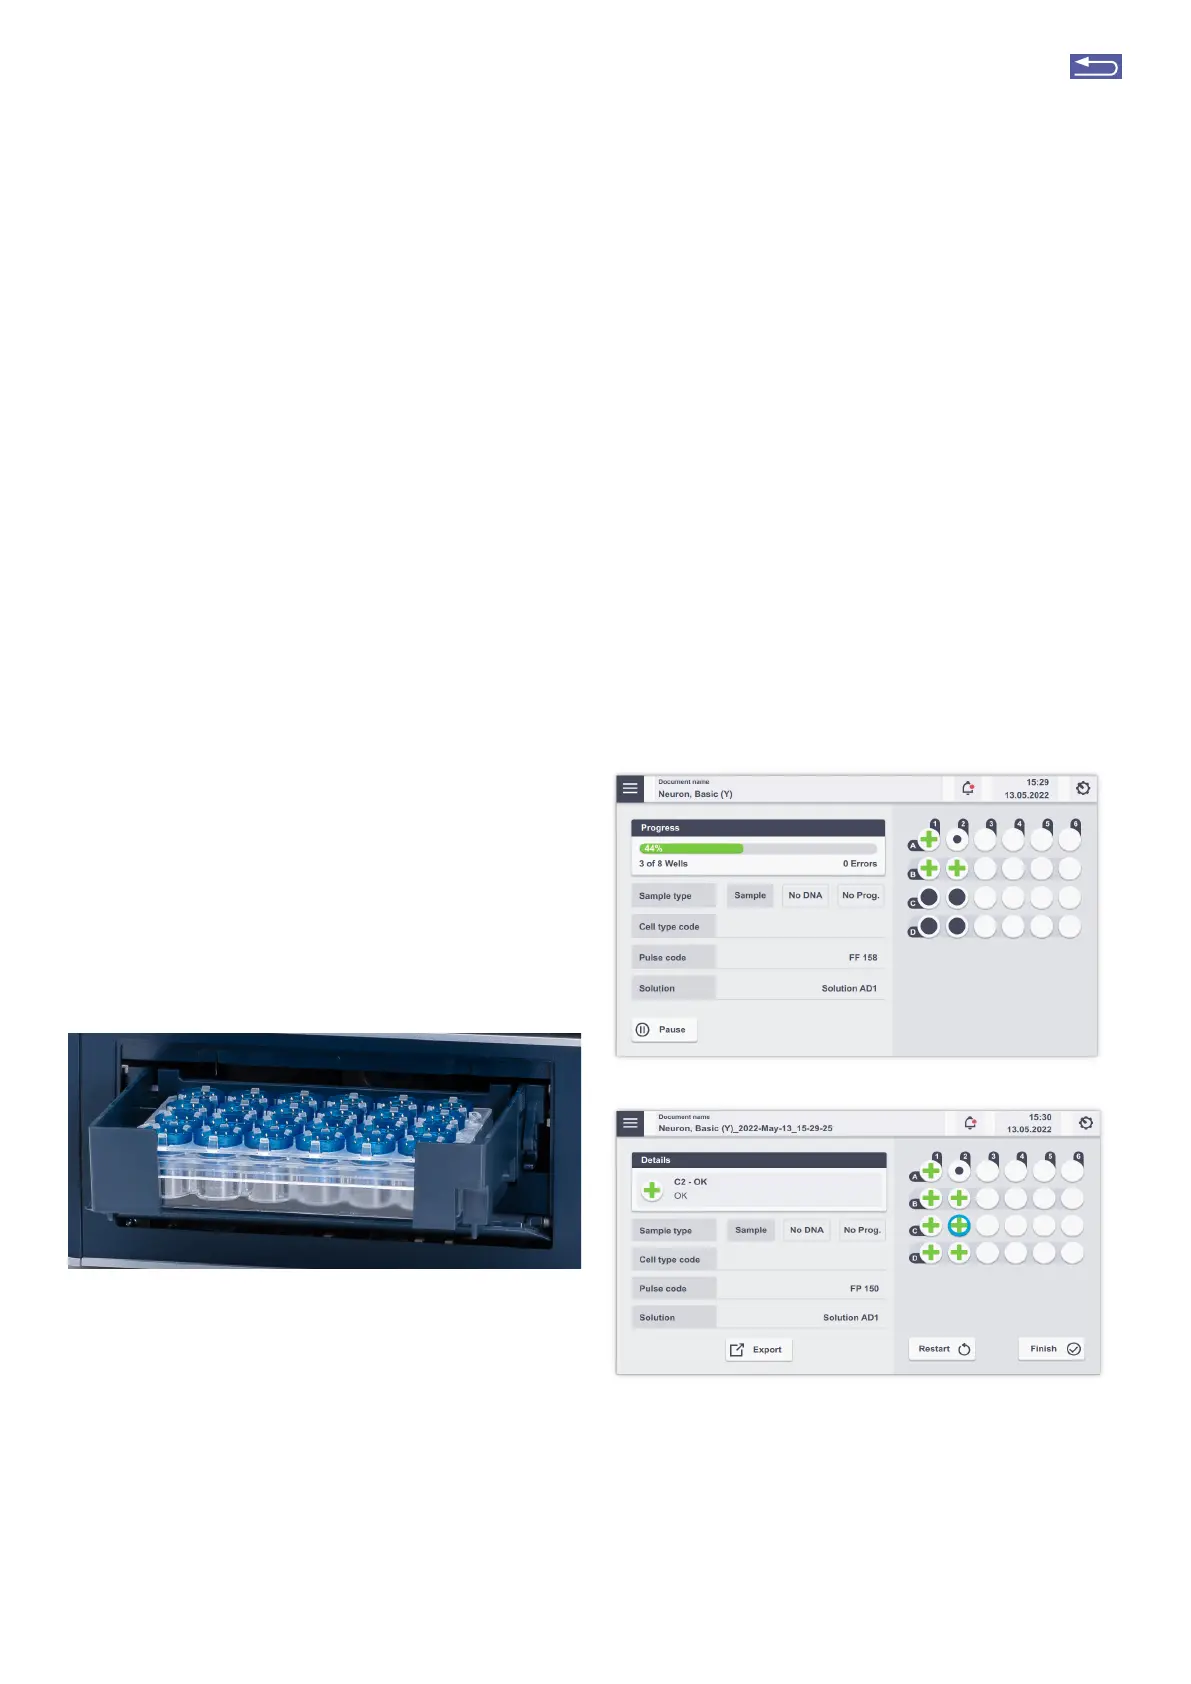
2.10.3 Running the experiment
1. After loading the samples, press “Stat” to run the
experiment.
2. The progress of the experiment is indicated by
changing the color of the cuvette or well positions
(Figure 2.23 A; for color codes, see chapter 4).
3. When the experiment is complete, a result file sum-
marizing the Nucleofection
®
Process will be displayed
(Figure 2.23, B).
4. The result file will be saved automatically by the
system and can be reopened as described in chapter
2.13.2.2
5. Press “Restat” to stat the experiment or “Finish” to
return to home screen.
Figure 2. 23: (A) Nucleofection
®
Progress (Y Unit). (B) Result Screen. Select
wells to receive result details.
A
B
Return to TOC