20 | 4D-Nucleofector
®
Manual
Tapping on the “Clear” button will delete all settings from
the selected wells after confirmation.
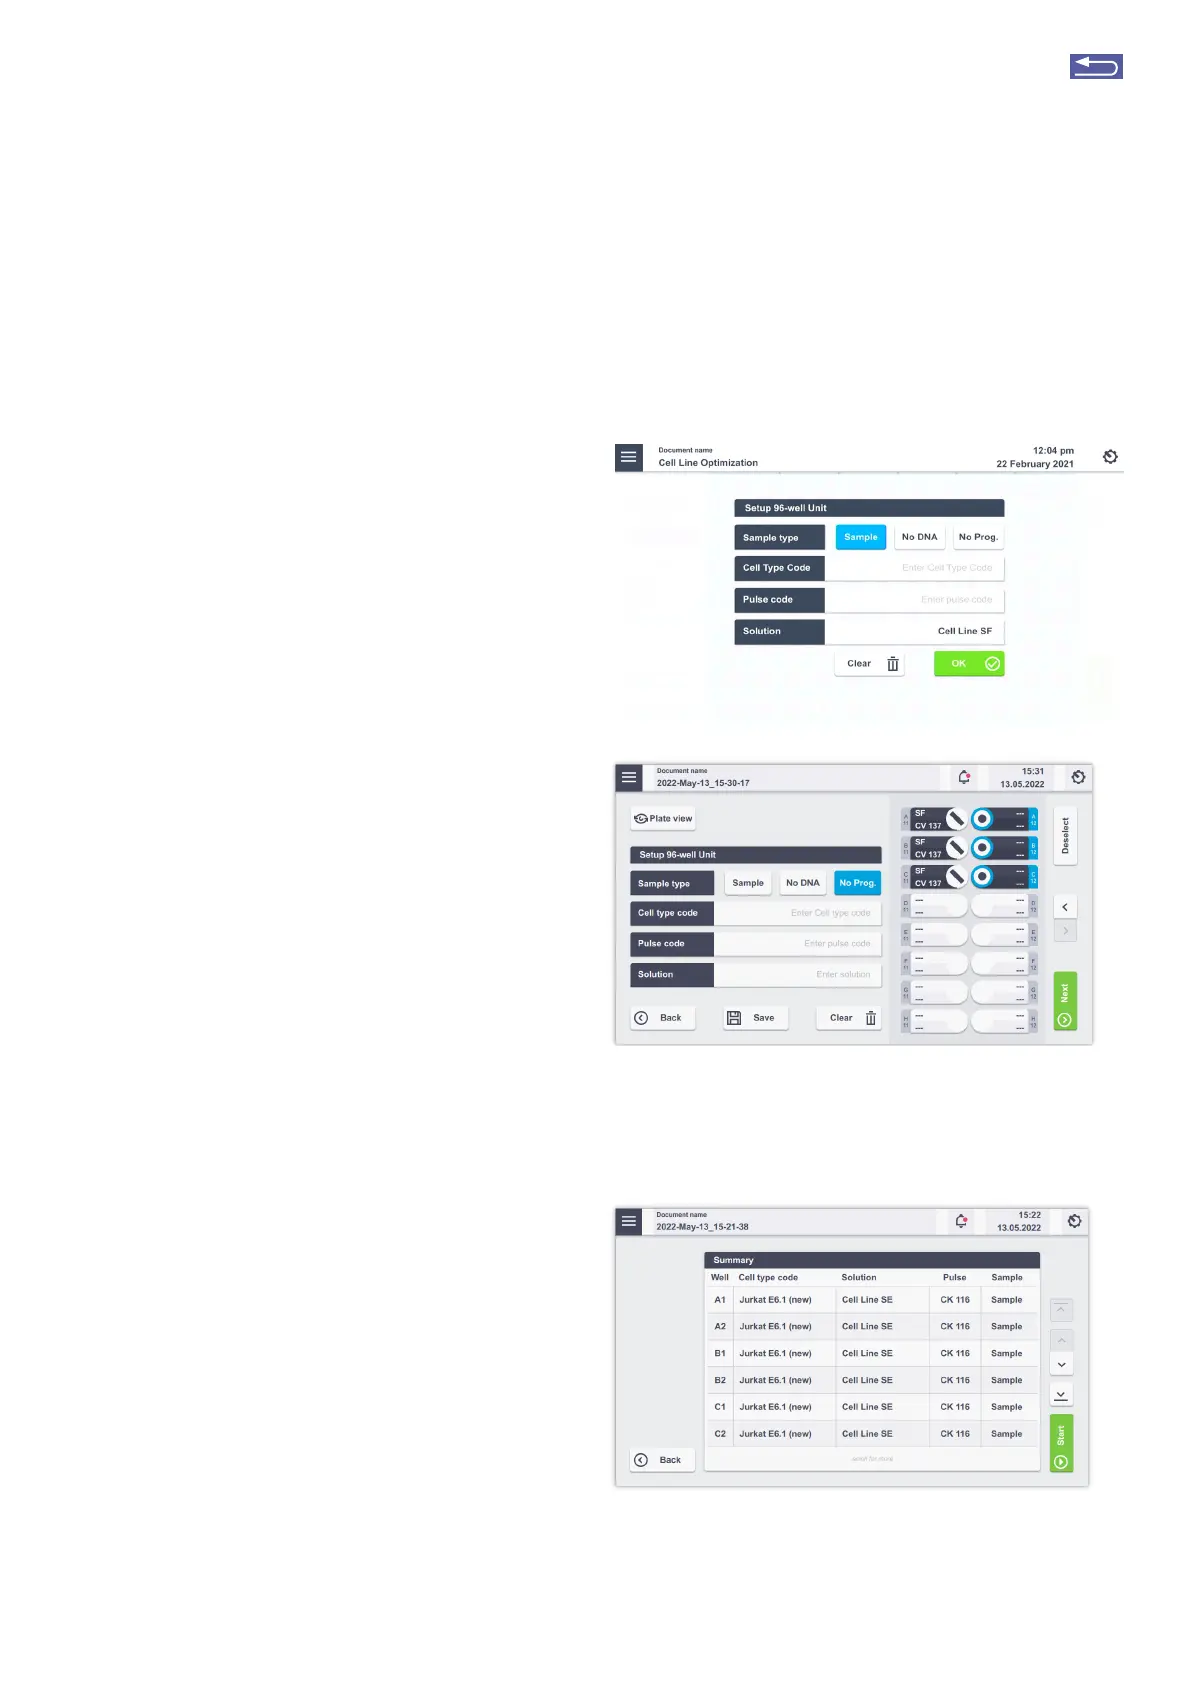
2. Choose your sample type
Choose “Sample” for substrate-containing samples
that will be pulsed.
Select “No DNA” for samples that do not contain any
substrate (pulse control).
Select “No Prog” for samples with substrate not being
subjected to an electrical pulse (no-pulse control)
3. Enter Cell type code (optional)
Press the field “Cell type code” to choose predefined
Nucleofection
®
Conditions from a Cell type list (Figure
2.15). A list with all available Cell type codes (defined
by Lonza or custom) will appear. Select the code
that shall be used by scrolling through the menu or
by stating to type in the search field. Enter the cell
name in the field Cell type code.
To confirm your selection press “Apply”. If you pick a
Cell type code the next two steps do not apply
NOTE: Instead of defining solution and program code via
the Cell type code, both parameters can also be specified
independently of each other, e.g. if no predefined Cell type
code is available. For adding new Cell type codes, please
refer to chapter 2.13.2.3.
4. Enter Pulse code
Modify Pulse code if necessary by pressing the Pulse
code field. A keyboard will appear, enabling you to
change settings. Press the check mark field to con-
firm the selection.
5. Enter Solution
The Solution code can be modified by selecting the
Solution field and clicking on the desired solution.
Then press “Apply” to confirm the selection.
6. Optional:
At this stage, you can save your defined experiment
or only the pulse-solution code combination (as
custom Cell type code) for future use by pressing
the “Save” button. Select whether the Cell type
code or the experiment shall be saved. A keyboard
will appear, allowing you to define a name (max.
length: 26 characters) for either the Cell type code
or the experiment.
Confirm and save the experiment parameters by
pressing “Next” (saves the experiment and opens the
drawer) or “Save” (saves the experiment for later use).
A summary of the defined settings will be displayed
(Figure 2.16). Before loading samples and pressing
“Stat” (see chapter 2.9.3), please double-check for
accuracy.
Figure 2.26 A: Experiment settings after well selection and tapping on “Edit”
button in plate view (A) and Sample definition in strip view (B).
For futher explanation about parameters, please refer to
chapter 2.8.3.
Figure 2.27: Summary screen after experiment setup.
A
B
Return to TOC