Before start-up
- 45 -10.13
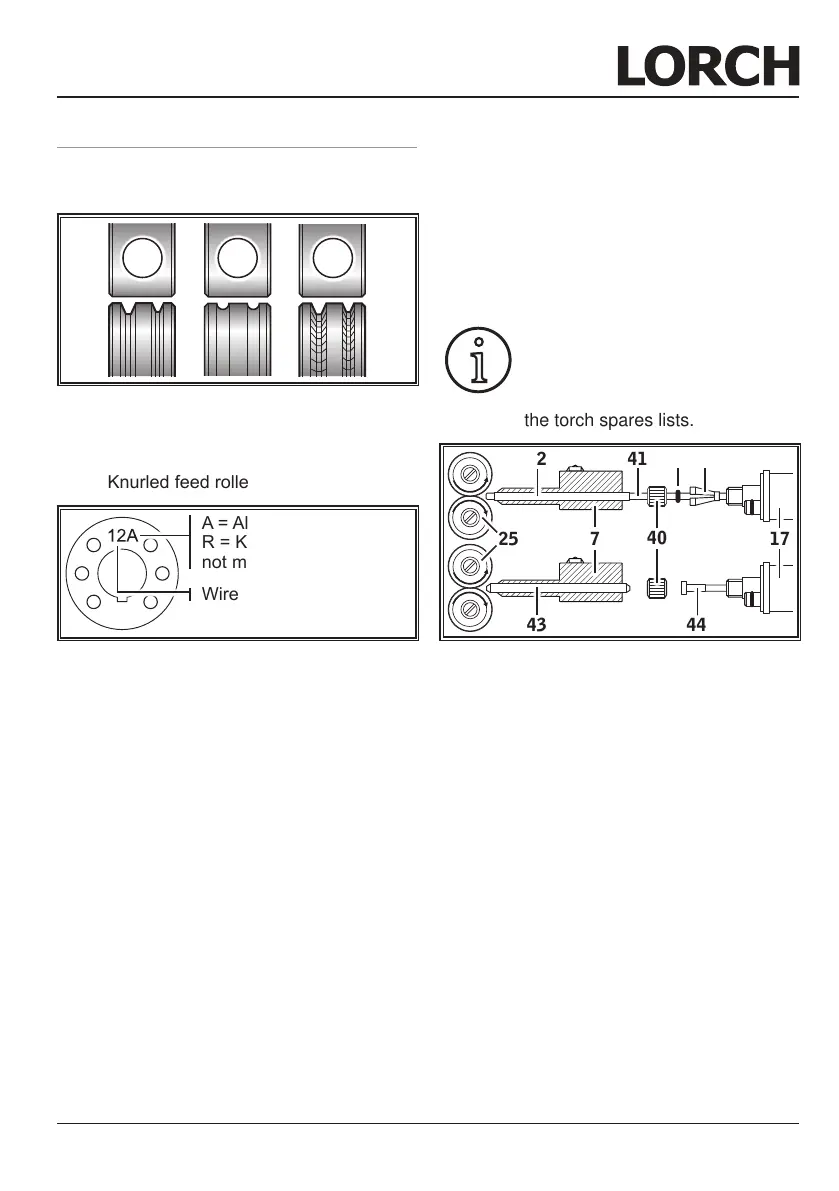
12.7 Changing the wire electrode
 Change the wire feed rollers. Select the
most suitable rollers for the application.
A B C
Abb. 12: Wire feed rollers
A Steel feed roller
B Aluminium feed roller
C Knurled feed roller (for ux-cored wire)
Wire dia. in mm / 10
A = Aluminium
R = Knurled
not marked = Steel
Abb. 13: Marking of wire feed rollers
 Replace the steel torch with an appropri-
ate torch, or change the wire feed spiral.
Wire feed spiral: (for steel or ux-
cored wire)
 Remove the existing wire feed spiral or
plastic core and insert the new wire feed
spiral. (Refer to the operating manual for
the torch)
 Insert the guide tube 85 into the central
connection.
Plastic core: (for aluminium, stain-
less steel or CuSi wire)
 Remove the existing wire feed spiral or
plastic core and insert the new plastic
core. (Refer to the operating manual for
the torch)
 Remove the guide tube 85 from the cen-
tral connection.
 Shorten the protruding plastic core so that
it is tight up against the wire feed roller,
and slide the appropriately shortened sup-
port tube over the protruding plastic core
for stabilisation.
All:
 Tighten the torch and thread the wire elec-
trode in.
The order numbers of the replace-
ment parts depend upon the type
of torch used and the diameter of
the wire, and can be obtained from
the torch spares lists.
42
40
41
39 38
25
17
43
7
44
Abb. 14: Wire feed
7 Central socket
17 Central connection (torch)
25 Wire feed roller
38 Retaining nipple (=clamp) of the plas-
tic liner for 4.0 mm and 4.7 mm out-
side diameter
39 o-ring
40 Union nut
41 Plastic liner
42 Support tube for plastic cores with 4
mm OD Support tube not required with
OD of 4.7 mm.
43 Guide tube
44 Wire feed spiral
 Loading...