Recording
7
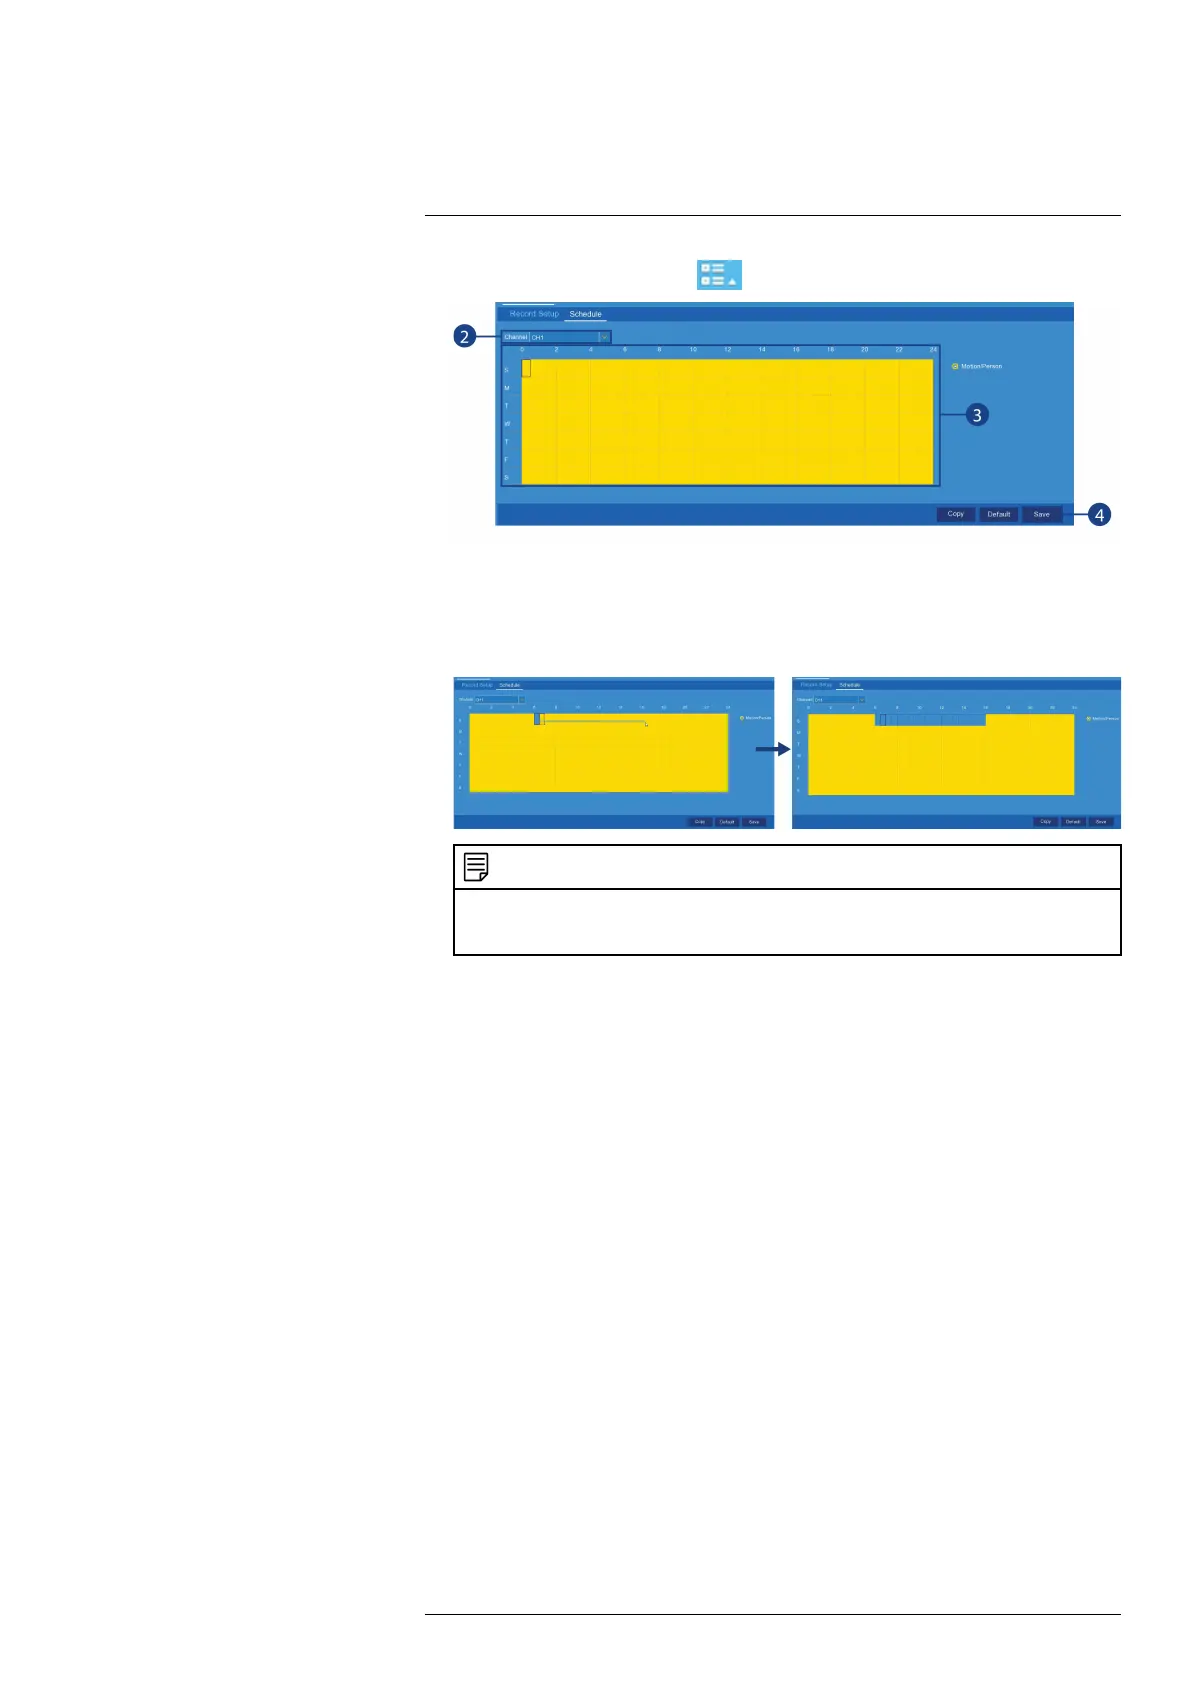
1. From the Live View screen, click > Setup > Recording > Schedule.
2. Click the drop down next to Channel to select a channel.
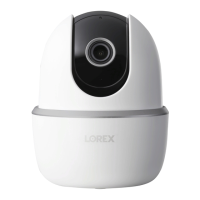
3. Click or click-and-drag over existing bars to remove sections from the recording schedule.
For blank areas of the schedule, click or click-and-drag to add sections to the recording
schedule.
NOTE
If your system and the selected channel support continuous recording, you will have the option to choose
between Motion and Continuous schedules for each day of the week. Continuous recording will only occur
if you set a recording schedule.
4. Click Save.
5. (OPTIONAL) Use the Copy function to copy your settings to another or all connected cam-
eras. See 13.1.1 Copying Channel Settings to Another Channel, page 40 for details on using
the copy function.
#LX400115; r. 4.0/58631/58631; en-US 23