Using the Main Menu13
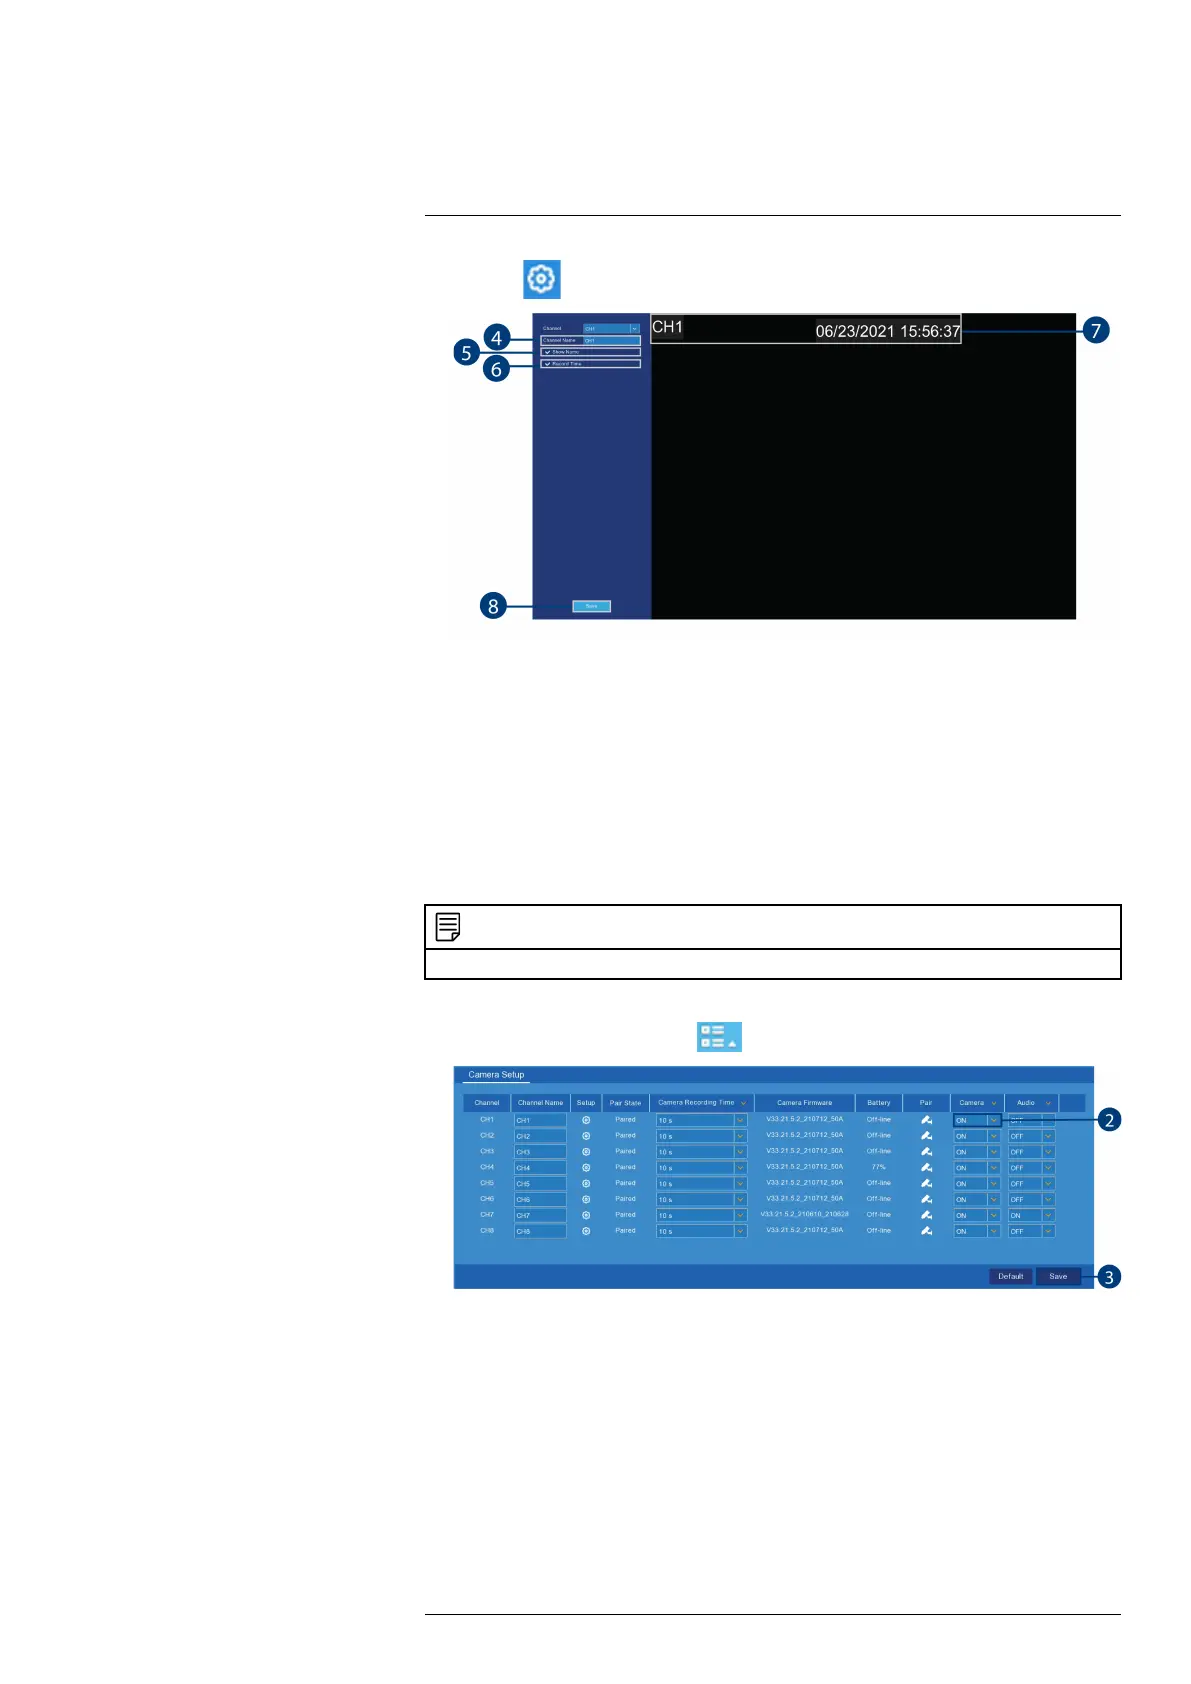
3. Click the icon under Setup.
4. Enter a channel name of your choice (e.g., Back Yard Camera). This name will appear on the
camera image in live viewing and in recordings.
5. Select the check box next to Show Name to display the channel name
6. Select the check box next to Record Time to display the recording time.
7. Click-and-drag the recording time or channel name to reposition it.
8. Click Save.
9. (OPTIONAL): Click the drop-down next to Channel to quickly switch to another channel.
13.2.2 Enabling / Disabling Cameras
Enable or disable wire-free cameras.
NOTE
Disabled cameras will not show video during live viewing or record video to the hard drive.
To enable / disable cameras:
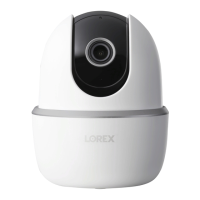
1. From the Live View screen, click
> Setup > Camera > Camera Setup.
2. Find the channel row, then click the drop-down under Camera and select ON or OFF to en-
able / disable a specific camera.
(OPTIONAL) From the drop-down beside Camera, select ON or OFF to enable / disable
all connected cameras.
3. Click Save.
13.2.3 Camera Firmware
In order to troubleshoot certain issues, technical support may ask you for the firmware version
of your wire-free cameras. Use the procedure below to determine the current version.
To check camera firmware:
#LX400115; r. 4.0/58631/58631; en-US 42