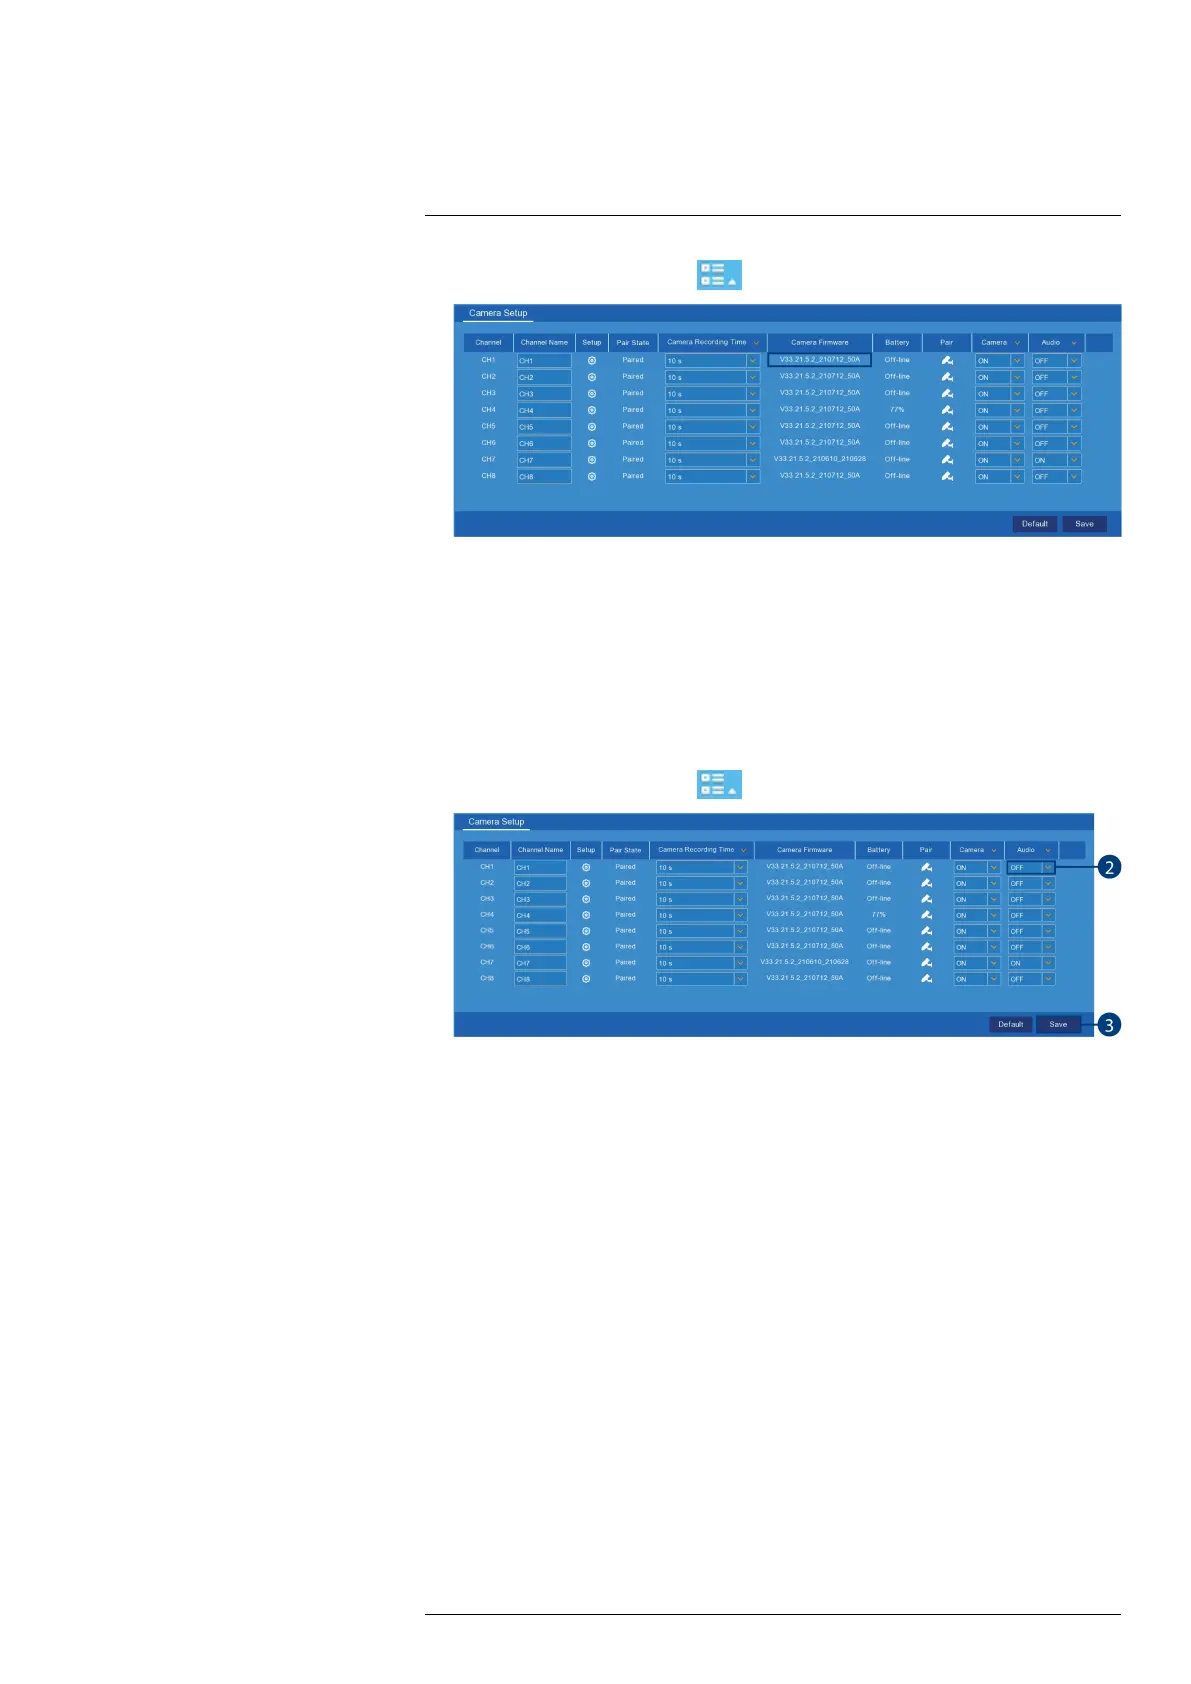
Using the Main Menu13
1. From the Live View screen, click
> Setup > Camera > Camera Setup.
2. From the channel row, look at the Camera Firmware description to see the current firm-
ware version for the specific channel.
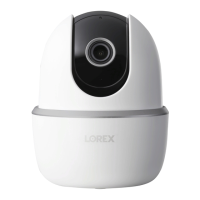
13.2.4 Enabling Audio
The included cameras support audio recording, but must be enabled through the recorder inter-
face. This is due to the fact that audio recording is unlawful in certain jurisdictions. Please ensure
your installation complies with local laws before enabling audio recording.
To enable audio:
1. From the Live View screen, click
> Setup > Camera > Camera Setup.
2. Find the channel row, then click the drop-down under Audio and select ON or OFF to ena-
ble / disable audio for a specific camera.
(OPTIONAL) From the drop-down beside Audio, select ON or OFF to enable / disable
audio for all connected cameras.
3. Click Save.
13.2.5 Changing the Display Resolution
To optimize display, you can change the output resolution of your recorder to match the maxi-
mum supported resolution of your monitor.
To change the recorder’s output resolution:
#LX400115; r. 4.0/58631/58631; en-US 43