Using the Main Menu13
13.2.9.2 Email Notifications — Using your own server information
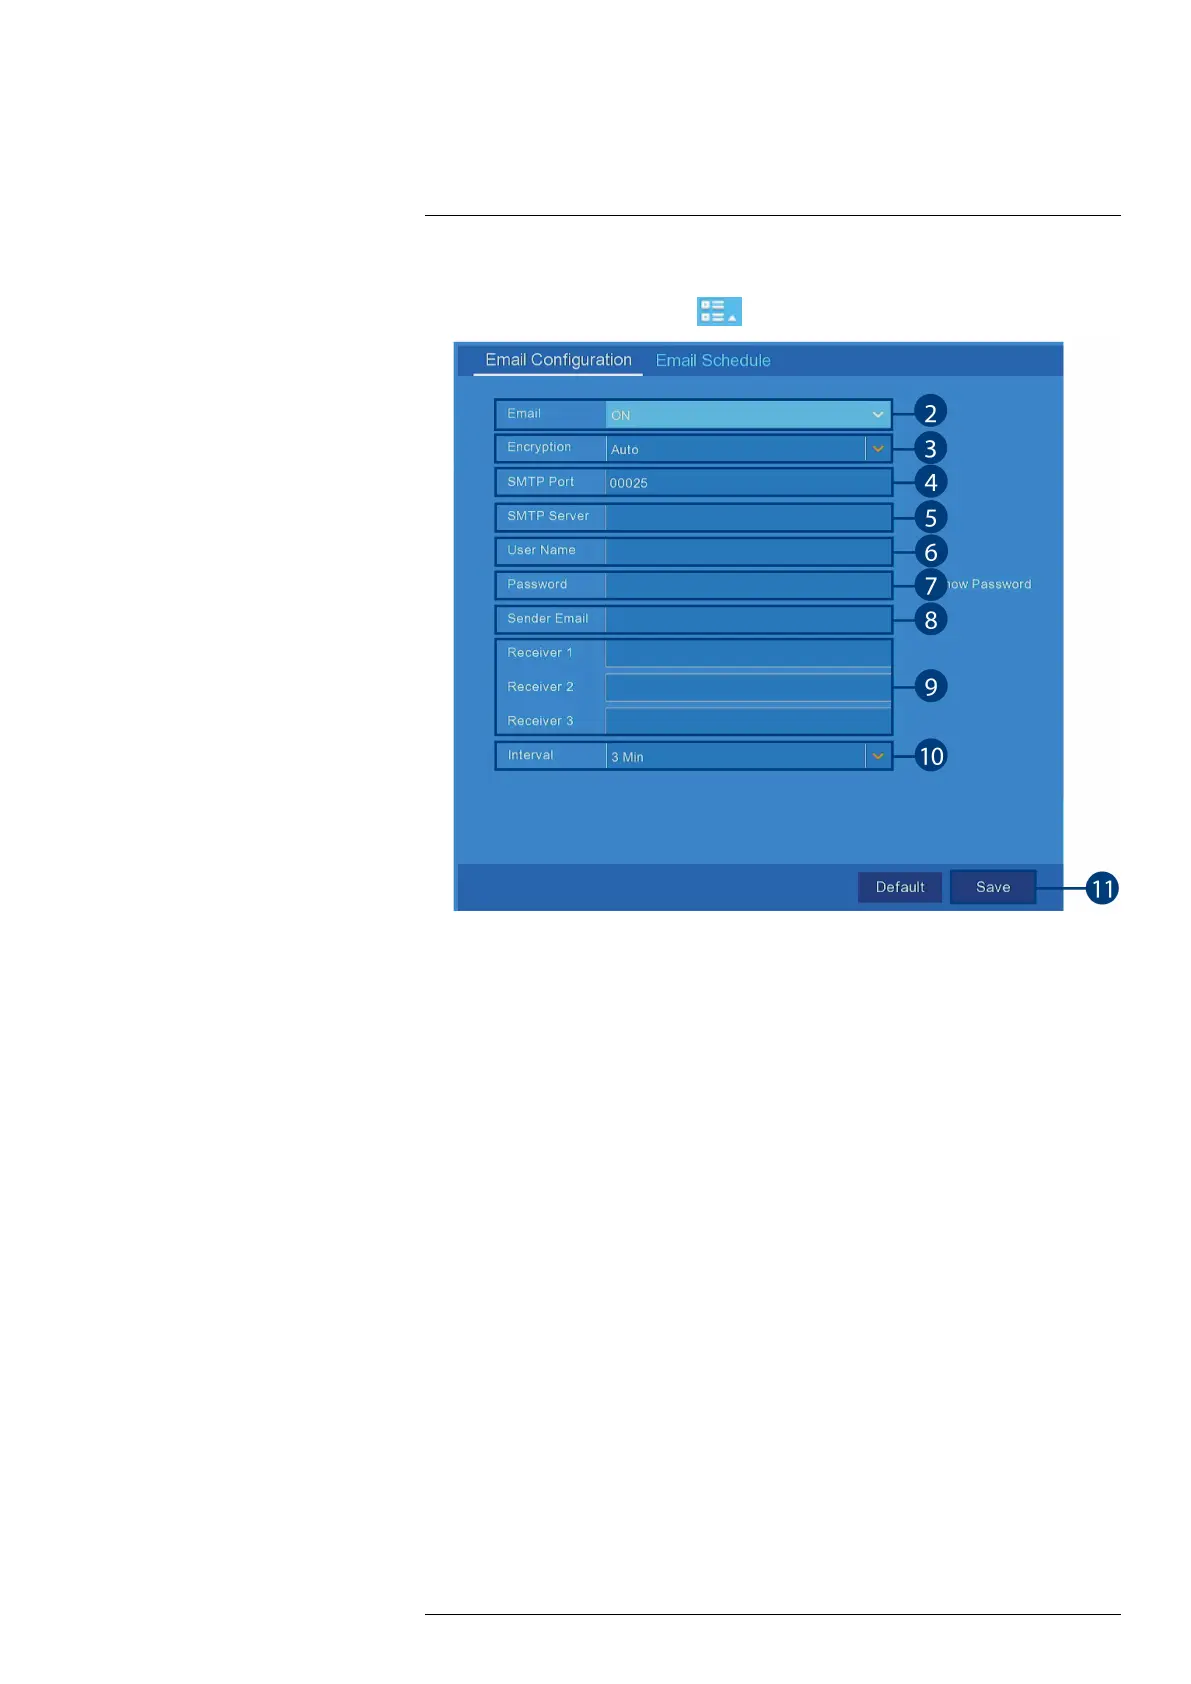
1. From the Live View screen, click
> Setup > Network > Email.
2. Select ON from the drop-down next to Email to enable e-mail notifications using a custom
mail server.
3. Use the drop-down next to Encryption to select an encryption type.
4. Click the field next to SMTP Port to enter the SMTP port.
5. Click the field next to SMTP Server to enter the URL used by your mail server.
6. Click the field next to User Name to enter your user name for the mail server.
7. Click the field next to Password to enter your password for the mail server.
8. Click the field next to Sender Email to enter the sending email address. This can be any
email of your choice.
9. Click to enter up to 3 e-mail addresses that will receive email notifications from the system.
10. Use the drop-down next to Interval to set the minimum amount of time between email noti-
fications. This can be used to limit the number of notifications you receive throughout the
day.
11. Click Save.
Email notifications are now enabled. The default schedule is set to send email notification
whenever motion is detected or a system warning occurs. To configure the schedule for
email notifications, see 13.2.10 Setting an E-mail Schedule, page 47.
13.2.10 Setting an E-mail Schedule
The e-mail schedule determines the time periods that the system will send out e-mail notifica-
tions. You can set separate schedules for motion events and system warnings per channel.
Prerequisites:
• You must enable e-mail notifications for the e-mail schedule to take effect.
• To enable e-mail notifications using the default Lorex e-mail server, see 13.2.9.1 Email Noti-
fications — Using the Lorex server (recommended), page 46.
• To enable e-mail notifications using custom mail server information, see 13.2.9.2 Email Noti-
fications — Using your own server information, page 47.
#LX400115; r. 4.0/58631/58631; en-US 47