Recording
7
2. From the list of channels, find the camera you want to configure.
3. Click the drop-down arrow, then select a period of time the camera will record video for
when motion is detected.
4. (OPTIONAL) Click the drop-down arrow beside Camera Recording Time to select a peri-
od of time for all connected cameras.
5. Click Save.
NOTE
• You should configure motion detection settings to ensure objects of interest are being recorded. For full in-
structions, see 13.2.11 Configuring Motion Detection Settings, page 48.
• Depending on your system, you may have the option to record continuously by setting Camera Recording
Time to Continuous. This option is only available on systems that use a hard drive for storage rather than a
microSD card, and only on cameras which have a wired connection to power.
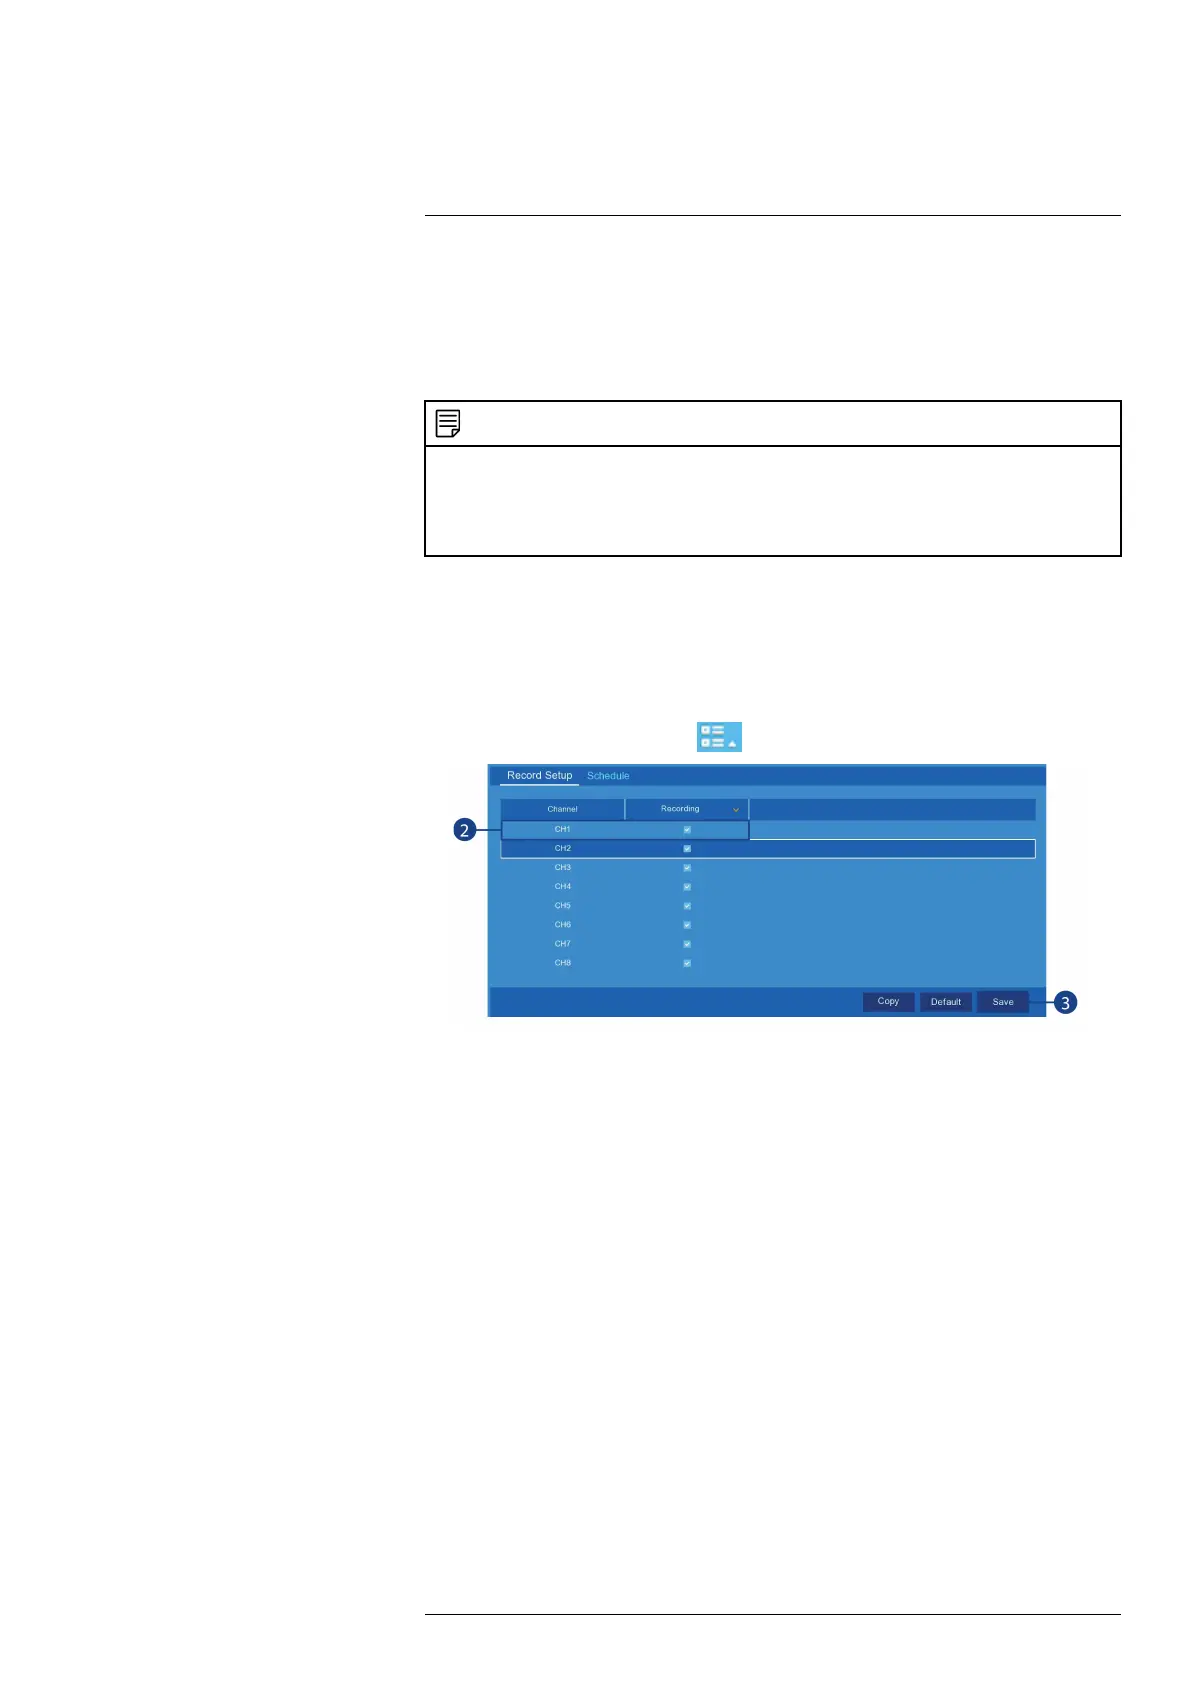
7.2 Configuring Manual Recording
The system will automatically record video when motion is detected by a camera. You can also
use manual recording to record a video file with a custom start and stop time. By default, man-
ual recording is enabled on all channels.
To enable / disable manual recording:
1. From the Live View screen, click
> Setup > Recording > Record Setup.
2. From the list of channels, find the camera you want to configure, then click the check box to
enable / disable manual recording.
3. Click Save.
4. (OPTIONAL)
• Click the drop-down arrow beside Recording, then select ON or OFF to enable / disable
manual recording for all connected cameras.
• Use the Copy function to copy your settings to another or all connected cameras. See
13.1.1 Copying Channel Settings to Another Channel, page 40 for details on using the
copy function.
7.3 Setting a Recording Schedule
By default, the system is set to record whenever a camera detects motion. You have the option to
set a recording schedule so that a particular camera only records at certain times. The recording
schedule repeats weekly and can be configured differently per camera.
To set a recording schedule:
#LX400115; r. 4.0/58631/58631; en-US 22