Using the Main Menu13
3. Click Save.
4. (OPTIONAL) Use the drop-down beside the features then select ON or OFF to select or de-
select all check boxes.
13.3 System Menu
Change general system information such as date, time and region, edit passwords and permis-
sions, and more.
13.3.1 Changing the Date and Time
If you need to change the date and time after completing the setup wizard, follow the steps
below.
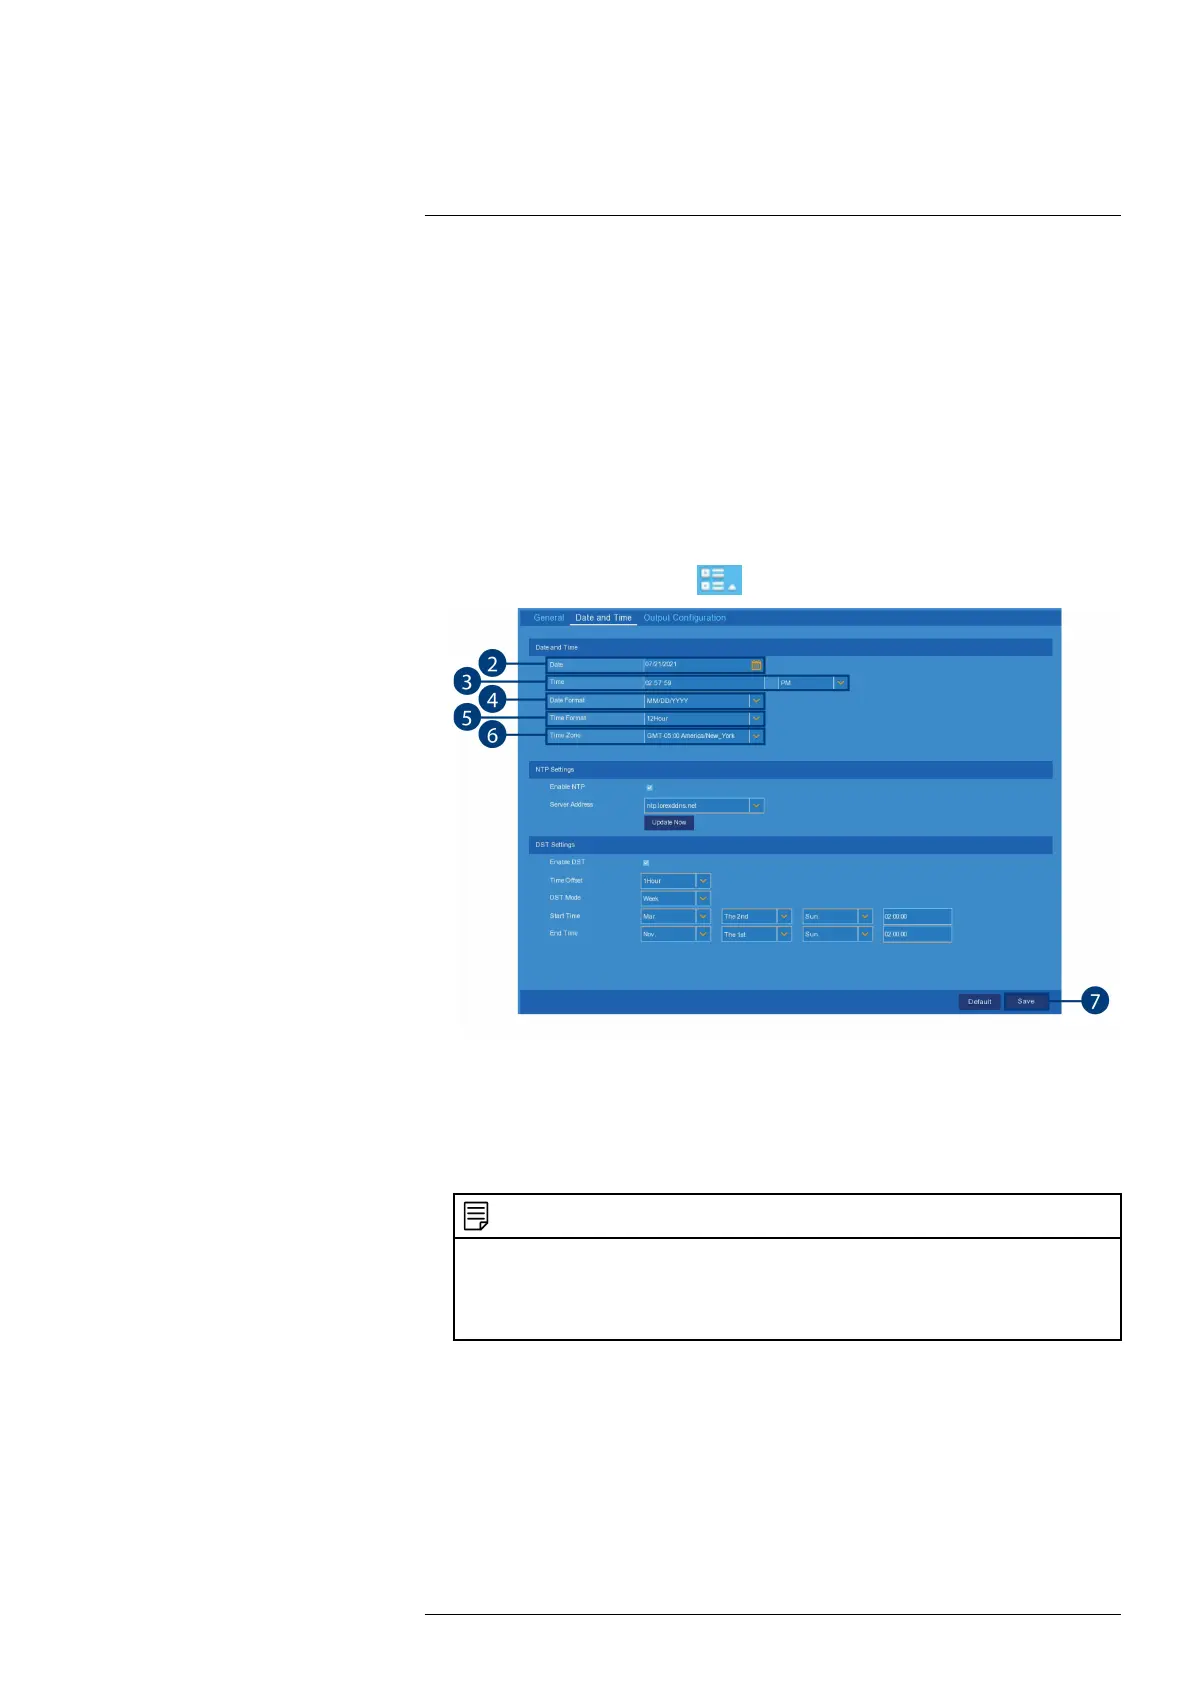
To change the recorder’s date and time:
1. From the Live View screen, click
> Setup > General > Date and Time.
2. Select the correct date from the calendar.
3. Enter the correct time. Use the drop-down to select AM or PM if using 12-hour time format.
4. Select a date format for date stamps on recordings.
5. Select a time format for time stamps on recordings.
6. If needed, use the drop-down next to Time Zone to set the correct region.
NOTE
In most cases, the region should already be correct as it was configured during the recorder setup wizard. In
addition to determining the time zone, the selected region is also used by the system to intelligently deter-
mine the correct video format (NTSC or PAL) for that region, which may change automatically when
changing the region. For example, changing the region from New York to London will also switch the video
format of the system from NTSC to PAL.
7. Click Save.
13.3.2 Changing Device Name
Change the device name for the recorder.
To change the device name:
#LX400115; r. 4.0/58631/58631; en-US 52

 Loading...