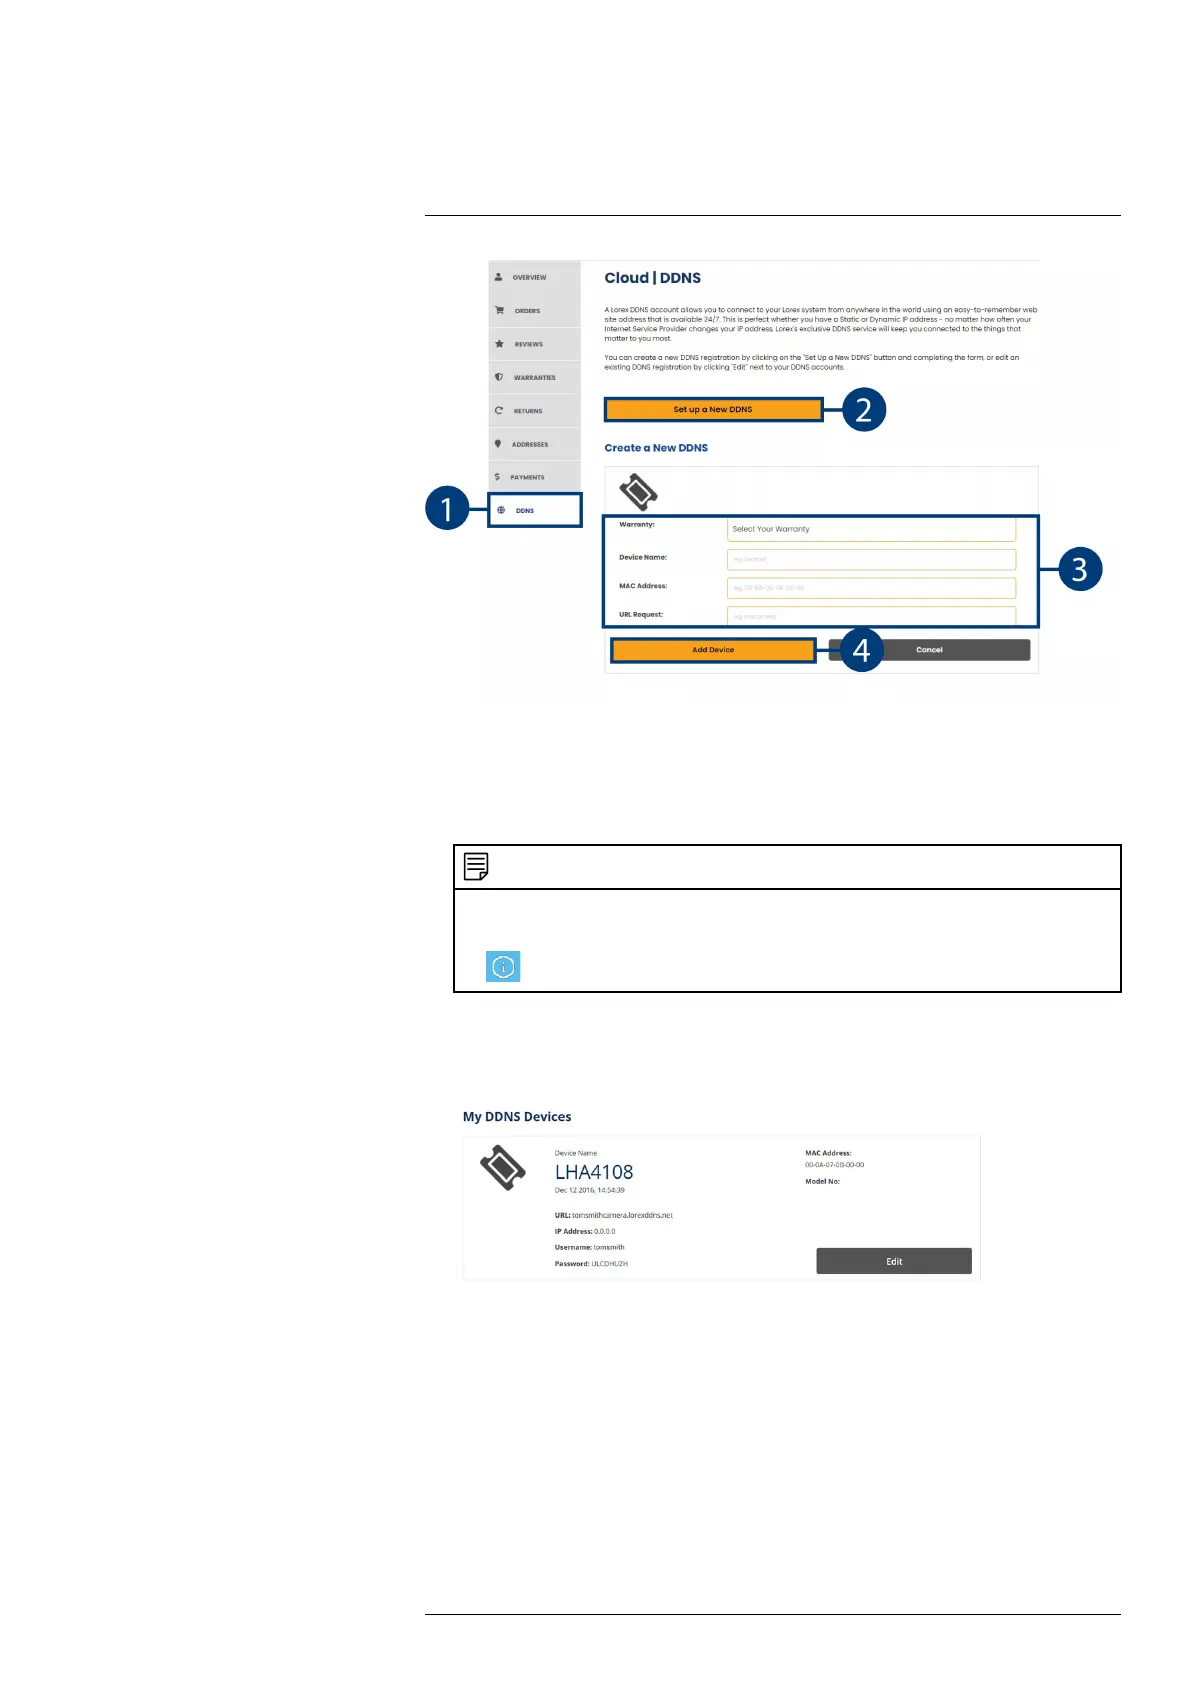
DDNS Setup (Advanced)18
1. From your LOREX account, click the DDNS tab.
2. Click Set up a New DDNS.
3. Click Select Your Warranty to select your recorder warranty from the drop-down. Enter the
rest of your product information.
NOTE
• The Device Name can be any name of your choice (for example, “Store Security System”).
• You can find your recorder’s MAC Address in the system information window on the recorder. Click
on the Taskbar to open the system information window.
4. Click Add Device.
Once submitted, your DDNS account information will be summarized under My DDNS De-
vices. Make a note of your DDNS URL, Username and Password, as they will be needed
to complete DDNS setup.
18.6 STEP 6: Enable DDNS on the recorder
The primary connectivity option for this recorder uses Lorex Client 13 to connect to your system
over the Internet without requiring port forwarding or DDNS registration.
Lorex DDNS is available as an optional connectivity option.
• For details on connecting to your system over the Internet using a smartphone or tablet (no
DDNS setup required), see 15 Connecting to Your System Using Smartphone or Tablet Apps,
page 63.
Prerequisites:
#LX400115; r. 4.0/58631/58631; en-US 69