Using the Main Menu13
1. From the Live View screen, click > Setup > Alarm > Alarm Setup.
2. Use the drop-down next to Channel to select the channel you want to configure motion de-
tection options for.
3. Use the drop-down next to Detection to choose between Motion or Person detection, or to
turn OFF detection.
4. Use the drop-down next to Buzzer to choose whether the recorder should sound an alarm
when motion is detected by the selected channel.
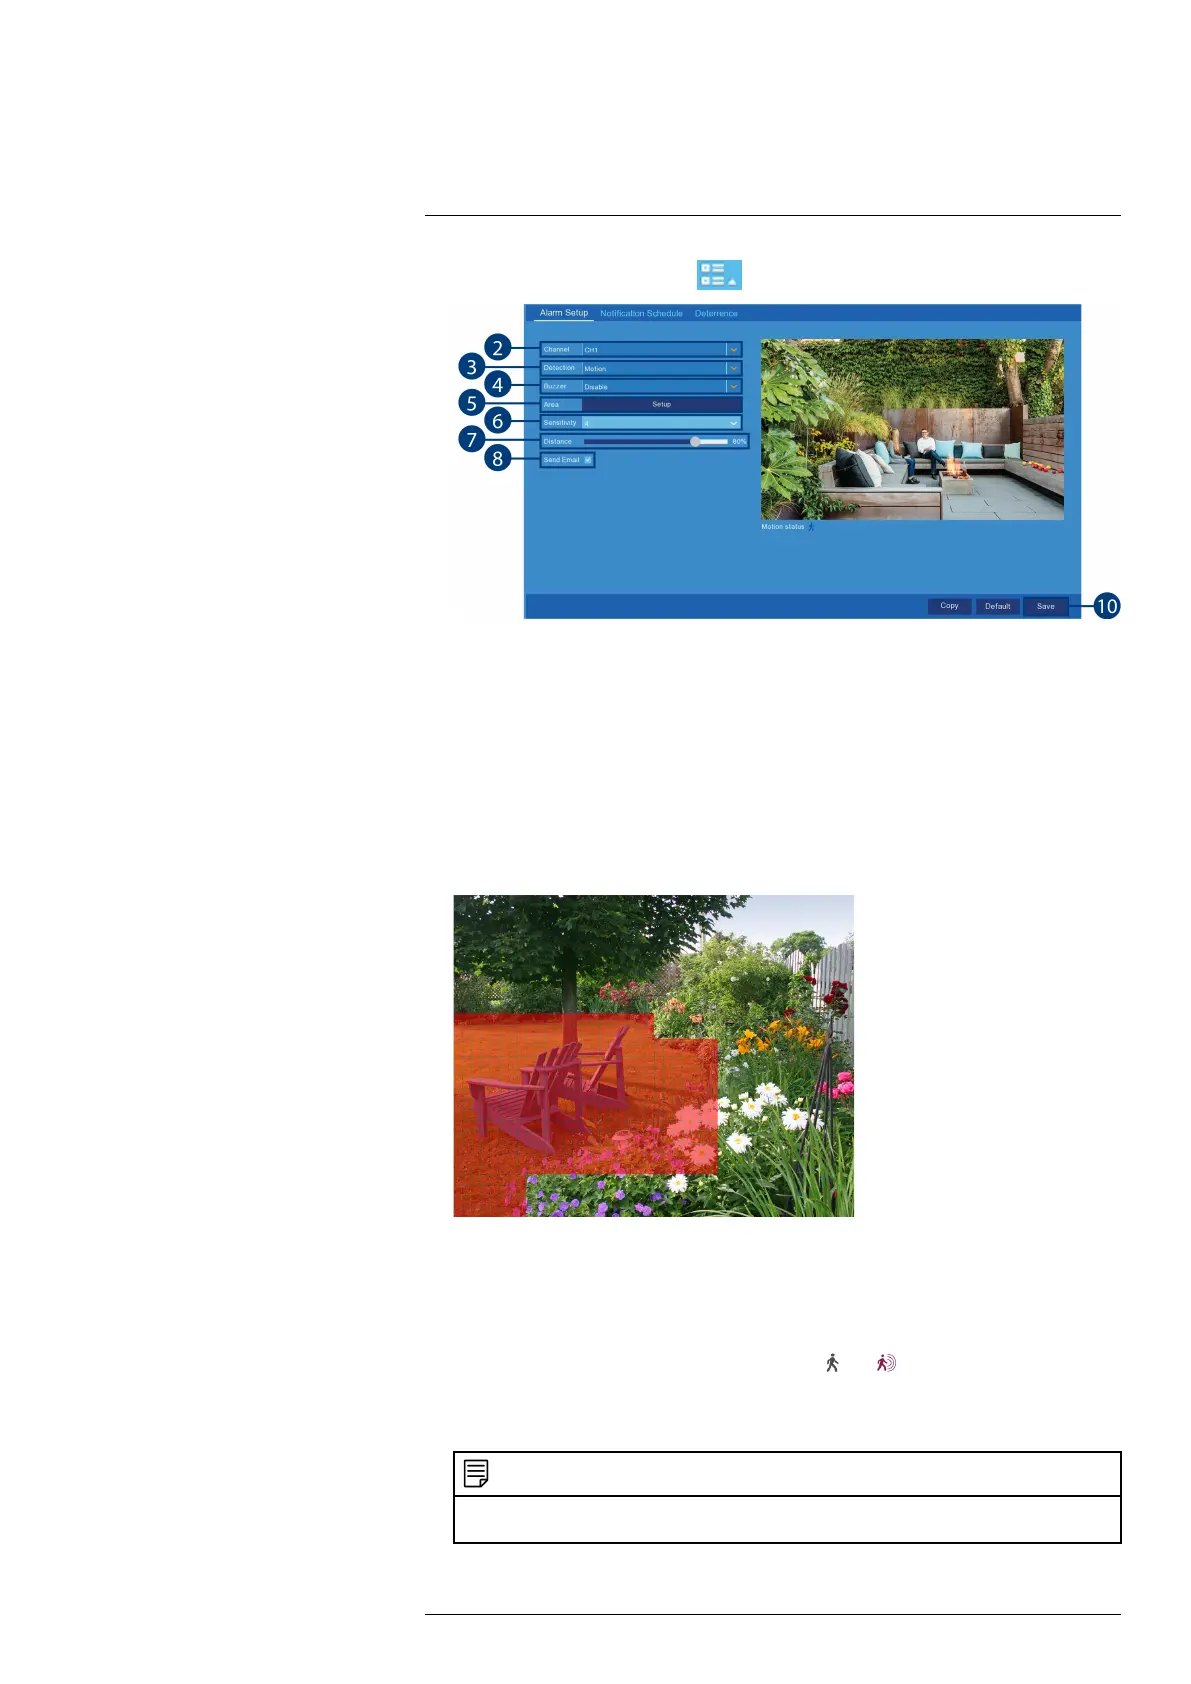
5. Click Setup next to Area to configure the active area for motion detection. The live view ap-
pears with a red grid overlay covering the whole image, meaning the whole image is active.
Click or click-and-drag to enable / disable parts of the image. In the example image below,
only motion occurring in the yard will trigger recording, but motion in the flower beds will
not.
6. Use the drop-down next to Sensitivity to choose a sensitivity level for motion detection
events.
7. Set the Distance to configure the PIR sensor. This will help to make motion detection more
accurate. Recreate a motion event in front of the camera, and set the distance so that wanted
events turn the icon below the camera image from
to .
8. Check the box next to Send Email to receive an e-mail when motion is detected by the se-
lected channel.
NOTE
E-mail notifications require additional configuration. Please see 13.2.9 Setting up Email Notifications, page
46 for full setup details.
9. Click Save.
#LX400115; r. 4.0/58631/58631; en-US 49
 Loading...