Using the Main Menu13
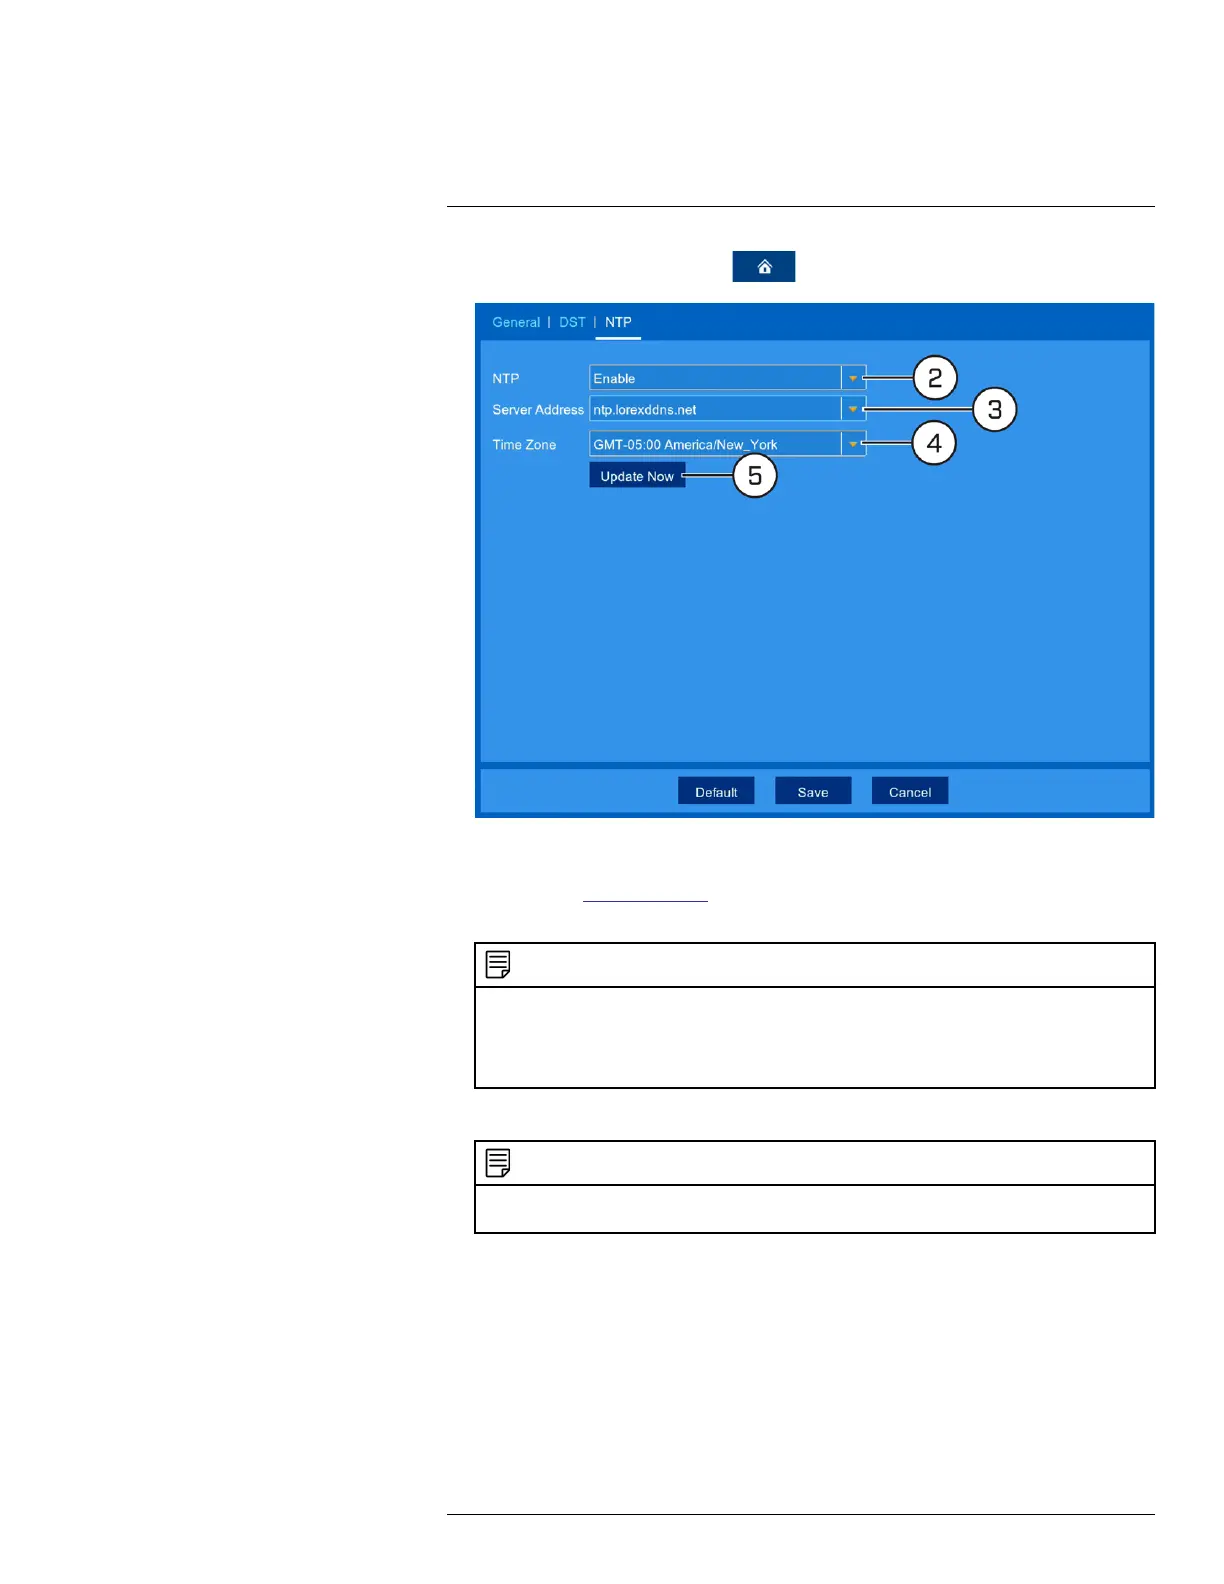
1. From the live viewing screen, click > System > General > NTP.
2. Select Enable from the dropdown next to NTP.
3. Select the desired NTP server from the dropdown next to Server Address (we recommend us-
ing the default ntp.lorexddns.net).
4. If needed, use the dropdown next to Time Zone to set the correct region.
NOTE
In most cases, the region should already be correct as it was configured during the recorder setup wizard. In
addition to determining the time zone, the selected region is also used by the system to intelligently determine
the correct video format (NTSC or PAL) for that region, which may change automatically when changing the
region. For example, changing the region from New York to London will also switch the video format of the
system from NTSC to PAL.
5. Click Update Now to sync with the NTP.
NOTE
If the video format changes between NTSC and PAL based on your new choice of region, the recorder will re-
boot automatically.
13.3.7 View System Information
View system information such as device ID, IP address, MAC address, model number, firmware
version and more.
#LX400109; r. 2.0/54857/55689; en-US 63

 Loading...


