Manitowoc Published 03-29-17, Control # 064-23 v2 4-91
14000 OPERATOR MANUAL SETUP AND INSTALLATION
Jib Installation – #134
General
See Jib Assembly Drawing at end of this section for jib
makeup.
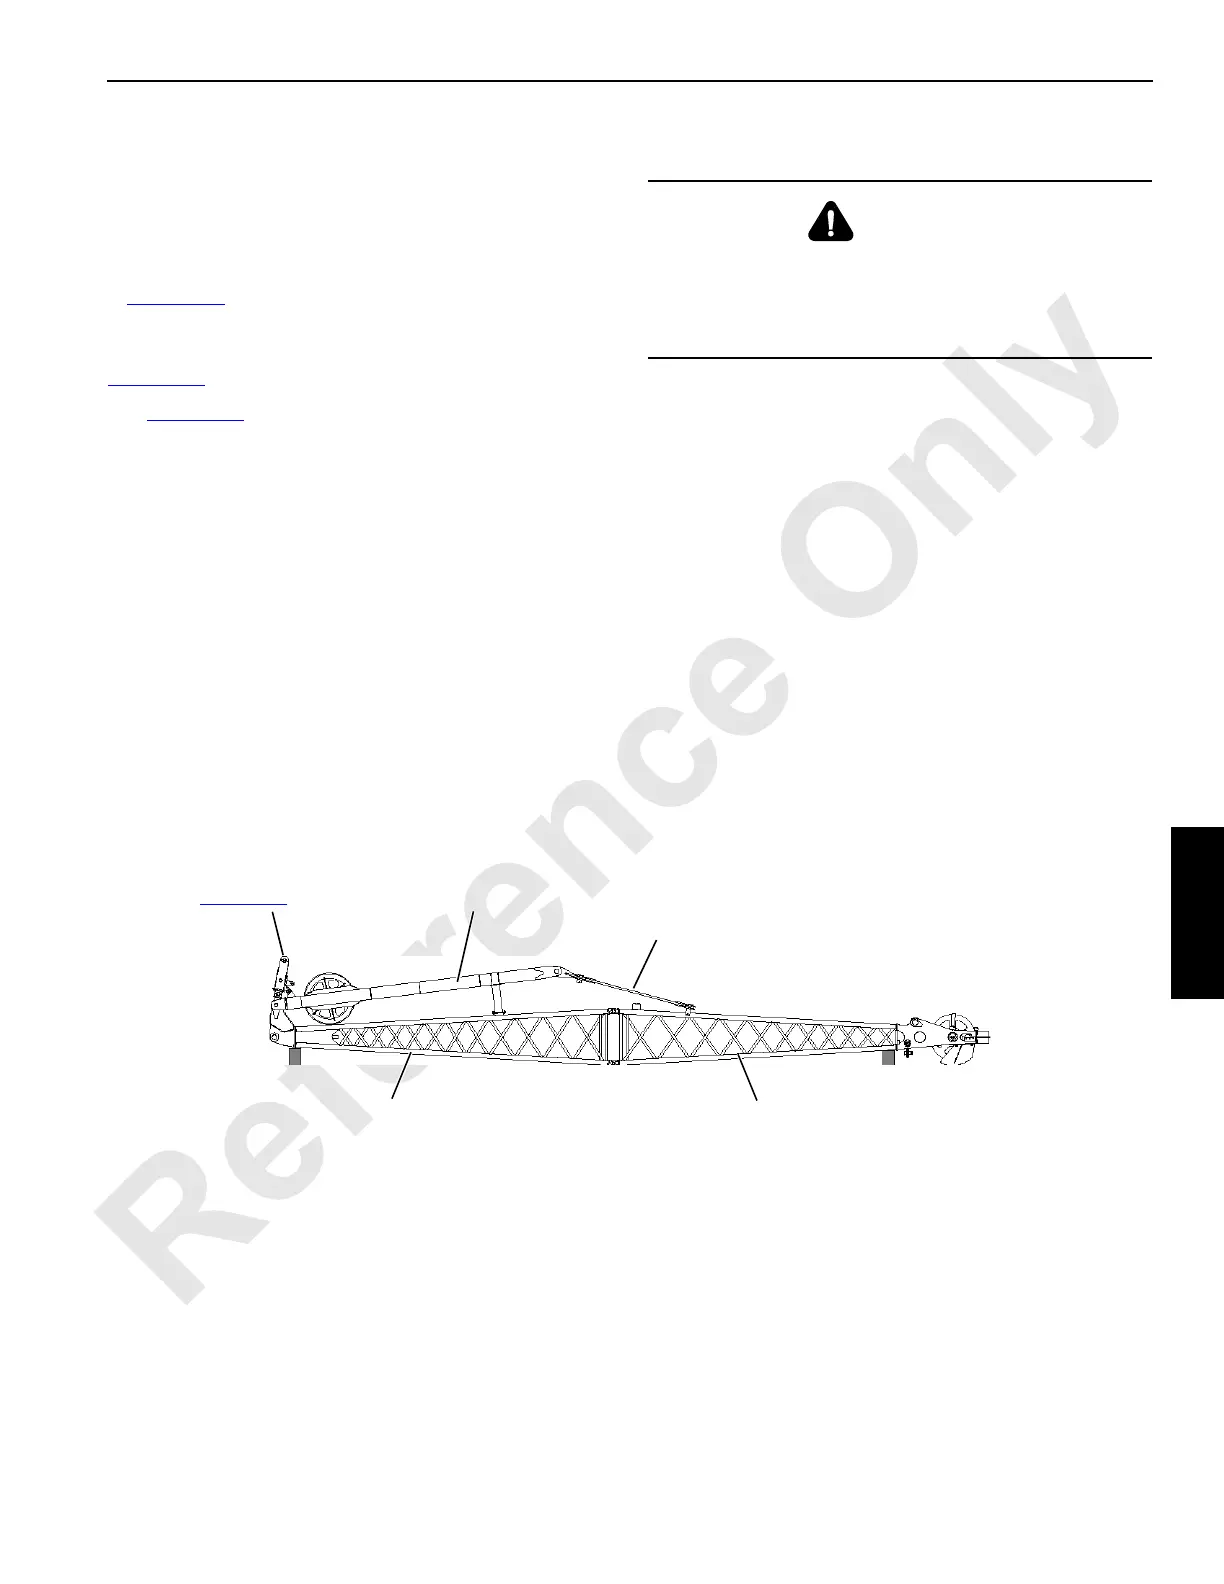
The jib assembly may be shipped from Manitowoc as shown
in Figure 4-42
.
Jib offsets (5°, 15°, 25°) are set by changing the lengths of
the jib backstay straps, links, and pendants (View A,
Figure 4-43
).
See Figure 4-41
for the following procedures.
Prepare Boom
1. Lower boom onto blocking (7, View C).
2. Remove load line from upper boom point, if equipped.
3. Remove and store upper boom point.
4. Make sure insert with jib backstay lugs (8, View E) is
installed next to boom top (6).
Install Butt
1. Lift jib butt (J1, View D) into position and align holes in jib
butt with holes in boom top.
2. Install pins (9, View D).
Install Inserts
1. Pin desired length of jib inserts (J3) to jib butt (J1):
• Wire rope timber guards (4, View B) must face up
• Shortest inserts must be closest to butt
• Pin (5) heads must be toward outside of jib (View B)
2. Block inserts as assembly progresses.
Install Top
Pin jib top (J2) to last insert (J3) or to jib butt (J1), depending
on jib length:
• Pendant lugs on jib top must face up
• Pin (5) heads must be toward outside of jib (View B)
• If not already done, install wire rope timber guard (4,
View B)
WARNING!
Collapsing Jib Hazard!
To prevent death or serious injury, do not stand on, inside,
or under jib during assembly. Always stand outside of jib
when installing connecting pins.
FIGURE 4-42
Jib Butt
Jib Stop
(see Figure 4-41
, View A)
Jib Strut
Jib Top
Jib Backstay Links
and Spreaders
Shipping Configuration
from Manitowoc