3A-22 90-13645--2 495FUEL SYSTEM AND CARBURETION
CLEANING AND INSPECTION
1. Carefully inspect carburetor body and fuel bowl
for cracks, stripped threads, plugged or restricted
passages and passage plugs that show signs of
leakage.
2. Thoroughly clean all carburetor parts with a mild
cleaning solution (that will not damage rubber or
plastic) to remove dirt, gum and varnish that may
have accumulated.
3. After washing parts, blow parts dry with com-
pressed air. Be sure to blow air thru all passages,
orifices and nozzles.
4. Check float hinge in the float pin area for wear and
check float for leaks. Replace parts as necessary.
5. Examine inlet needle for wear. If worn, replace
with new inlet needle.
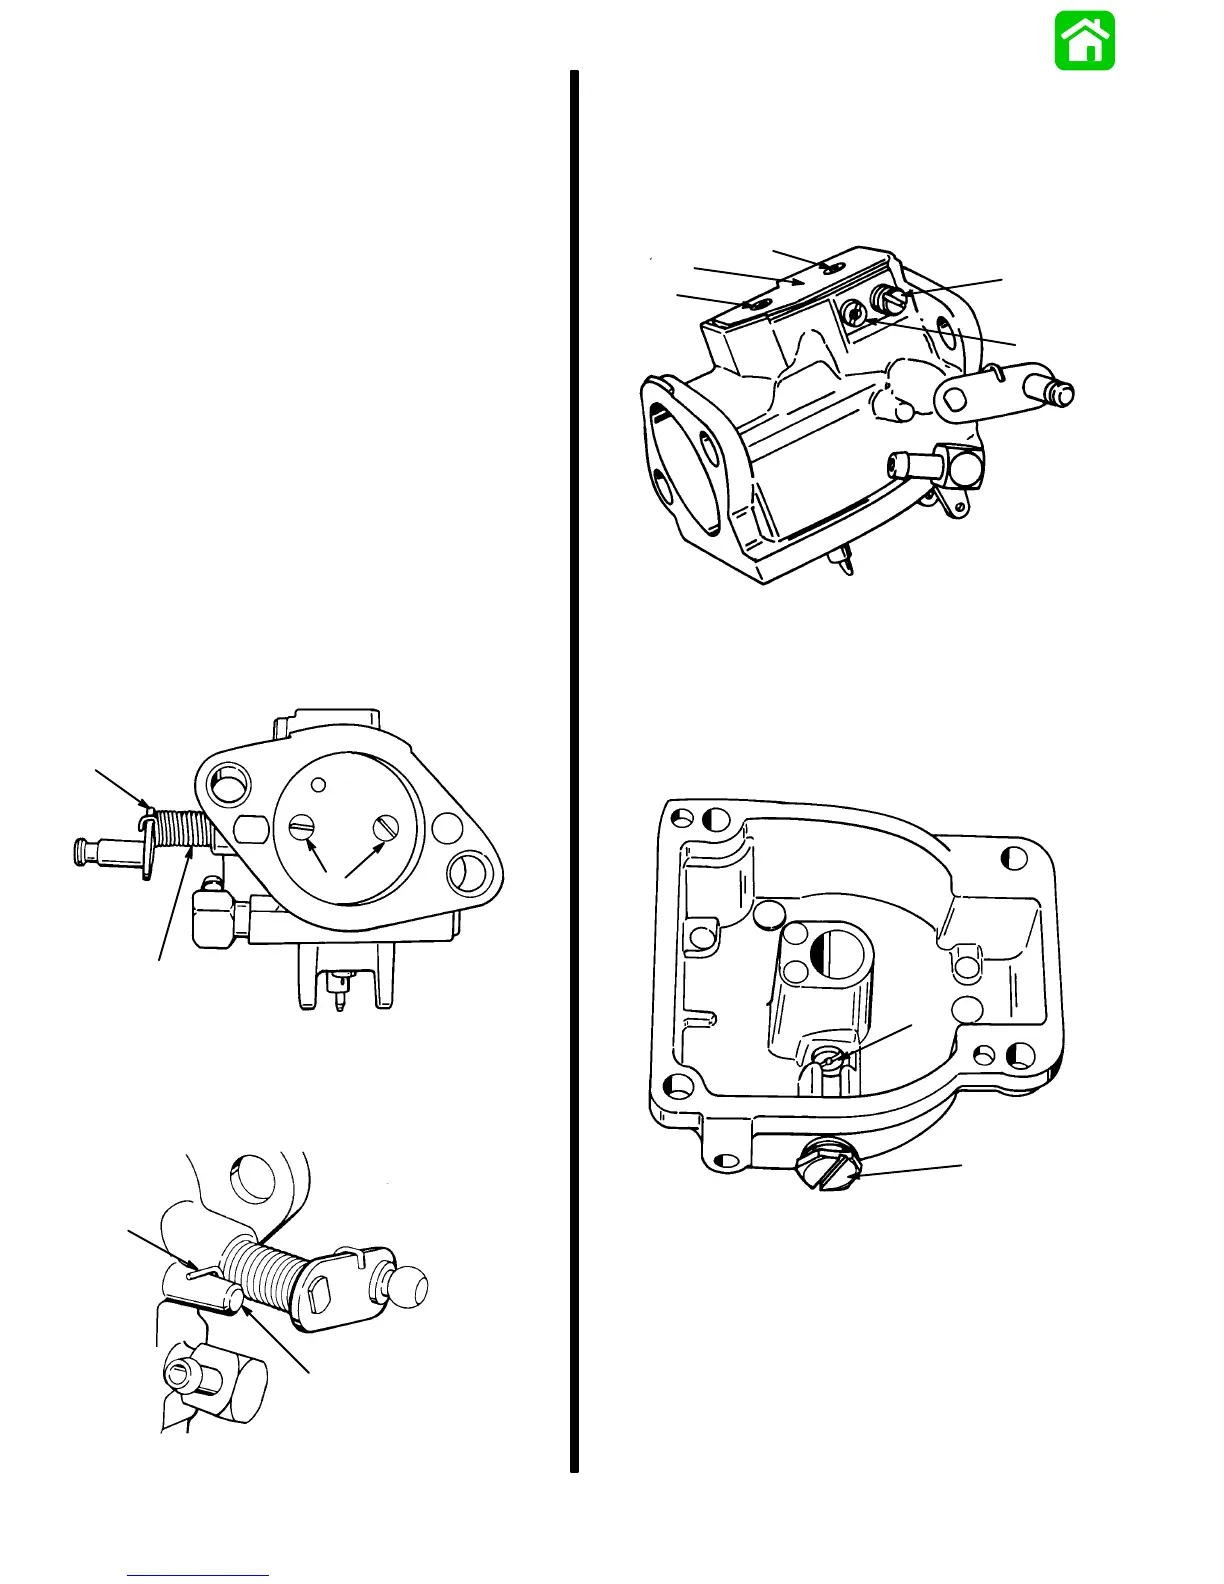
Carburetor Reassembly
S If removed, install throttle shaft throttle shutter
plate — 2 screws (use specified LoctiteR), and
throttle shaft spring as shown. Install retaining clip
on other end of shaft.
51117
a
b
c
a - Throttle Shaft
b - Screws (2)
c - Throttle Shaft Spring
S Spring “tensions on stud”.
51259
a
b
a - Spring
b - Stud
S Install mixing chamber cover and gasket as
shown.
S Install low speed mixture screw.
S Install bowl vent jet (back drag) (3-Cylinder Models
only).
51116
a
b
c
d
d
a - Mixing Chamber Cover and Gasket
b - Idle Mixture Screw
c - Bowl Vent Jet
d - Screw (2) Torque 18 lb. in. (2.1 Nm)
S Install main jet.
S Install main jet plug and gasket.
a
b
51116
a - Main Jet [Torque 14 lb. in (1.6 Nm)]
b - Main Jet Plug and Gasket [Torque 22 lb. in. (2.5 Nm)]