Catch Sensors | V1 | System Configuration and Display
Information about the sensor is displayed.
5.
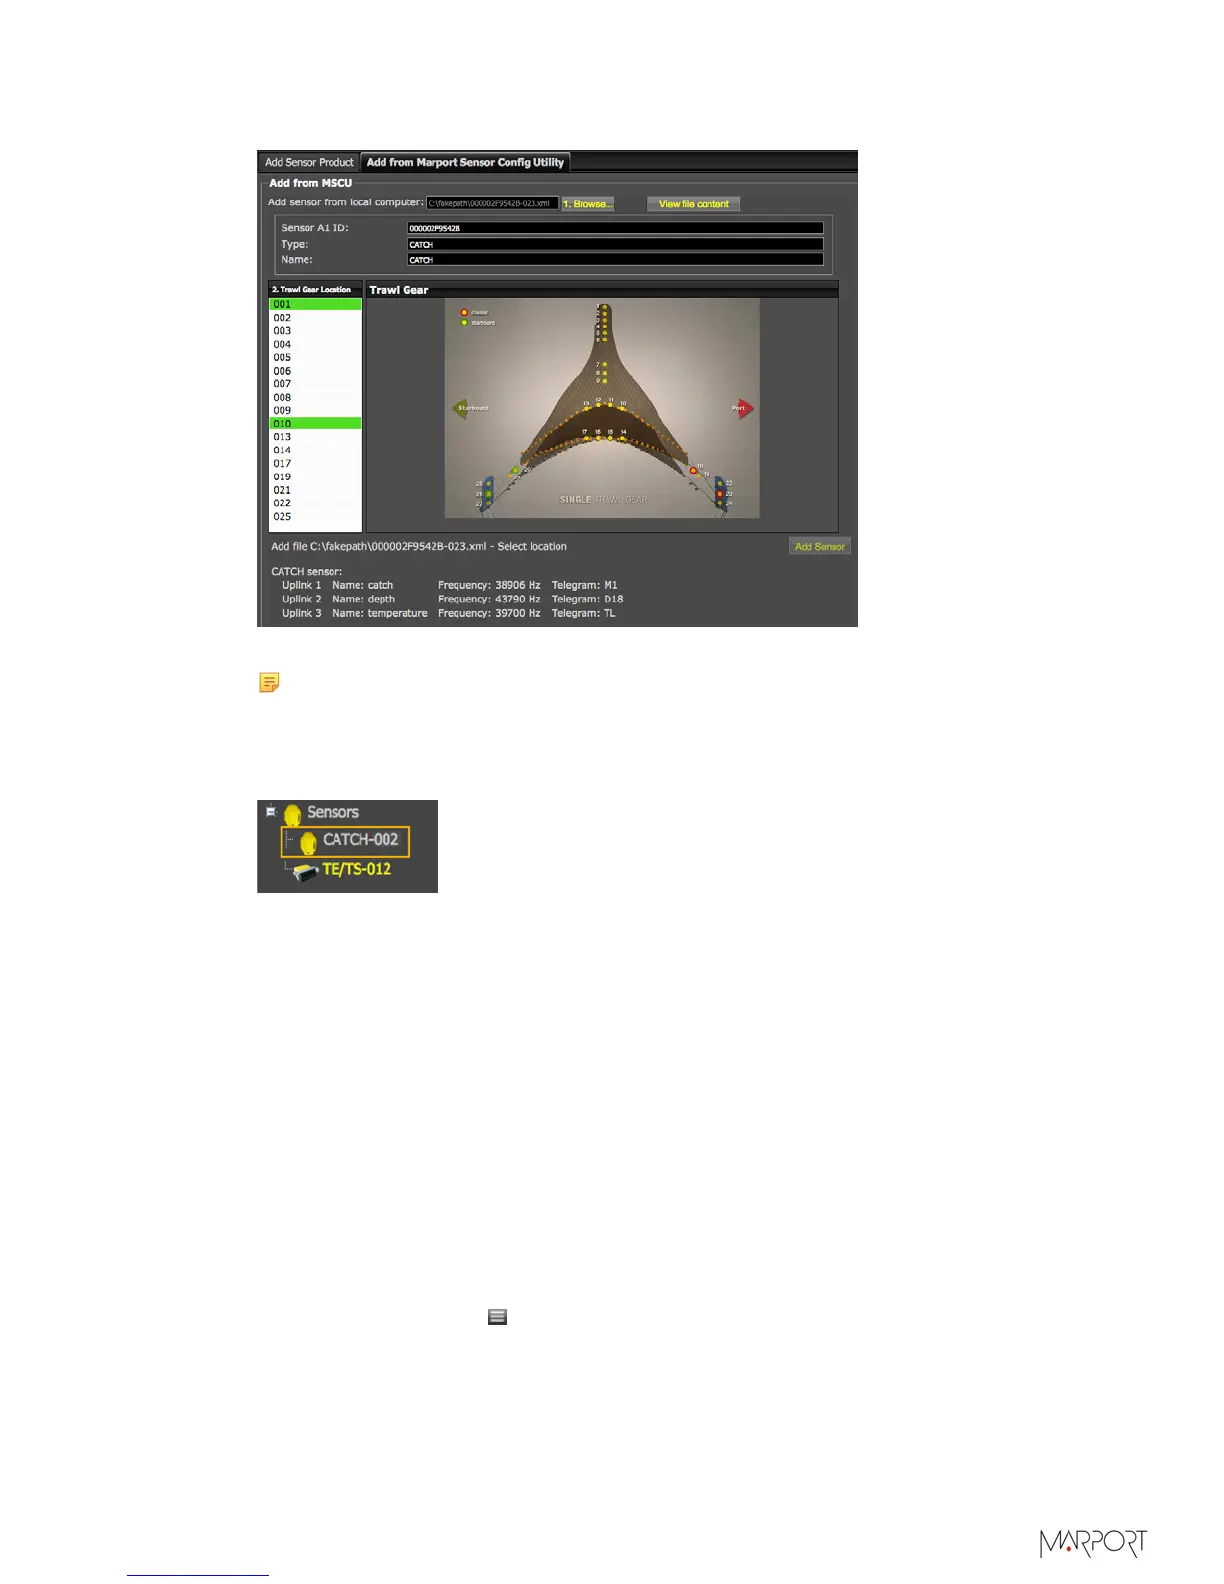
Select a node from the list on the left. Nodes in green are already used.
Note: We recommend you to choose nodes between 1 and 6 because they are
placed on the codend.
6.
Click Add Sensor.
The sensor is added to the system, with all its settings.
Results
You can see incoming data from the control panels, in Sensors Data.
What to do next
• If you want to apply filters on data received by the sensor, see Configuring the Sensor
Settings on page 45.
• You can now configure the display of incoming data in Scala.
Adding the Sensor Manually
You can add the sensor to the receiver from Scala, by entering the same settings as the
ones in Mosa.
Adding the Sensor to the Receiver
1.
From Scala, click Menu > Expert Mode and enter the password copernic.
2.
Click menu again, then Receivers.
| 44