Catch Sensors | V1 | Servicing and Maintenance
12.
When you have enough data, click Stop Spectrum.
Charging the Sensor
Charge the sensor at any battery level with either Marport Basic Sensor Charger or
Marport Medusa II Multi-charger.
About this task
The sensor uses lithium-ion batteries. Charge them only with Marport's chargers.
Warning: In case of water ingress in the product, do not charge it: battery may
vent or rupture, causing product or physical damage.
Procedure
1.
Before charging the sensor: wash with fresh water and dry the sensor. This prevent
corrosion of the charging pins.
2.
Place the sensor and charger in a dry room like the deck or bridge. The optimal
temperature while charging is between 10 and 25 °C.
3.
Place the sensor away from any installing material (e.g. wet ropes) and fix the sensor
with brackets to keep it stable while charging.
4.
Allow good air circulation around the charger for cooling.
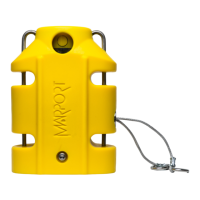
5.
Connect the 3-pin charging connector to the sensor shoulder bolts.
Tip: You can apply a small film of electrical contact grease lubricant on pins.
To maintain the electrical pins, polish them with fine sandpaper.
Important: Check that the shoulder bolts are not damaged. If they are, contact
your local Marport dealer for replacement. Below is an example of shoulder
bolts damaged because of insufficient maintenance.
6.
Plug in the charger to a 110-240 V AC 50-60 Hz socket.
7.
If you have the multi-charger, turn the power switch to the ON position.
The power switch lights on. If not, check the AC power cord connection.
8.
Wait for the battery to charge: standard charging cycle takes 6 to 8 hours. A fast
charge configuration allows a 70 % charge in 1 hour and full charge in 2.5 hours.
9.
Look at the LED(s) on the charger box to know the charge status. For the multi-
charger, there is a LED for each sensor charging cable. The charge status are:
•
Green LED: > 90%
•
Orange LED: from 70% to 90%
•
Red LED: < 70%
| 59