36 Matrox Extio 3 Series – User Guide
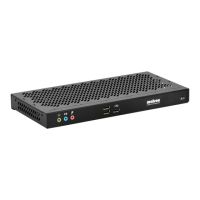
Extio N3208 transmitter or receiver unit
Extio N3208 transmitter unit (Front)
LAN1
Connect an RJ45 cable to this connector.
Note: If you’re using link redundancy, make sure the
LAN1
and
LAN2
connectors are connected before enabling the
Link
redundancy
feature.
LAN2
Connect an SFP module (RJ45 cable or LC-LC fiber optic cable)
to this connector. For more information, see “Installing the SFP
module”, page 39.
Note: If you’re using link redundancy, make sure the
LAN1
and
LAN2
connectors are connected before enabling the
Link
redundancy
feature.
Line In
Connect the
Line Out
connector of your computer (host) or of
another audio device (local or remote) to this connector. This
connector supports a 3.5 mm stereo jack.
Line Out
Connect the
Line In
connector of your computer (host) or of
another audio device (local or remote) to this connector. This
connector supports a 3.5 mm stereo jack.
Microphone
Connect your microphone to this connector. This connector
supports a 3.5 mm stereo jack.
RS232
Control an RS232 device on one of your devices with an RS232
controller connected to device, or with an RS232 controller
sending commands over the network.
If your RS232 device has a DB25 connector, use a DE9 (also
known as a DB9) to DB25 converter to connect your device to
this connector.
USB 2.0
Connect a USB device to this connector. Note: When the
Enable
local console on the transmitter
option is enabled (Extio Central
Manager
Transmitter settings
More options
Local
console), only keyboard and mouse can be connected to the front
USB connectors on a transmitter device.
Connector
Tx
Rx
Description
Video Out
(DisplayPort 1.1)
USB 2.0