16 Matrox Extio 3 Series – User Guide
2
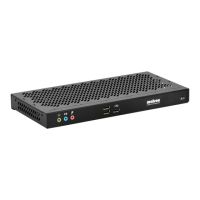
Connect your devices
–
see “Connecting your Extio 3 devices”, page 31.
3
Validate your setup
–
see “Description of LEDs”, page 43.
4
The network administrator must create and configure the
Strongswan.zip
files so that the
remote receiver units will be able to communicate with the transmitter units. Once these
files have been created, they need to be provided to the remote user.
5
The remote user must then import the VPN configuration (
Strongswan.zip
) from a USB
mass storage device from the OSD and apply to the receiver device. For more
information, see “VPN configuration”, page 20.
6
Connect to the VPN from the OSD. When you are in VPN mode, the interface is similar
to when you are connected in networked mode, except for the additional
VPN
tab.
Note
:
You will not be able to log in unless you connect to the VPN successfully.
7
Update your firmware using the
UpdaterOverNetwork.exe
tool
–
see “Updating your
Extio 3 firmware”, page 47.
Note
: All of your units need to be running version 3.01.50 or
3.03 or higher of the firmware.
8
Install your Extio Central Manager software
–
see “Installing Matrox Extio Central
Manager software”, page 75.
9
Configure your Extio devices through the Extio Central Manager software.
Note
: You
must discover the receivers manually (
Manual device discovery
), then discover the
transmitters using
Transmitter discovery
from the receiver settings. For more
information on using the Extio Central Manager software, see the Matrox Extio Central
Manager User Guide.
10
Log into your receiver and switch to different transmitters (OSD)
–
see “Using the OSD
(On-Screen Display)”, page 76.
Link redundancy
Link redundancy is a vital safety feature in Point-to-Point and Networked-LAN modes of operation
that Extio 3 supports. For more information on connecting a redundant network, see “Setting up link
redundancy”, page 41.
Changing the OSD keyboard settings
You can change the keyboard settings in the OSD user interface.