DRIVE AXLE
Article Text (p. 3)
1983 Mazda RX7
For www.iluvmyrx7.com
Copyright © 1998 Mitchell Repair Information Company, LLC
Sunday, August 26, 2001 06:34PM
system.
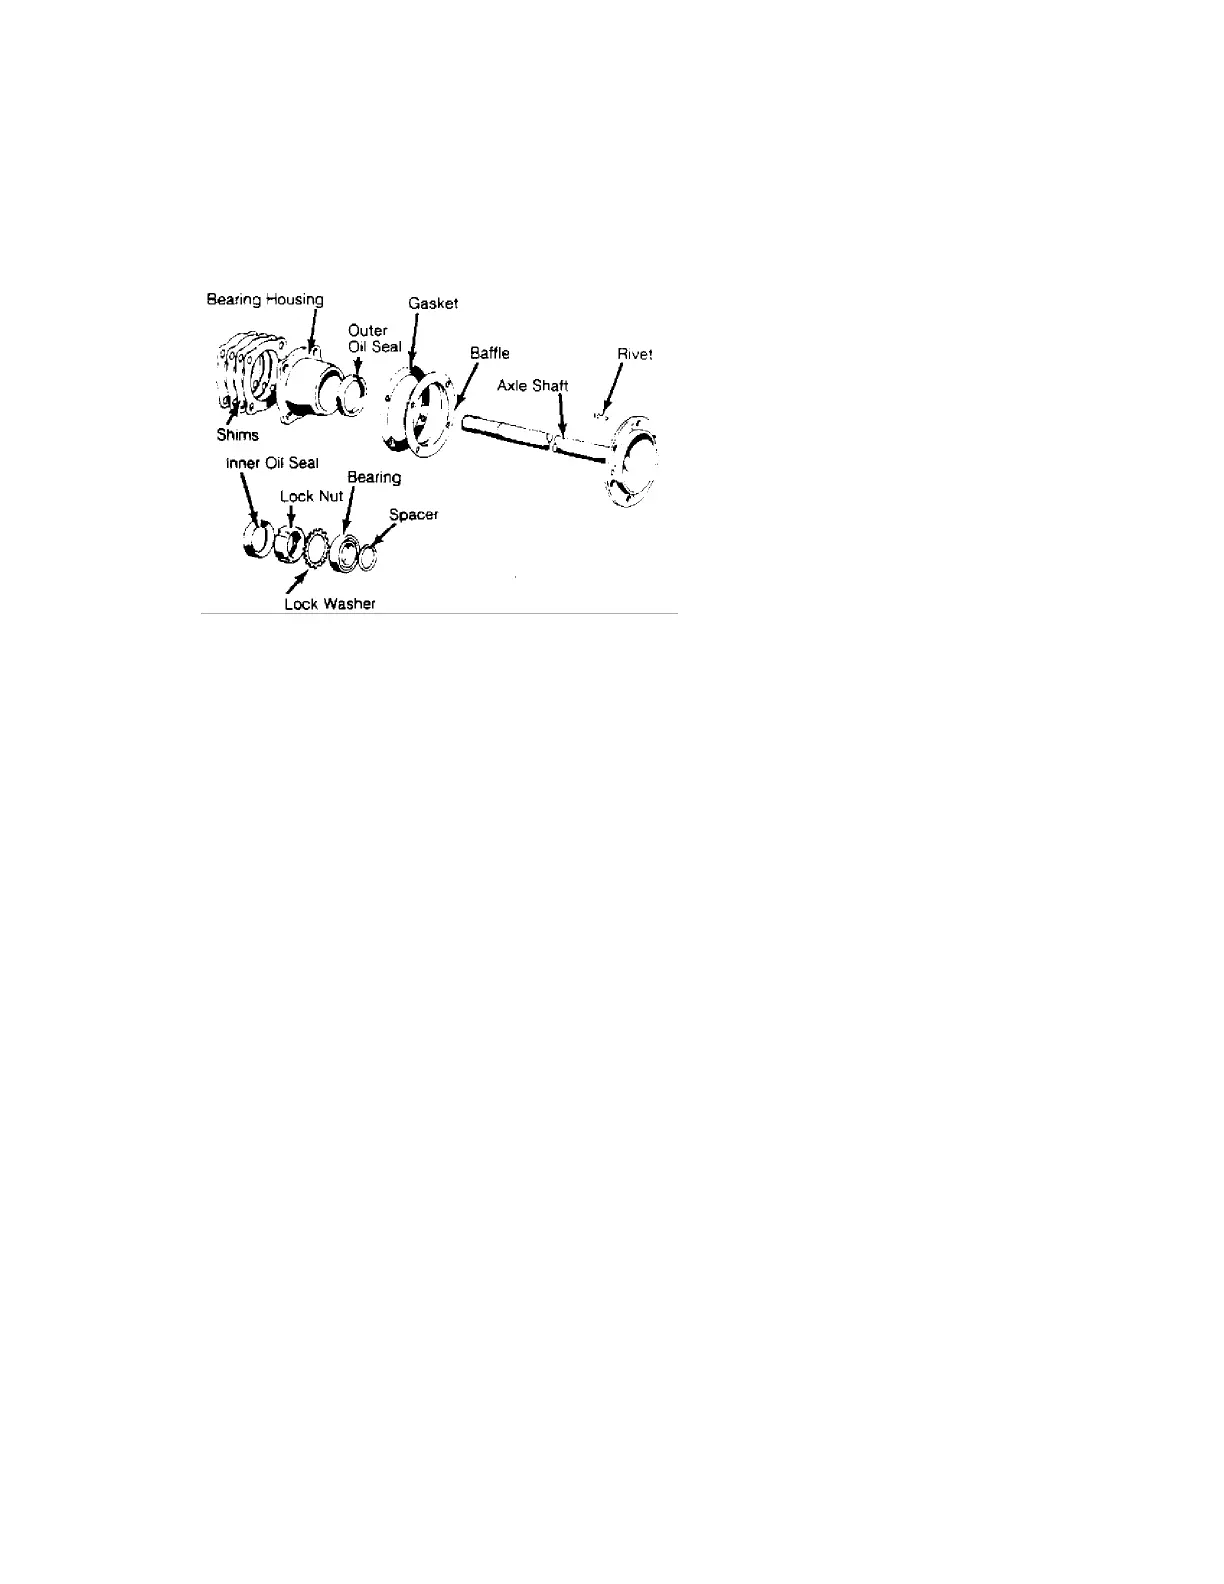
Fig. 3: Exploded View of Axle Shaft Assembly for Pickups
If both drive axles were removed, the end play of each shaft must be
measured separately.
DIFFERENTIAL CARRIER
Removal
1) Raise and support vehicle with jack stands. Remove drain
plug and drain rear axle lubricant. Remove drive axles.
2) Mark drive shaft and pinion flange for reassembly
reference. Disconnect drive shaft. Remove carrier attaching nuts
and withdraw carrier from axle housing.
Installation
To install, reverse removal procedure. Make sure to refill
axle with lubricant.
OVERHAUL
DISASSEMBLY
1) Mount carrier in a repair stand. Punch identification
marks on side bearing supports of carrier, differential bearing caps
and side bearing adjusters. Remove adjuster lock plates, loosen
bearing cap attaching nuts or bolts, and slightly back off adjusters
to relieve preload.
2) Remove bearing caps and adjusters, then withdraw
differential assembly from carrier, making sure side bearing races
remain with their respective bearings.
3) Using puller, (49 0839 425C) remove side bearings from
gear case. Straighten lock tabs, remove ring gear attaching bolts,
and separate ring gear from gear case.
4) On limited slip differentials, gradually loosen attaching
screws until distance between left and right half of differential
case is about 0.12" (3 mm). Then carefully separate differential
halves. Remove following parts: Thrust washer, conical spring,