DRIVE AXLE
Article Text (p. 7)
1983 Mazda RX7
For www.iluvmyrx7.com
Copyright © 1998 Mitchell Repair Information Company, LLC
Sunday, August 26, 2001 06:34PM
41 ....................................................... .134 (3.41)
44 ....................................................... .135 (3.44)
47 ....................................................... .137 (3.47)
ÄÄÄÄÄÄÄÄÄÄÄÄÄÄÄÄÄÄÄÄÄÄÄÄÄÄÄÄÄÄÄÄÄÄÄÄÄÄÄÄÄÄÄÄÄÄÄÄÄÄÄÄÄÄÄÄÄÄÄÄÄÄÄÄÄÄÄÄÄÄ
Pinion Bearing Preload
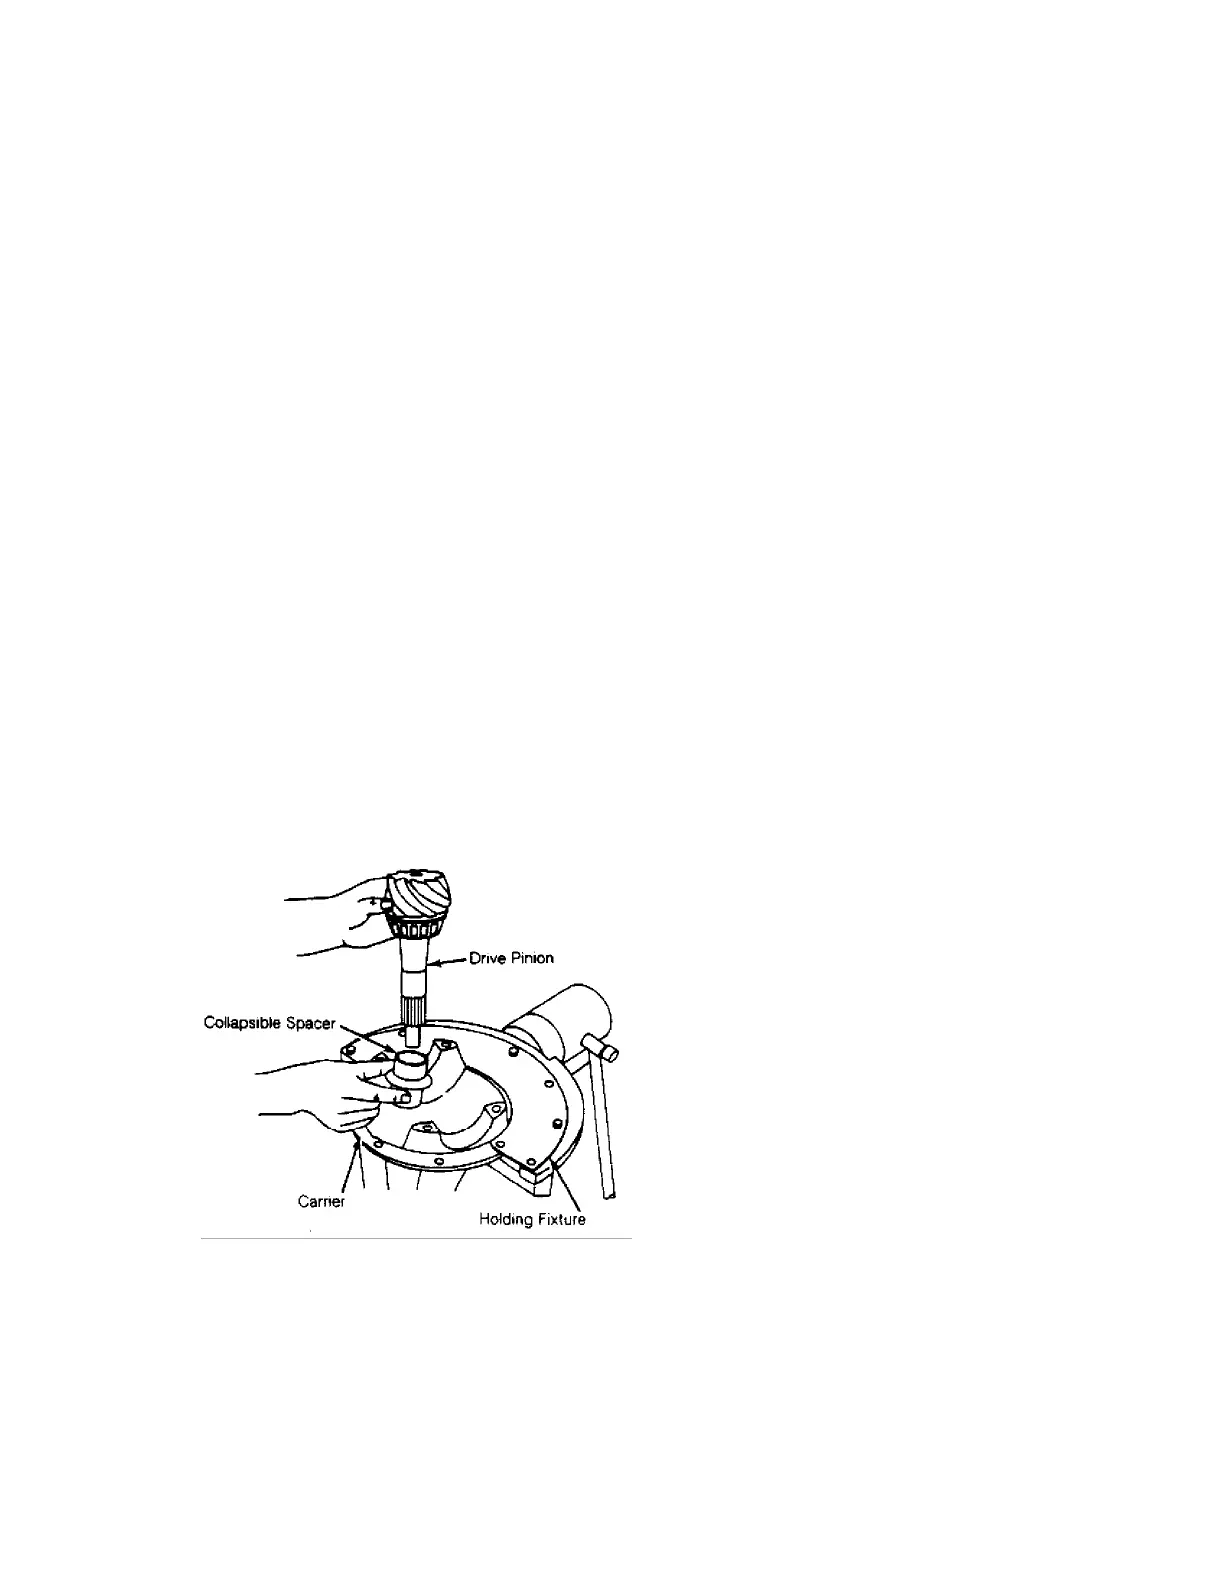
1) Install collapsible spacer onto drive pinion assembly and
install in carrier. Place front bearing in position on pinion. Hold
pinion fully forward and drive pinion bearing over pinion until
seated.
2) Apply grease to pinion oil seal lip and install seal into
carrier. Install flange on pinion by tapping with soft hammer.
Install pinion washer and nut.
3) Before tightening nut (when pinion preload is zero),
check oil seal drag using a torque wrench. Tighten pinion nut to
initial torque specifications as shown in chart.
INITIAL PINION NUT TORQUE
ÄÄÄÄÄÄÄÄÄÄÄÄÄÄÄÄÄÄÄÄÄÄÄÄÄÄÄÄÄÄÄÄÄÄÄÄÄÄÄÄÄÄÄÄÄÄÄÄÄÄÄÄÄÄÄÄÄÄÄÄÄÄÄÄÄÄÄÄÄÄ
Application Ft. Lbs. (N.m)
GLC Wagon ........................................... 87-130 (118-176)
Pickups ............................................ 145-253 (197-343)
All Others .......................................... 94-130 (127-176)
ÄÄÄÄÄÄÄÄÄÄÄÄÄÄÄÄÄÄÄÄÄÄÄÄÄÄÄÄÄÄÄÄÄÄÄÄÄÄÄÄÄÄÄÄÄÄÄÄÄÄÄÄÄÄÄÄÄÄÄÄÄÄÄÄÄÄÄÄÄÄ
Fig. 6: Installing Drive Pinion Bearing Collapsible Spacer
If preload specifications are exceeded, collapsible spacer must be
replaced.
4) With nut tightened to initial torque value, check preload
using a torque wrench mounted on pinion nut. If preload is not as
specified in specification table, continue tightening nut and
checking preload until specified preload is obtained.
CAUTION: Preload builds quickly. Nuts should be tightened a little at
a time and preload checked after each slight amount of


 To Next Page