FOCKE MELER GLUING SOLUTIONS
4-2
MELTER OPERATION
Loading the adhesive
To fill the tank:
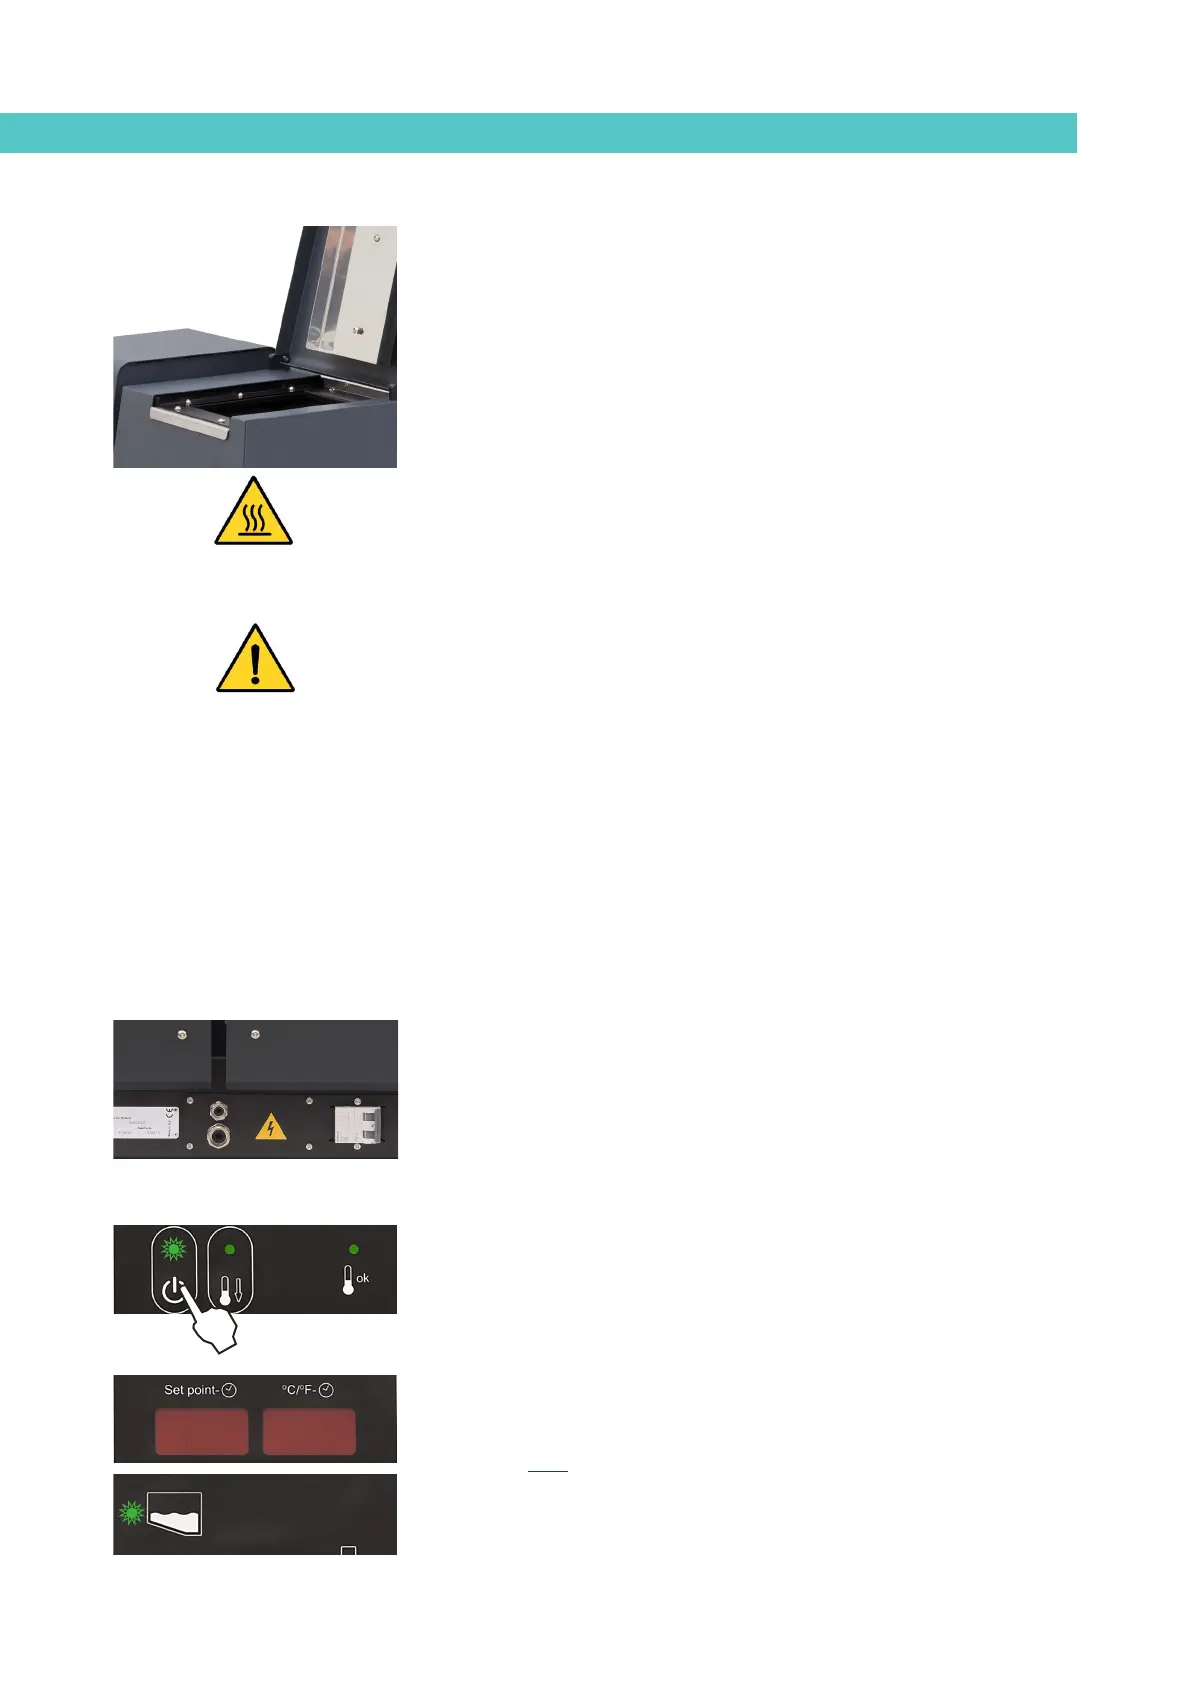
1. Open the tank lid.
2. Use a shovel or a ladle to fill the tank with adhesive. Do not fill the tank
above the loading opening level. The lid must be able to close normally.
Warning: Risk of burns. Always wear protective gloves and safety glasses
when refilling.
3. Close the lid when you have finished refilling the tank.
Warning: Before refilling the tank, make sure that the adhesive is the same
type as that already in the tank. Mixing different types of adhesives can cause
damage to the melter/applicator equipment.
‘B4 VARIABLE SPEED’ melter has a tank capacity of 4 liters (4 kg for an
adhesive density of 1 g/cc).
Starting up the melter
Before starting up the equipment, check that the unit is correctly installed and
that all the input/output and accessory connections have been established.
Also check that the equipment has been filled with the adhesive to be used
and that the working parameters have been programmed.
To start:
1. Connect the melter’s power switch.
If the control board was turned off the last time the equipment was
disconnected, this will remain off on restarting (time display).
If the control board was on the last time the equipment was disconnected, it
will turn on again when restarted.
2. If it is not already activated, turn on the control board by pressing the
ON/OFF button.
By default, the tank set point value and temperature are displayed.
The tank heating control LED (green) will light up and the tank will begin to
heat. The LEDs for the hoses and applicators connected will also come on.
Once the tank has reached 3°C below the temperature set point value, a
programmable delay timer is activated until a signal is given to start the pump
(activation of the solenoid valve or turning of the motor) and connect to the
main machine, provided that the other components have also reached 3°C
below their set point temperature.
57 57 07 07