SECTION III
SCHEDULED MAINTENANCE
© Midmark Corporation 2002 SF-1803 Page 3-1 Printed in U.S.A.
3.1 Scheduled Maintenance
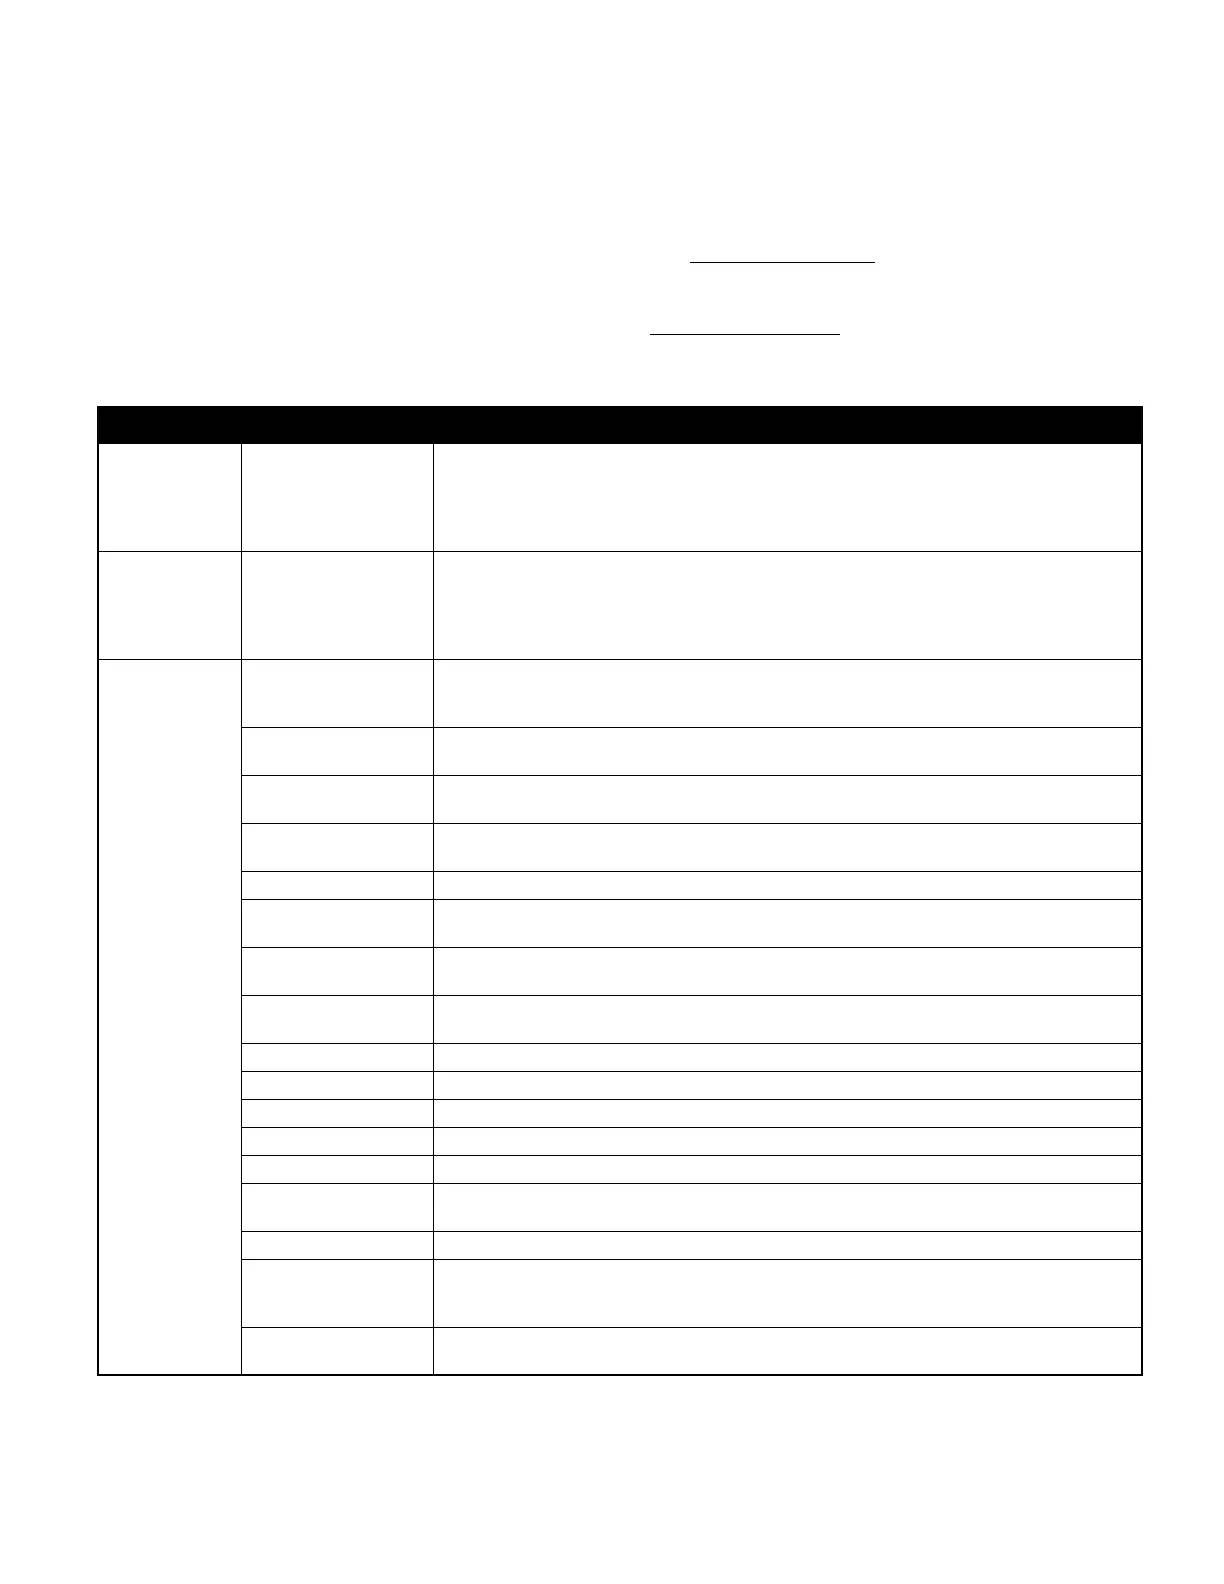
Table 3-1 is a Scheduled Maintenance Chart which lists
the inspections and services that should be performed
periodically on the Model M9 or M11 Sterilizers. These
inspections and services should be performed as often
as indicated in the chart.
Also, periodically the display on the Sterilizer will inform
the operator that either a Weekly or Monthly Mainte-
nance is required.
The Weekly Maintenance
display occurs when the Ster-
ilizer software senses that 7, 14, and 21 days have
passed.
Monthly Maintenance
is displayed when 28 days have
passed.
Interval Inspection or Service What to Do
Weekly
(Maintenance
should be per-
formed by Opera-
tor).
Clean Chamber and
Trays.
Drain water from the Sterilizer using drain tube in front of unit. Allow unit to cool to prevent burns.
Wash inside of chamber and trays with a solution of mild soap or Speed-Clean® and distilled
water. Remove any debris in or around the mesh filters in the chamber and rinse the filter.
Wipe off the door gasket and mating surfaces using a damp cloth and inspect gasket for damage.
Replace gasket if necessary. Refer to Installation / Operation Manual.
Monthly
(Maintenance
should be per-
formed by Opera-
tor).
Clean and flush the
chamber and related
plumbing. Wipe off trays.
Using Speedclean®, clean the chamber and related plumbing. Refer to the Installation / Operation
Manual, Operator Maintenance for Monthly cleaning procedures.
Semi-annually Obvious damage Visually check condition of sterilizer for obvious damage such as: cracks in components, missing
components, dents in components, or any other visible damage which would cause sterilizer to be
unsafe to operate or would compromise its performance. Repair sterilizer as necessary.
Fasteners / hardware Check for missing or loose fasteners / hardware. Replace any missing hardware and tighten any
loose hardware as necessary.
Warning and instructional
decals
Check for missing or illegible decals. Replace decals as necessary.
Pivot points / moving
parts.
Lubricate all exposed pivot points, and moving parts with high temperature, non-toxic, silicone
based lubricant.
Display Overlay Check for missing, damaged, or illegible display overlay. Replace display overlay if necessary.
Wiring Connections Check condition of all wiring connections. Clean, tighten or replace any dirty, loose, or damaged
connections.
Free movement of door
latch.
Clean door latch with solvent. Lubricate door latch and door pins with high temperature, non-toxic,
silicone grease.
Door interlock switch
operation.
Check to assure door switch operates correctly. Run Service Diagnostics.
Door gasket Check gasket for deterioration. Clean and, if necessary, replace gasket (Refer to para 4.8).
Chamber mesh filter. Inspect, clean or replace filters if necessary (Refer to para 4.7).
Water Level Sensor Clean or replace water level sensor (Refer to para 4.21).
Tubing Inspect all tubing for cleanliness. Clean or replace if required.
Reservoir Inspect reservoir for cleanliness and clean or replace if required (Refer to para 4.22).
Pressure Relief Valve Perform a pressure relief valve check (Refer to para 4.16). Replace pressure relief valve if required
(Refer to para 4.17)
Printer (optional) Check printer operation. Replace ribbon cartridge if required.
Operational Test Run a Normal Operation to determine if the sterilizer is operating within its specifications (Refer to
para 2.1). If it is determined there is a problem run Service Diagnostic (Refer to para. 2.2) and
review the Troubleshooting Guide (Refer to para 2.3) before replacing any components.
Service Diagnostics Test Run the Service Diagnostics (Refer to para. 2.2) to check the Main P.C. Board and various compo-
nents.
SECTION III
SCHEDULED MAINTENANCE
Return To Table of Contents