SECTION IV
MAINTENANCE / SERVICE
© Midmark Corporation 2002 SF-1803 Page 4-8 Printed in U.S.A.
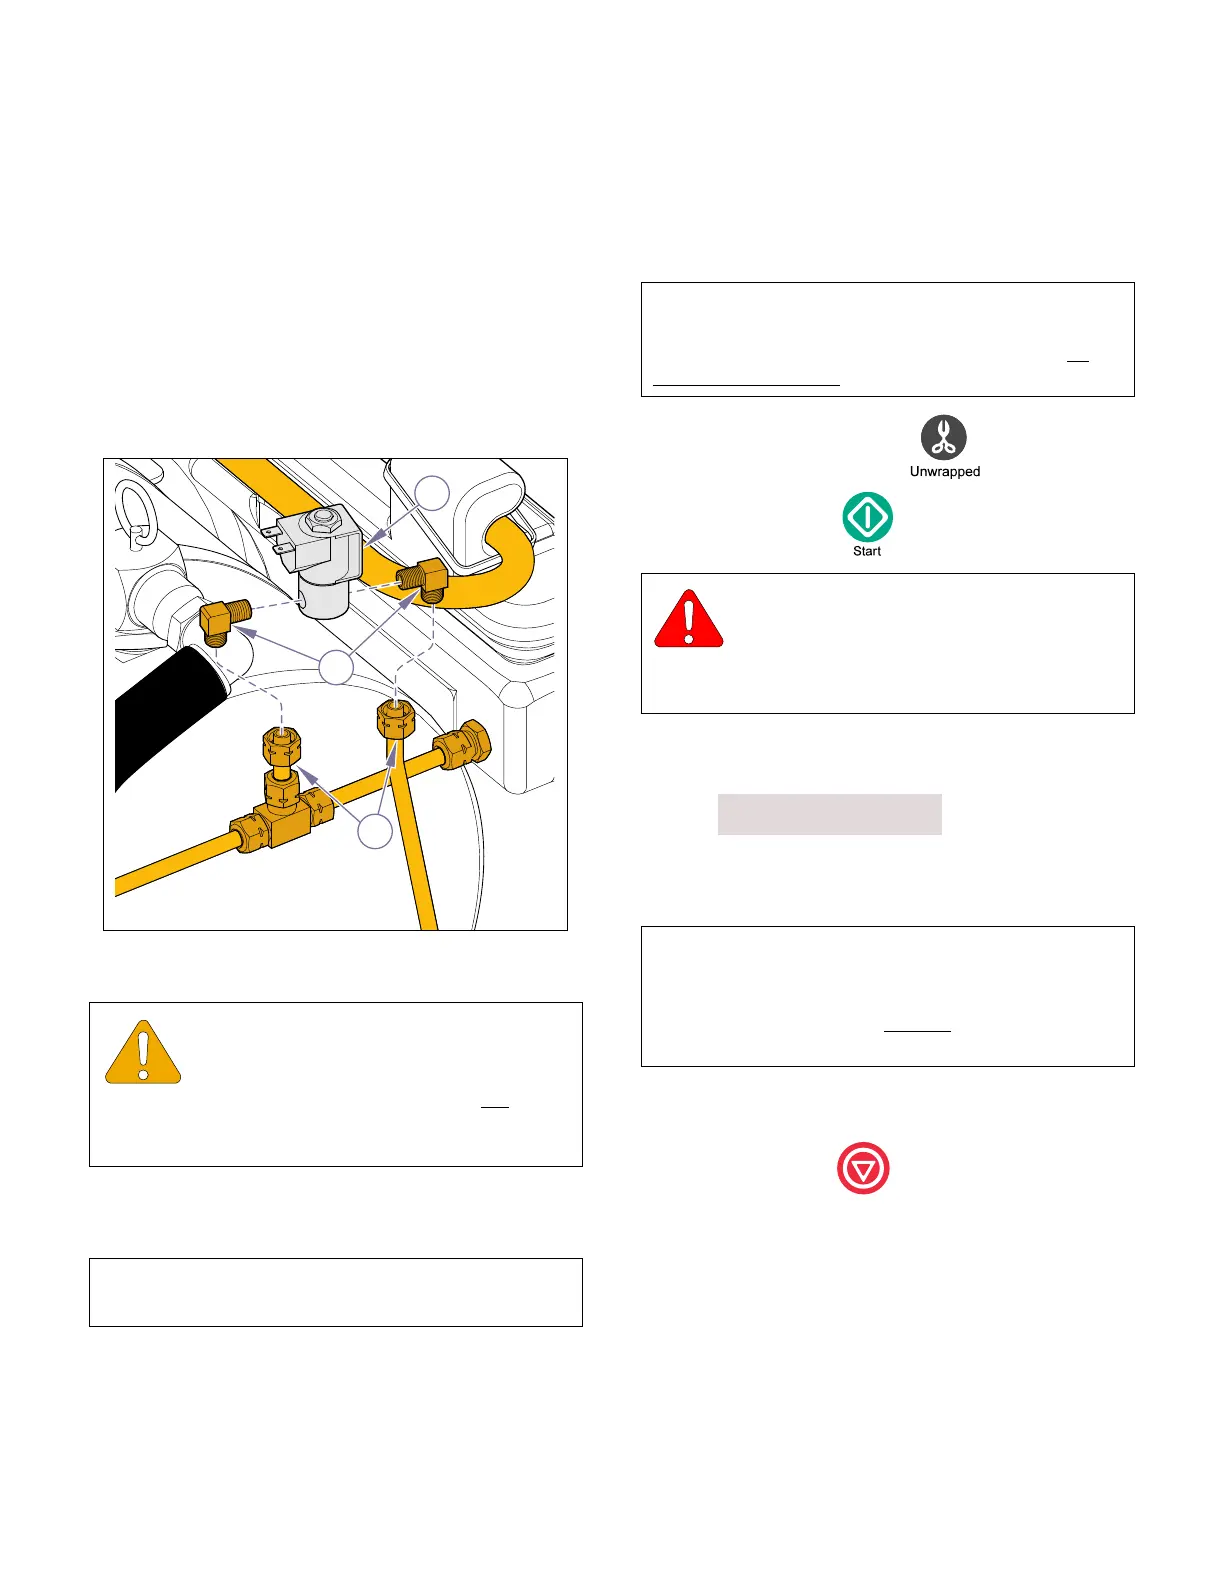
4.15 Air Solenoid Valve
A. Removal
(1) Unplug power cord from outlet receptacle.
(2) Remove R.H. side and Back panels (Refer to
para 4.2).
(3) Disconnect two wires from terminals of air sole-
noid valve (1, Figure 4-15) .
(4) Loosen two compression nuts (2) and remove
air solenoid valve (1) from unit.
(5) Remove two male fittings (3) from air solenoid
valve (1).
B. Installation
(1) Coat threads of male fittings (3, Figure 4-15)
with high temperature hydraulic sealant (Loctite
565). and install the fittings onto the valve (2)
(2) Install air solenoid valve (1) securing with two
compression nuts (2).
(3) Connect two wires to the valve terminals.
(4) Plug unit in, run a cycle to place pressure on
lines and fittings, then check for leaks.
(5) Run Service Diagnostics to check operation of
Air Solenoid Valve (refer to Service Diagnostics
[Air Valve Test], Para 2.2).
(6) Install panels (Refer to para 4.2).
4.16 Pressure Relief Valve Test
(1) Press UNWRAPPED
(2) Press START
(3) Wait until pressure in chamber reaches at least
25 PSI during the Heating cycle.
Display:
(4) Pull upward on the pressure relief valve handle
(A, Figure 4-16) for a brief period. Steam
should discharge freely from beneath the unit.
(5) Release handle (B). Valve should close, stop-
ping release of steam.
(6) Press STOP to abort cycle, preventing
unit from over-heating.
EQUIPMENT ALERT
Use a pipe thread compound on the steril-
izer fittings capable of withstanding the
operating pressures and temperatures. Do not
use a
teflon tape as particles may migrate through system
and cause blockage.
NOTE
The “In” port of the valve faces toward the reservoir.
1
2
3
MA617300i
Figure 4-15. Air Solenoid Valve
NOTE
Pressure relief valve operation must be checked
whenever servicing the unit or by the end user at
least once per month.
WARNING
During the pressure relief check steam is
vented from under the sterilizer. To
avoid being burnt, place a rolled up towel around
the bottom of the sterilizer.
NOTE
If the pressure relief valve does not completely close
when lever is released, pull upward again and
release it quickly so valve “snaps”
back into position.
Do this until valve seats properly.
HEATING - UNWRAPPED
268°F 25.5 PSI
Rev. 10/22/03
Return To Table of Contents