SECTION IV
MAINTENANCE / SERVICE
© Midmark Corporation 2002 SF-1803 Page 4-4 Printed in U.S.A.
4.7 Chamber Mesh Filters
A. Removal
(1) Open sterilizer door.
(2) Remove tray rack and trays (Refer to para 4.5).
(3) Using care not to damage filter, grasp filter (1,
Figure 4-7) and gently pull outwards while twist-
ing slightly (a pair of pliers or screwdriver may
be used if filter is stuck).
(4) The filter may be cleaned with mild soap and
distilled or demineralized water. A small stiff
bristled brush or ultrasonic cleaner may be
helpful to remove foreign objects from the filter
surface. Rinse the filter with distilled or dem-
ineralized water.
B. Installation
(1) Install the filter (1, Figure 4-7) by inserting the
filter into the hole (A) in the chamber bottom
and pressing downwards while twisting slightly.
(2) Install tray rack and trays (Refer to para 4.5).
(3) Close sterilizer door.
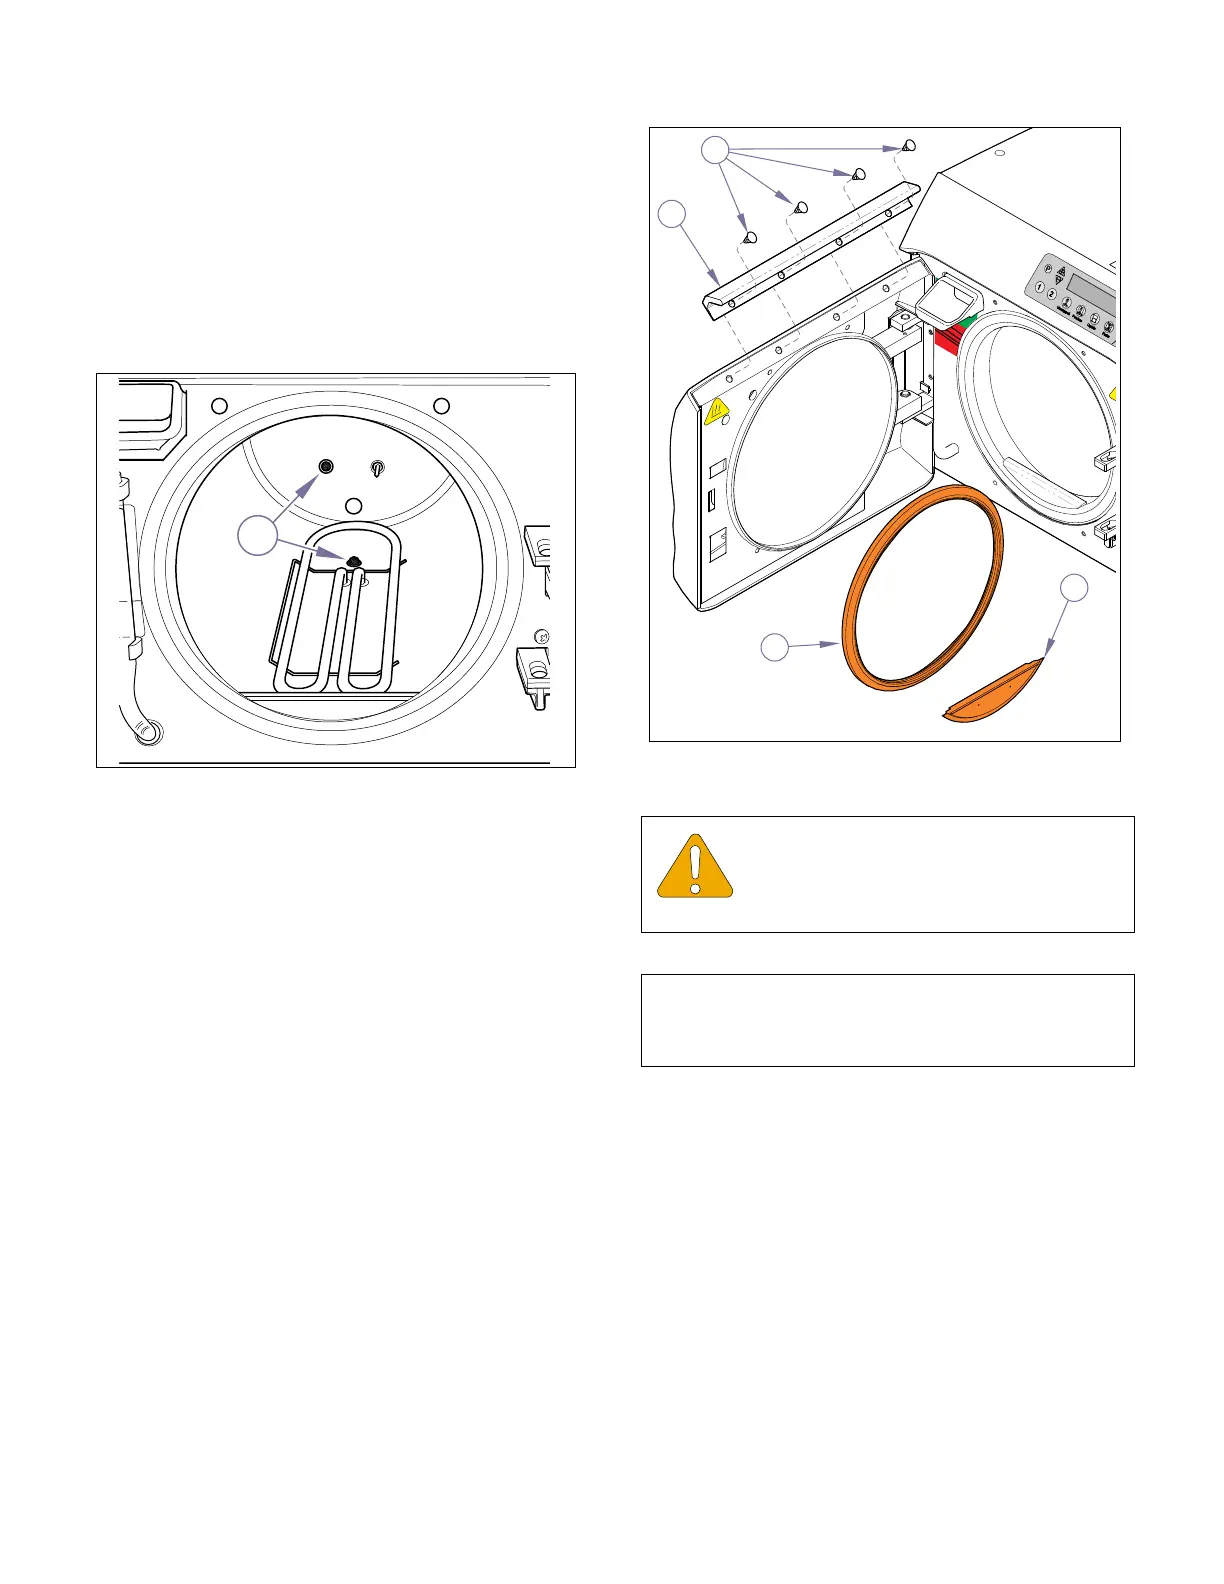
4.8 Door, Dam Gaskets, & Steam Block
A. Removal
(1) Open sterilizer door.
(2) Remove dam gasket (1, Fig. 4-8) and door gas-
ket (2).
(3) Remove the steam block gasket (3) by carefully
extracting the snap clips (4).
B. Installation
(1) Clean the new gaskets.
(2) Install door gasket (2, Figure 4-8) and dam gas-
ket (1).
(3) Install the steam block (3) securing with snap
clips (4).
(4) Operate sterilizer and check for leaks.
4.9 Axial Flow Fan
A. Removal
(1) Unplug power cord.
(2) Remove right side panel (Refer to para 4.2).
(3) Disconnect two wires (1, Figure 4-9) from termi-
nals of axial flow fan (2).
(4) Remove axial flow fan (2) (four screws).
MA615800i
1
Figure 4-7.
EQUIPMENT ALERT
Clean the new door gasket with a mild
solution of soap and water, then rinse with
distilled water before installing.
NOTE
If not installed, first install the reinforcement wire in
the gasket and then insert gasket in door.
MA615701i
1
2
3
4
Figure 4-8. Door Gasket
Rev. 10/22/03
Return To Table of Contents