OM-278174 Page 32
F
Complete Parts List is available at www.MillerWelds.com
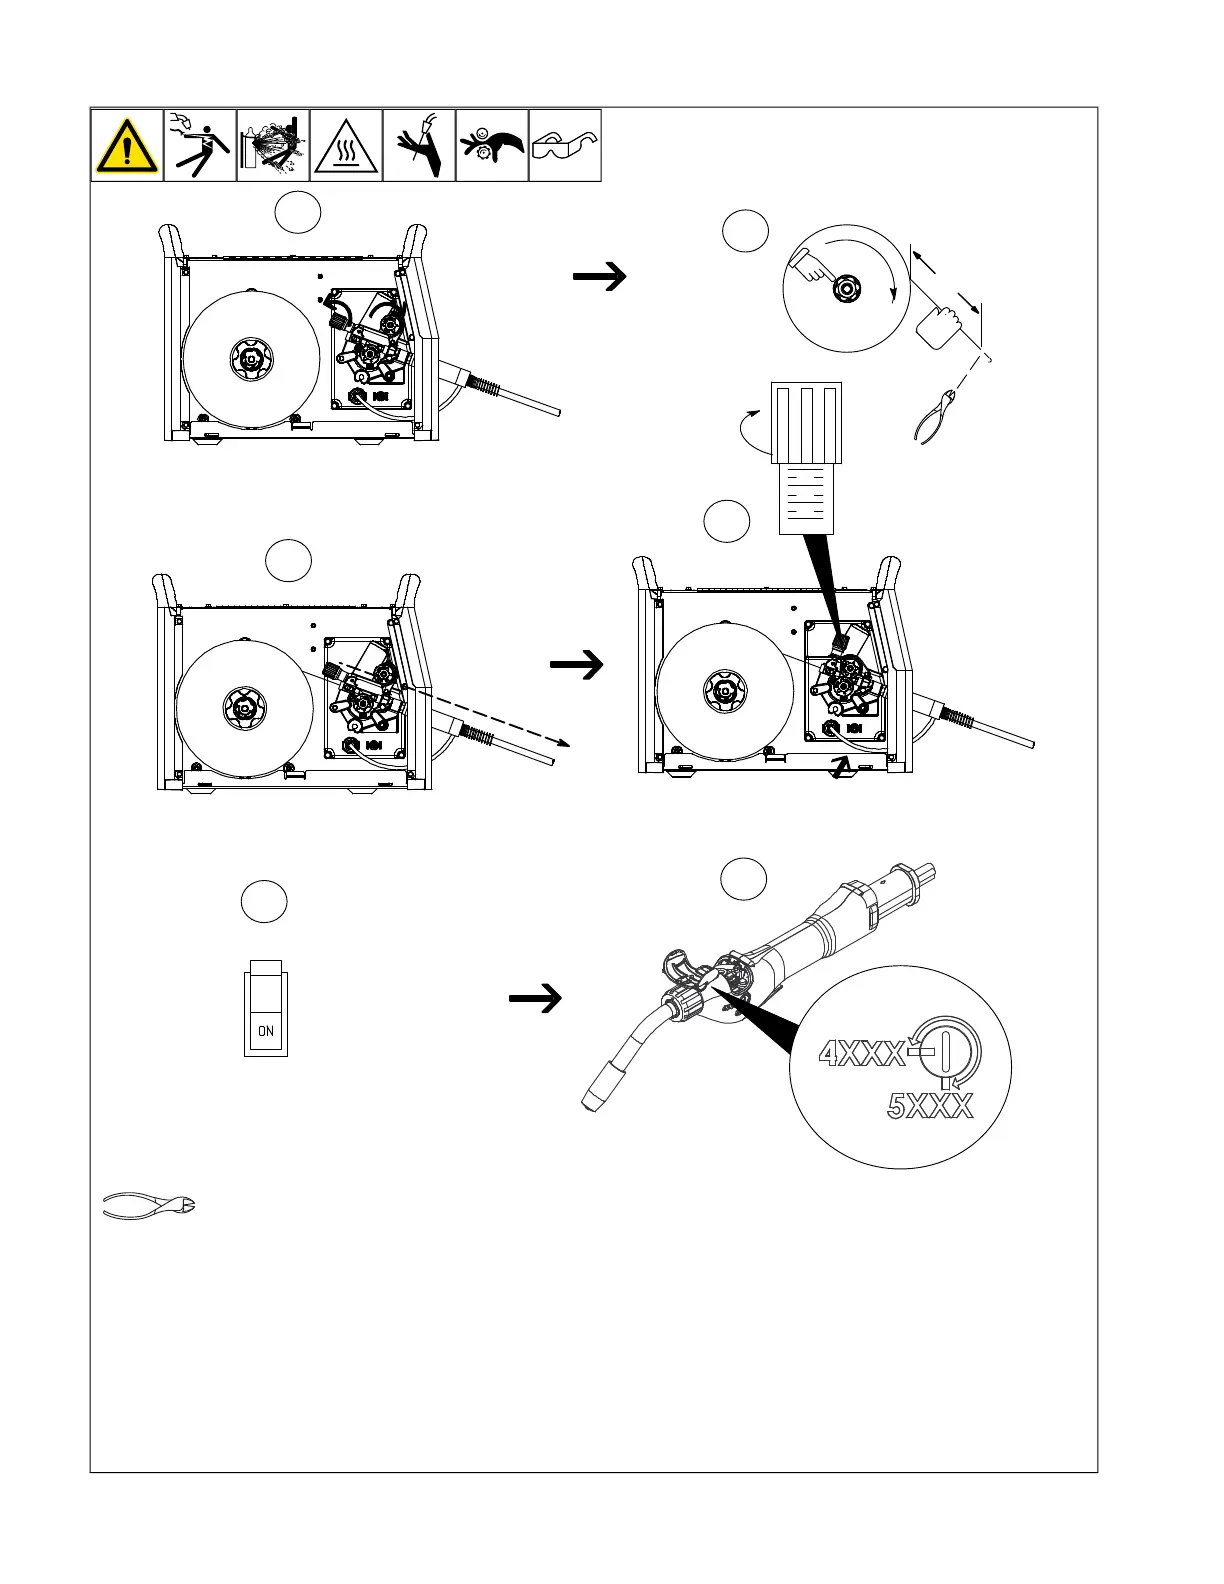
5-18. Threading Welding Wire For XR-Aluma-Pro Or XR-Aluma-Pro Lite
OM-222 Page 1
allen_wrench
NGO’s
tools/
flathead philips head wrench
pliers
knife
heavy-duty workclamp light-duty workclamp wirecutter frontcutter
allen_set
needlenose
steelbrush nutdriver
chippinghammer
solderiron
s
tripcrimp
drill
torque wrench
socket wrench
hammer awl file
crimper
paintbrush
feelergauge flashlight ruler
toothbrush
greasegun
qtip (swab)
vicegrip
handream
punch
filterwrench
strapwrench
airgun
solvent pinextractor eprompuller pipewrench
torque screwdriver
crescent wrench
Step 1. Open pressure assembly.
Step 2. Pull and hold wire; cut off end.
F
Hold wire tightly to keep it from
unraveling.
Step 3. Push wire through guides into gun;
continue to hold wire.
Step 4. Close and tighten pressure assem-
bly, and let go of wire.
F
Use pressure indicator scale to set a
desired drive roll pressure. Begin with
a setting of 2. If necessary, make addi-
tional adjustments after trying this ini-
tial setting.
Step 5. Turn on power switch.
Step 6. Open top cover and open pressure
roll assembly.
Remove nozzle and contact tip.
Press gun trigger until about 4 in. (102 mm)
of wire is sticking out front of gun. Install
nozzle and contact tip.
Close top cover on gun. Press trigger switch
until about 6 in. (152 mm) of wire is sticking
out end of contact tip. Cut off wire.
F
XR-Aluma-Pro and XR-Aluma-Pro Lite
gun drive roll pressure should be set to
match the alloy being used.