OM-278174 Page 34
F
Complete Parts List is available at www.MillerWelds.com
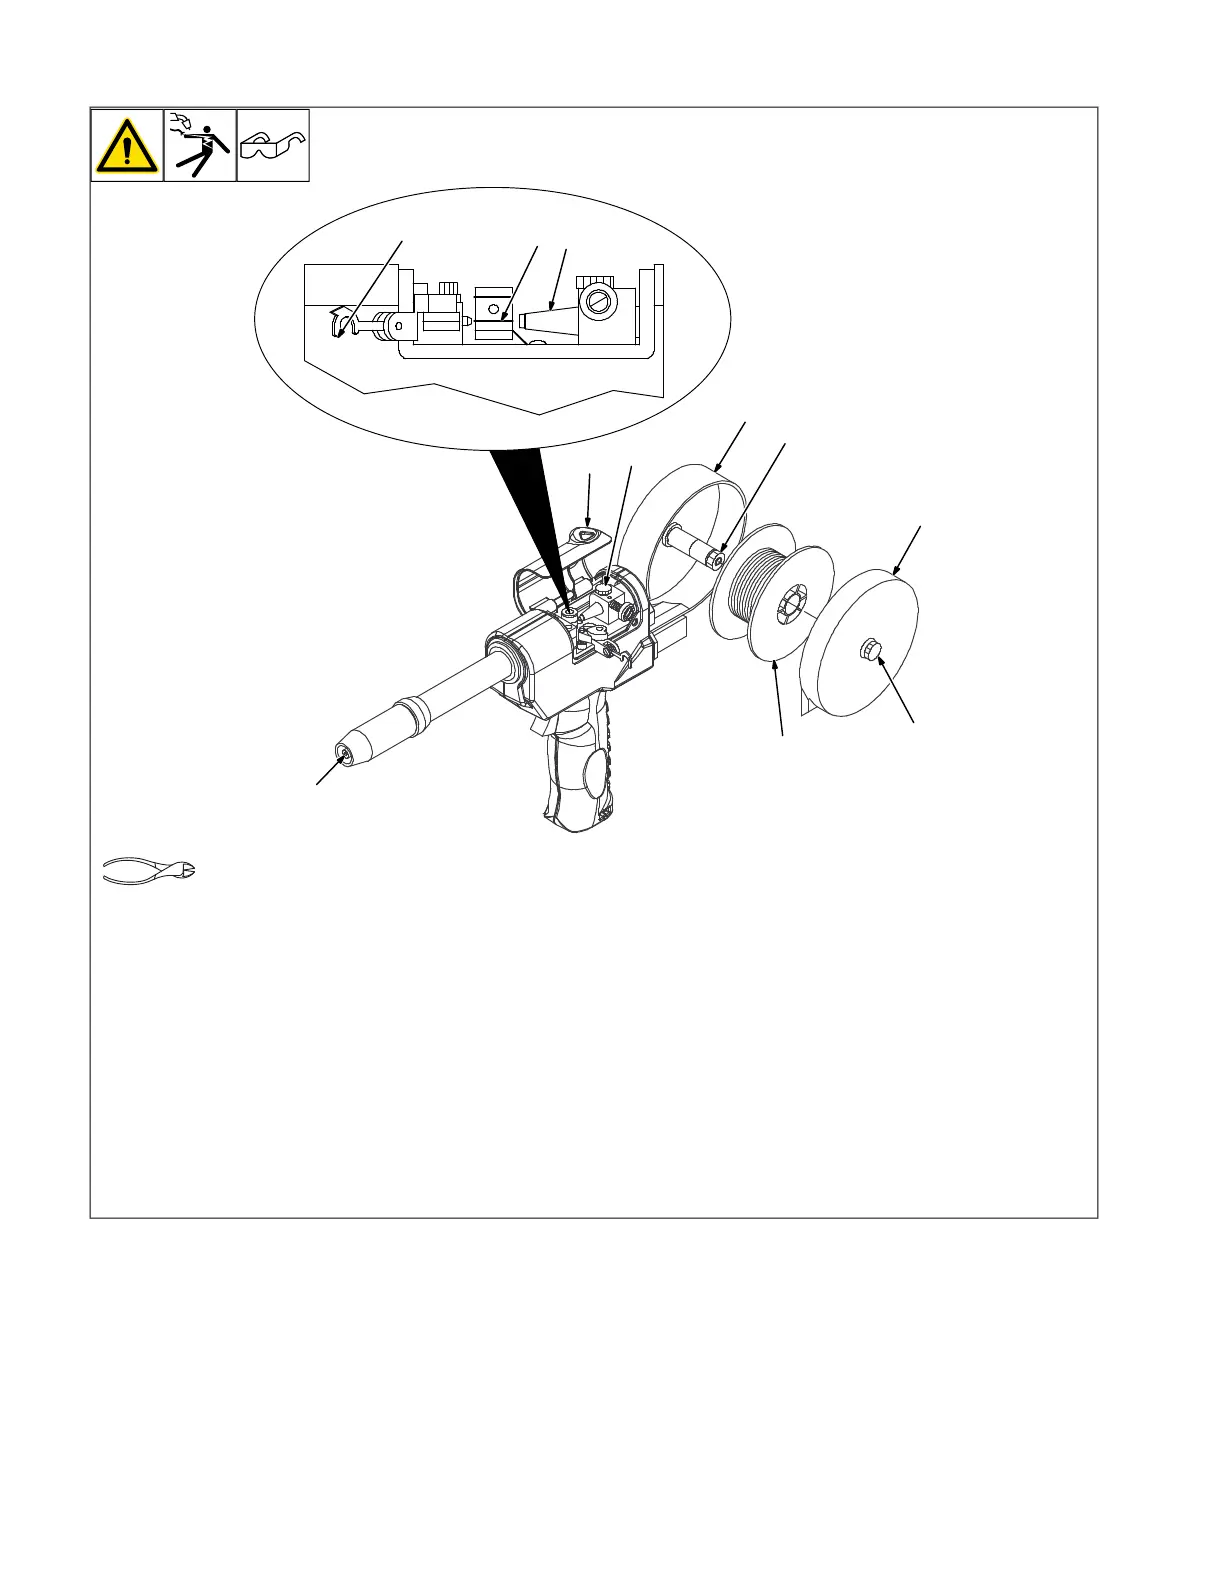
5-20. Threading Welding Wire For Spoolmatic 15/30A
OM-222 Page 1
allen_wrench
NGO’s
tools/
flathead philips head wrench
pliers
knife
heavy-duty workclamp light-duty workclamp wirecutter frontcutter
allen_set
needlenose
steelbrush nutdriver
chippinghammer
solderiron
s
tripcrimp
drill
torque wrench
socket wrench
hammer awl file
crimper
paintbrush
feelergauge flashlight ruler
toothbrush
greasegun
qtip (swab)
vicegrip
handream
punch
filterwrench
strapwrench
airgun
solvent pinextractor eprompuller pipewrench
torque screwdriver
crescent wrench
1 Cover
2 Canister
3 Canister Cover
4 Thumbscrew (Canister Cover)
Loosen thumbscrew, and remove cover.
5 Wire Spool
Loosen wire from spool, cut off bent wire,
and pull 6 in (150 mm) of wire off spool.
6 Pressure Roll Assembly
Lift arm and open pressure roll assembly.
7 Canister Inlet Guide
8 Drive Roll Groove
For wire sizes .035 in. (0.9 mm) and
smaller use small groove, and .047 in.
(1.2 mm) and 1/16 in (1.6 mm) use large
groove.
9 Contact Tip
Thread wire through canister inlet guide,
along drive roll groove, and out contact tip.
Install spool so wire feeds off bottom.
10 Spool Brake Thumbnut
If necessary, turn thumbnut counterclock-
wise slightly to install spool.
11 Thumbscrew (Canister Rotation)
Loosen thumbscrew to rotate canister.
Close and secure pressure roll assembly
Reinstall top cover and canister cover.