OM-278174 Page 35
F
Complete Parts List is available at www.MillerWelds.com
5-21. Calibrating Spoolgun
F
Spoolmatic 15/30A and Spoolmate
200 motors are unique to this welding
power source. Motor calibration is nec-
essary any time a different Spoolmatic
15/30A or Spoolmate 200 is connected
to the Multimatic 255.
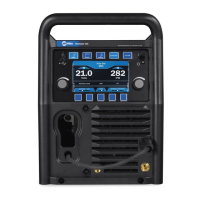
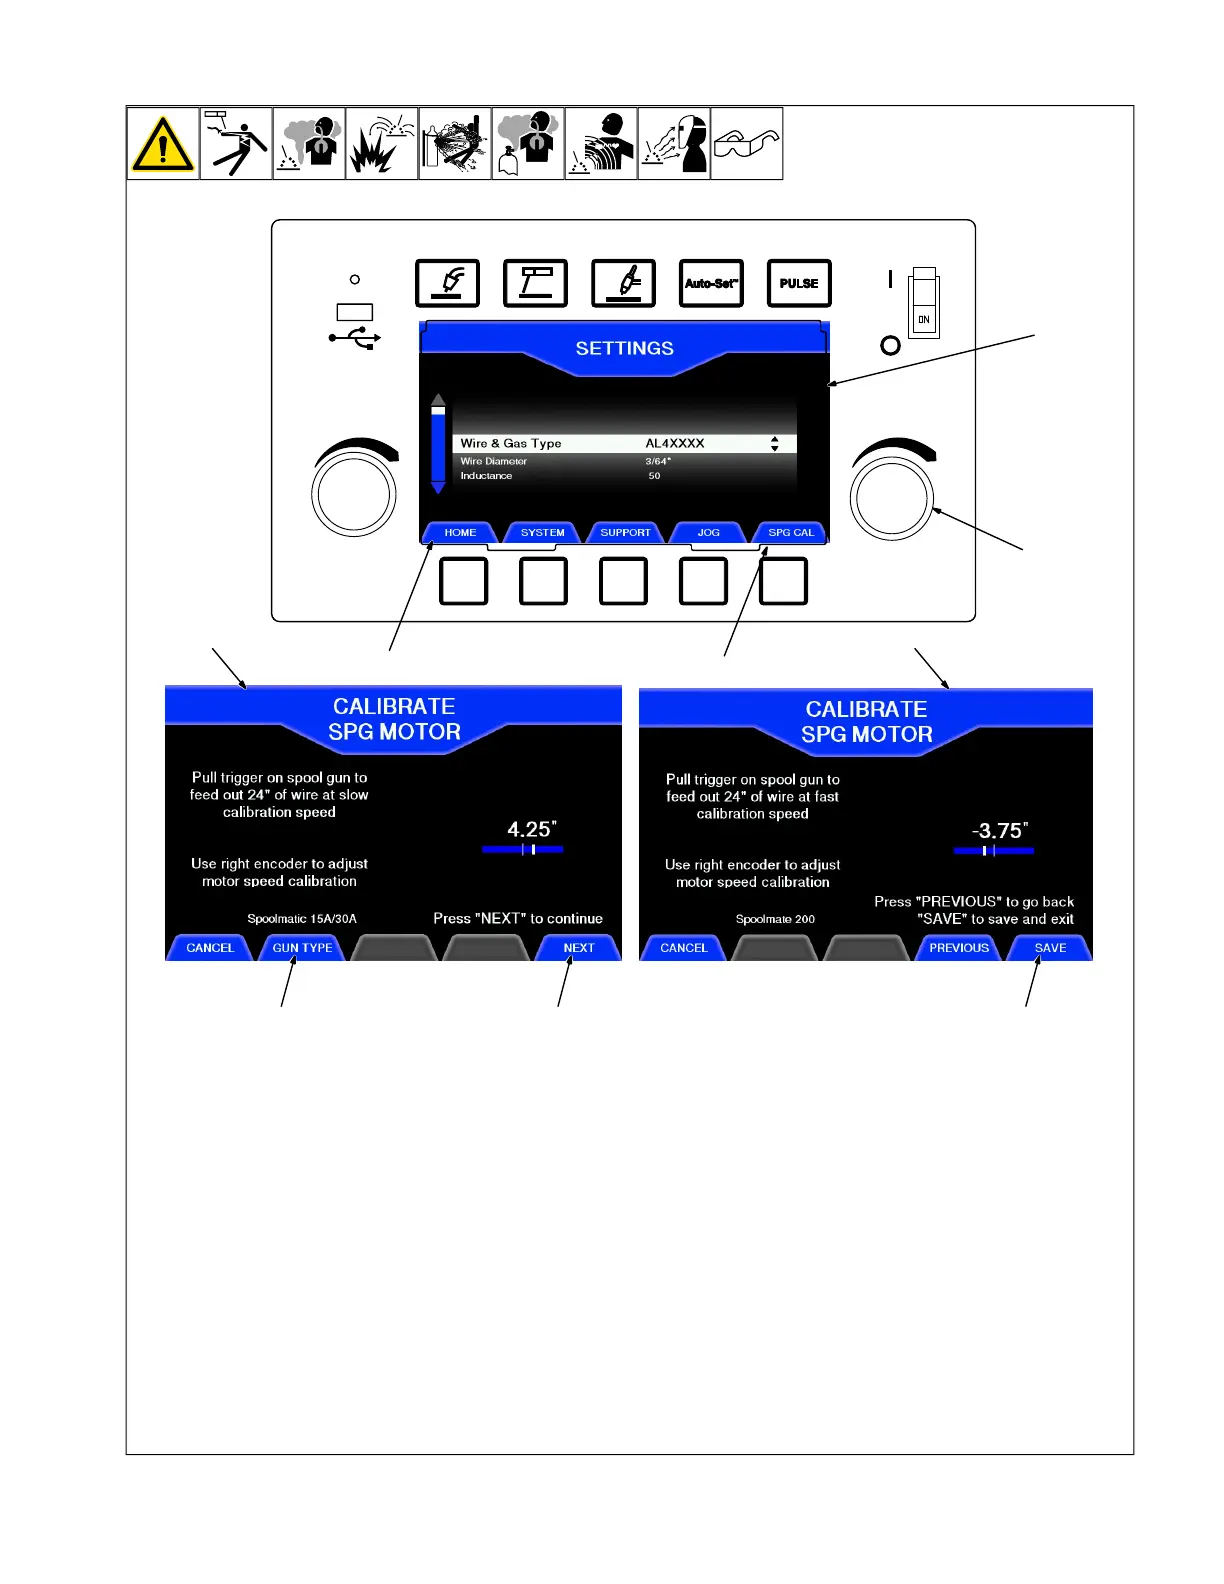
1 Settings Menu
2 Slow Speed Calibration Menu
3 Fast Speed Calibration Menu
4 Home
5 Spg Cal (Spoolgun Cal)
6 Right Knob
7 Gun Type
8 Next
9 Save
Connect spoolgun to unit. Cut wire flush at
nozzle
Follow instructions in Section 6-5 to enter
the setup menu.
F
SPG CAL will only be displayed as the
fifth tab when a spoolgun is
connected.
Press SPG CAL to access slow speed cali-
bration menu.
Press Gun Type to select the spoolgun
being used.
To begin the slow speed calibration, pull the
spoolgun trigger. The wire will feed and au-
tomatically stop.
Cut wire flush at nozzle and measure run-
out. If wire length is not 24 in., use right knob
to enter the amount that the wire was short/
long.
Pull spoolgun trigger again to verify the ad-
justment. Repeat these steps until satisfied
with accuracy.
Press Next to access fast speed calibration.
To begin the fast speed calibration, pull the
spoolgun trigger. The wire will feed wire and
automatically stop.
Cut wire flush at nozzle and measure run-
out. If wire length is not 24 in., use right knob
to enter the amount that the wire was short/
long.
Pull spoolgun trigger again to verify the ad-
justment. Repeat these steps until satisfied
with accuracy.
Press Save to complete the calibration pro-
cedure and be returned back to the settings
menu.
Press Home to return to weld mode.