System Installation 3-15
Power On
Before power on, ensure that the Ultrasound system, printer adapter, and
printers are correctly connected and properly powered on.
When powering on the printer adapter, do not abnormally power off the printer
adapter, which may cause device damage and malfunction.
1. Press the power button of the graph/text printer, and ensure that the printer
works normally.
2. Press the power button on the control panel of the ultrasound system, and the
imaging screen is displayed.
3. Press the power button of the printer adapter, and indicator of the button turns
blue. (sometimes, the printer adapter is automatically powered on together with
the Ultrasound system)
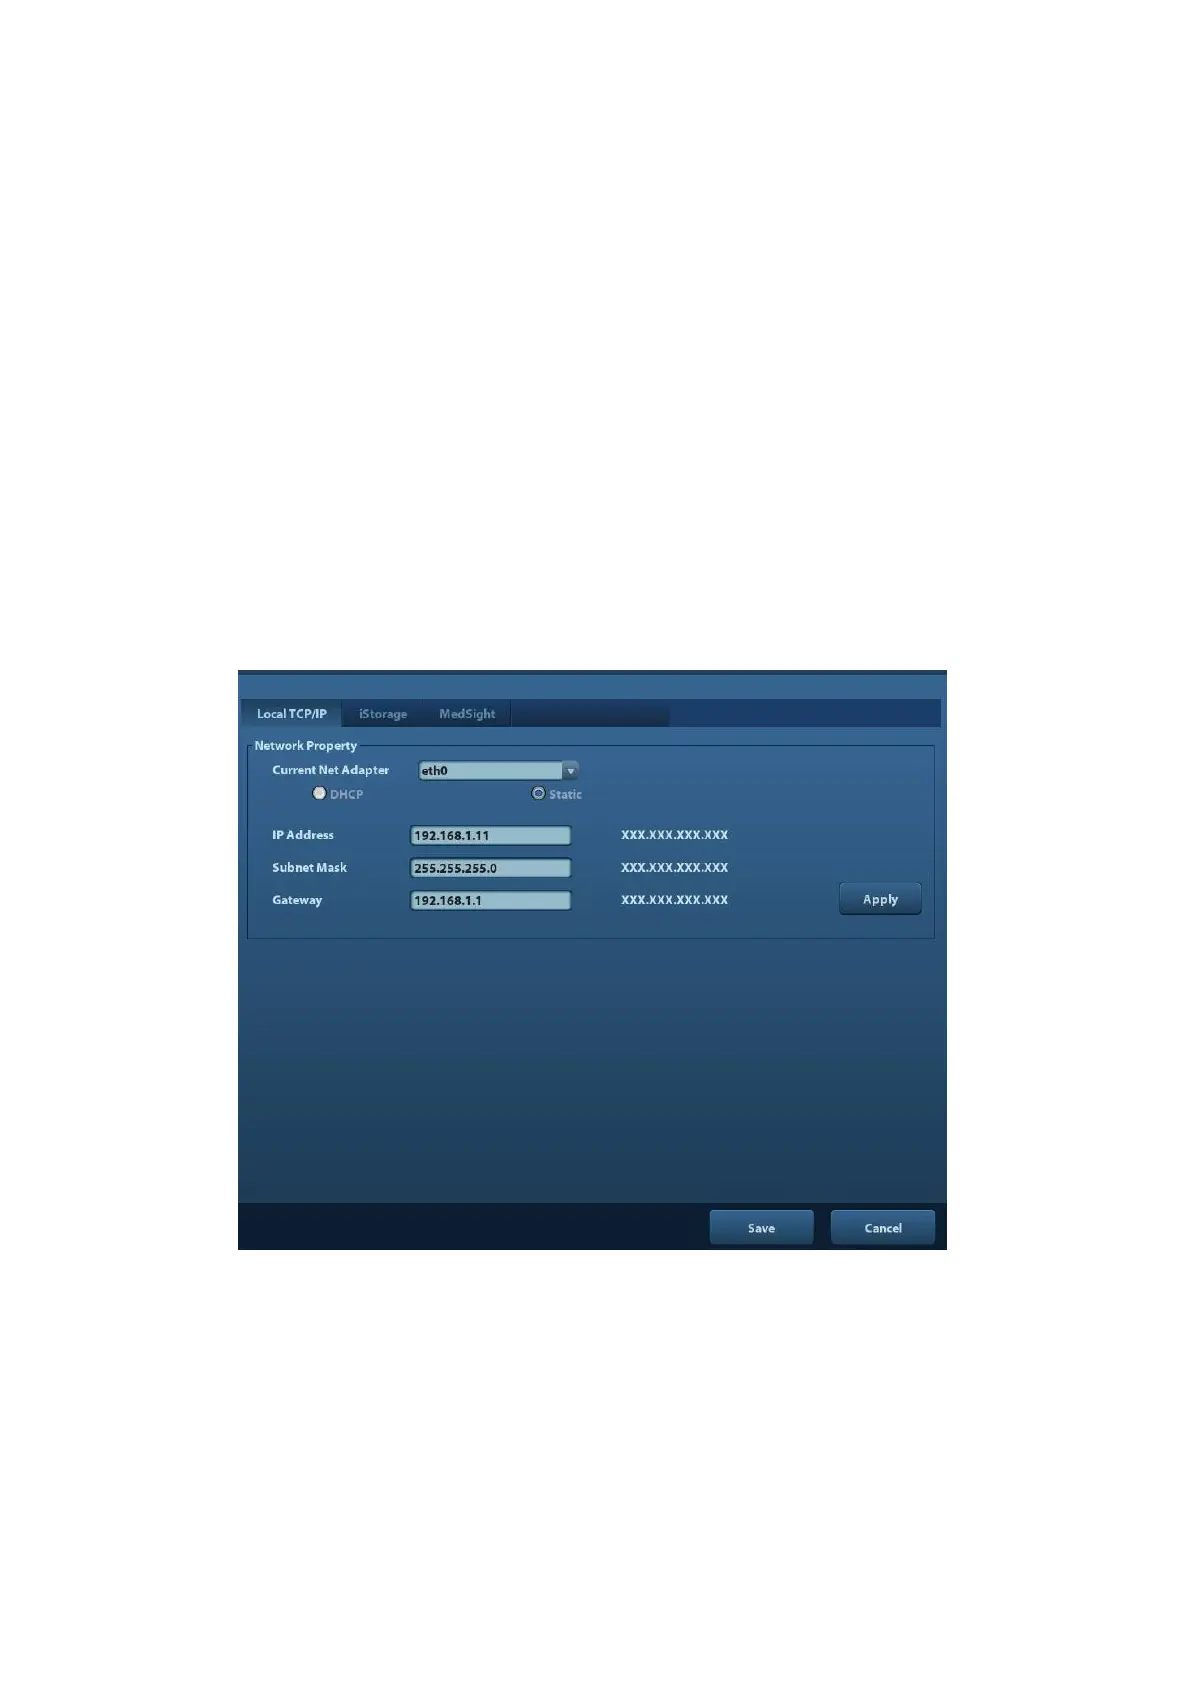
Settings
Network Preset
1. Open the Network page via [Setup] [Network Preset] [Local TCP/IP].
2. Select Static;
3. Set the IP Address to any value from 192.168.1.1 to 192.168.1.200 (192.168.1.10 is
excluded, because it belongs to the printer adapter);
4. Set the Subnet Mask to 255.255.255.0 and Gateway to 192.168.1.254;
5. Click [Save].