6-18 Instruments and warning lamps
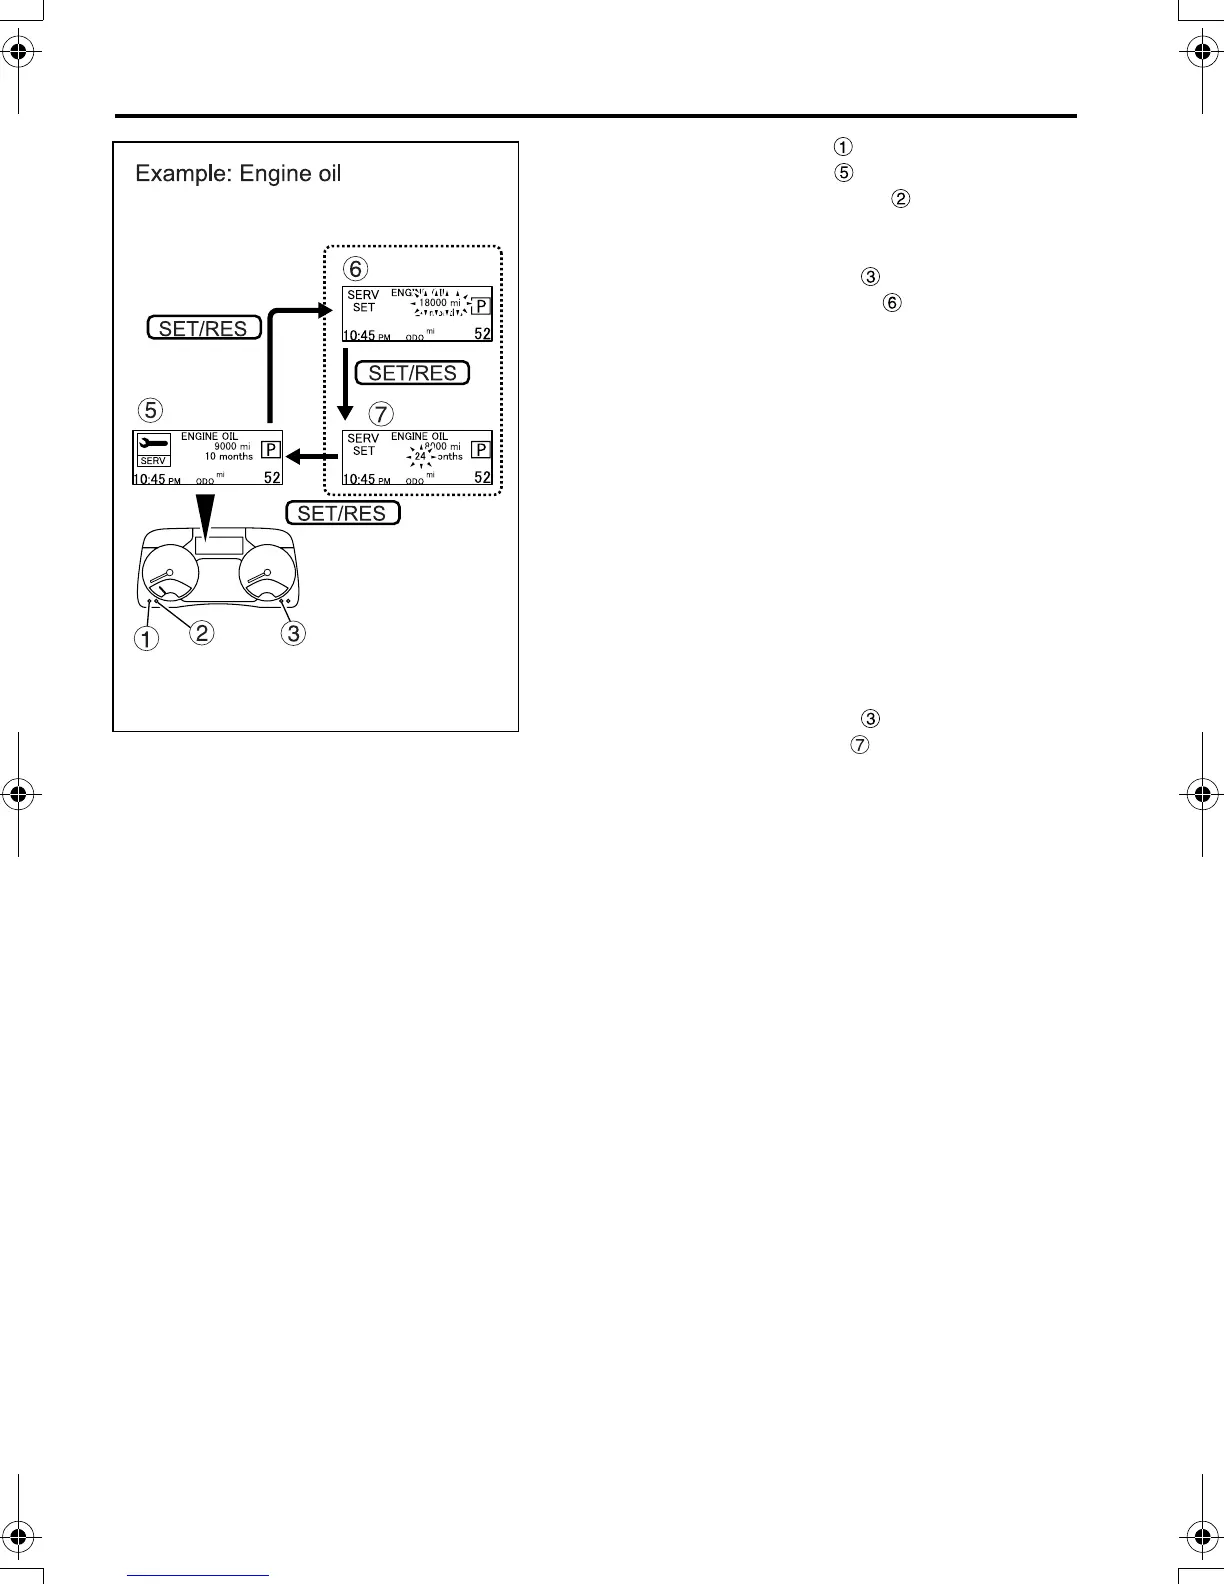
1. Press the MODE switch to select the mainte-
nance information mode .
2. Press the SELECT switch to select the
screen for the replacement item for which you
want to set the interval.
3. Press the SET/RES switch to select the inter-
val distance setting screen (with “mi” indi-
cated). The numerals indicating the distance
blink once this screen is selected.
4. Press the SELECT switch or MODE switch to
change the distance.
• Each time you press the SELECT switch, the
distance value increases by 500 miles
(1,000 km).
• Each time you press the MODE switch, the dis-
tance value decreases by 500 miles (1,000 km).
• A long press on the SELECT or MODE switch
increases or decreases the distance value by
2,500 miles (5,000 km), respectively.
• If the replacement interval is controlled by the
period of time (not by the distance), leave the
distance space blank (“---- mi”).
5. Press the SET/RES switch to select the inter-
val period setting screen (with “month” indi-
cated). The numerals indicating the period of
time blink once this screen is selected.
6. Press the SELECT switch or MODE switch to
change the value of the period.
• Each time you press the SELECT switch, the
period increases by 1 month.
• Each time you press the MODE switch, the
period decreases by 1 month.
• A long press on the SELECT or MODE switch
increases or decreases the period by 2 months,
respectively.
• If the replacement interval is controlled by the
distance (not by the period of time), leave the
period space blank (“-- month”).
7. Press the SET/RES switch to return to the initial
display screen.
8. In the initial display screen, give a long press on
the SET/RES switch until “0 mile” and “0
months” are indicated.
Z21558
FE_FG.book Page 18 Monday, December 19, 2011 4:22 PM

 Loading...