12 - 2 VC70 Vehicle Computer Product Reference Guide
Returning the Vehicle Computer for Service
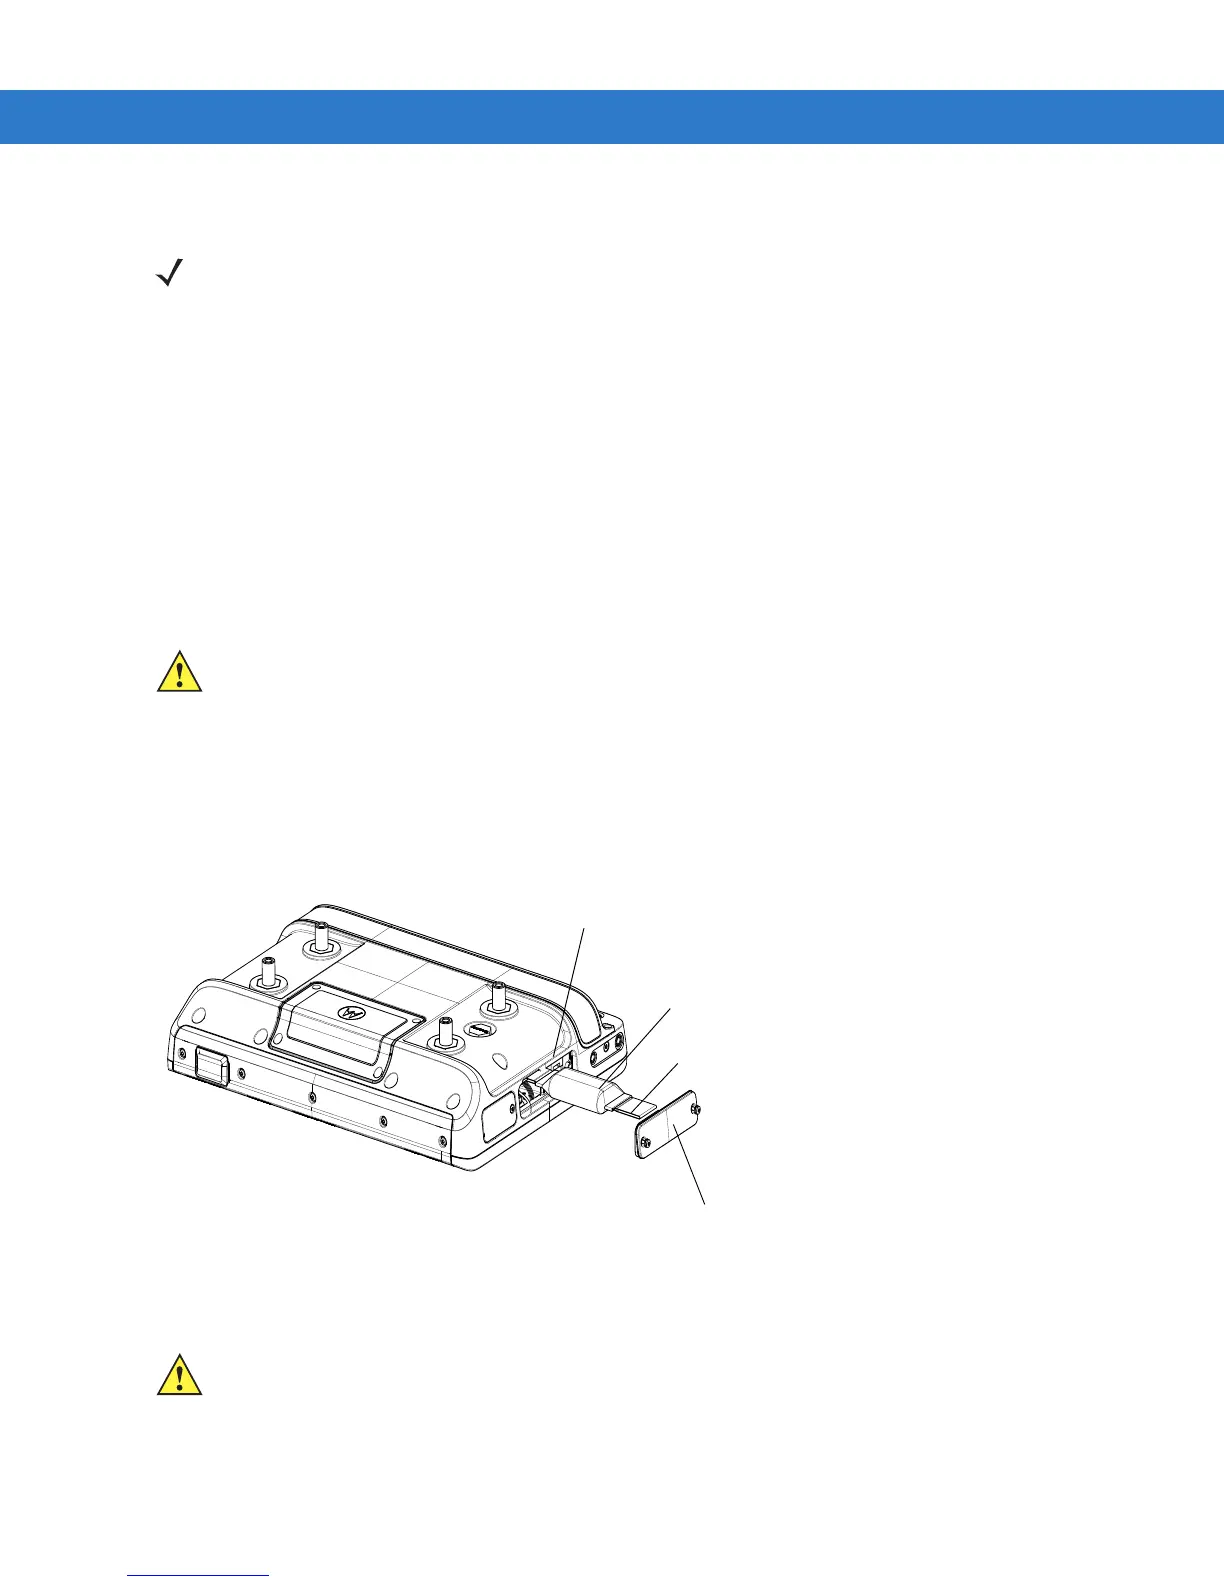
Replacing the Desiccant Bag
1. The VC70 ships with a desiccant bag installed. The installer may wish to replace the desiccant in the VC70
with a new bag prior to installing the VC70 on the vehicle, as transit and storage may have saturated the
desiccant.
2. Open the two screws securing the service door and remove the door.
3. Pull out the old dessicant bag using the attached tab.
4. Open the new desiccant package and remove the desiccant bag.
5. Fold the four corners of the bag under to form a pillow.
6. Place the desiccant bag in the desiccant well.
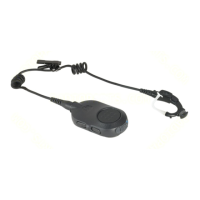
Figure 12-1
Replacing the Desiccant Bag
7. Carefully place the service door onto the right side of the housing.
8. Secure the door to the housing using the two captive screws. Torque to 9 ± 0.5 kgf.cm (7.8 ± 0.4 in-lbs).
NOTE Symbol has taken great care to ensure environmental conditions such as humidity will not affect the stability of
the vehicle computer. This is accomplished my means of desiccant bags which can be inserted by the user
upon receipt of the vehicle computer. In the event, the vehicle computer needs to be shipped by air carrier to
Symbol for repair or maintenance, it is essential that the user remove the desiccant door cover before the
vehicle computer is packaged for shipment. The reason for this step is to avoid compromising the vehicle
computer as a result of pressurization during air transit. The user must simply remove the screws associated
with the desiccant door on the back of the unit. Discard the used desiccant bags. Upon receipt of the repaired
vehicle computer, the user should insert new desiccant bags (if used) and reseal the doors using new screws.
CAUTION Do not use any sharp tool to pull the dessicant bag out of the VC70. Failure to comply may cause tear of
the bag and damage to the VC70.
Desiccant Well
Desiccant Bag
Service Door
Bag Tab
CAUTION Be sure to torque the screws to seal the device properly. Otherwise, sealing can be compromised.

 Loading...