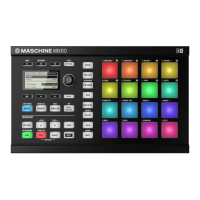
► Press the CONTROL button at the top right corner of the display to get back to Control
mode.
The GROUP button lights off and the CONTROL button lights up.
For now, stay in Step mode, to learn a few more things in this mode, so if you pressed CON-
TROL, press SHIFT + GROUP again (CONTROL must be off and GROUP must be lit).
If you decided to create a Pattern more than 16 steps long, you can use the left and right arrow to
switch between each bar or alternatively press F1 (FOLLOW) and MASCHINE will automatically fol-
low the Pattern and display the steps on the pads accordingly.
7.1.2 Adjusting the Pattern Length in Step Mode
At any time, you can adjust the Pattern Length directly from the Step mode:
1. Press PATTERN and turn Knob 4 to adjust the Pattern Length.
Only 16 steps will be represented on your pads, so if you want to program longer Patterns,
you will have to switch to the previous/next 16 steps using Knob 6, or alternatively:
2. Press FOLLOW (in the Transport section of your controller) and MASCHINE will automati-
cally follow the Pattern and display the next 16 steps of the Pattern on the pads as the
sequence plays.
In Step mode, the left display always indicates which part of the Pattern is currently represent-
ed on your pads:
The 16 pads representing the full Pattern (the Pattern is one bar long).
Creating Beats with the Step Sequencer
Building Up a Beat in Step Mode
MASCHINE MIKRO - Getting Started - 104

 Loading...