104
5. Using On-Screen Menu
Adjustment method
1. Alignthecursorwiththe[HORIZONTALCORNER]or[VERTICALCORNER]ofthe[GEOMETRICCORREC-
TION]menuandthenpresstheENTERbutton.
• Theadjustmentscreenwillbedisplayed.
2. Press the ▼▲◀▶ buttons to align the cursor (yellow box) with the target adjustment point and then press
the ENTER button.
• Thecursorwillchangeintoanadjustmentpoint(yellowincolor).
3. Press the ▼▲◀▶ buttons to adjust the corners or sides of the screen and then press the ENTER button.
• Theadjustmentpointwillgobacktobeingacursor(yellowbox).
Explanationofscreentransition
• Theadjustmentpointsofthefourcorners(a,c,fandhinthedrawing)willmoveindependently.
• Thefollowingadjustmentpointsdifferatthe[HORIZONTALCORNER]and[VERTICALCORNER].
HORIZONTALCORNER:WhenPointbinthedrawingismoved,andtheuppersideandPointgaremoved,the
lowersidewillmoveinaparallelmanner.
VERTICALCORNER:WhenPointdinthedrawingismoved,andtheleftsideandPointearemoved,theright
sidewillmoveinaparallelmanner.
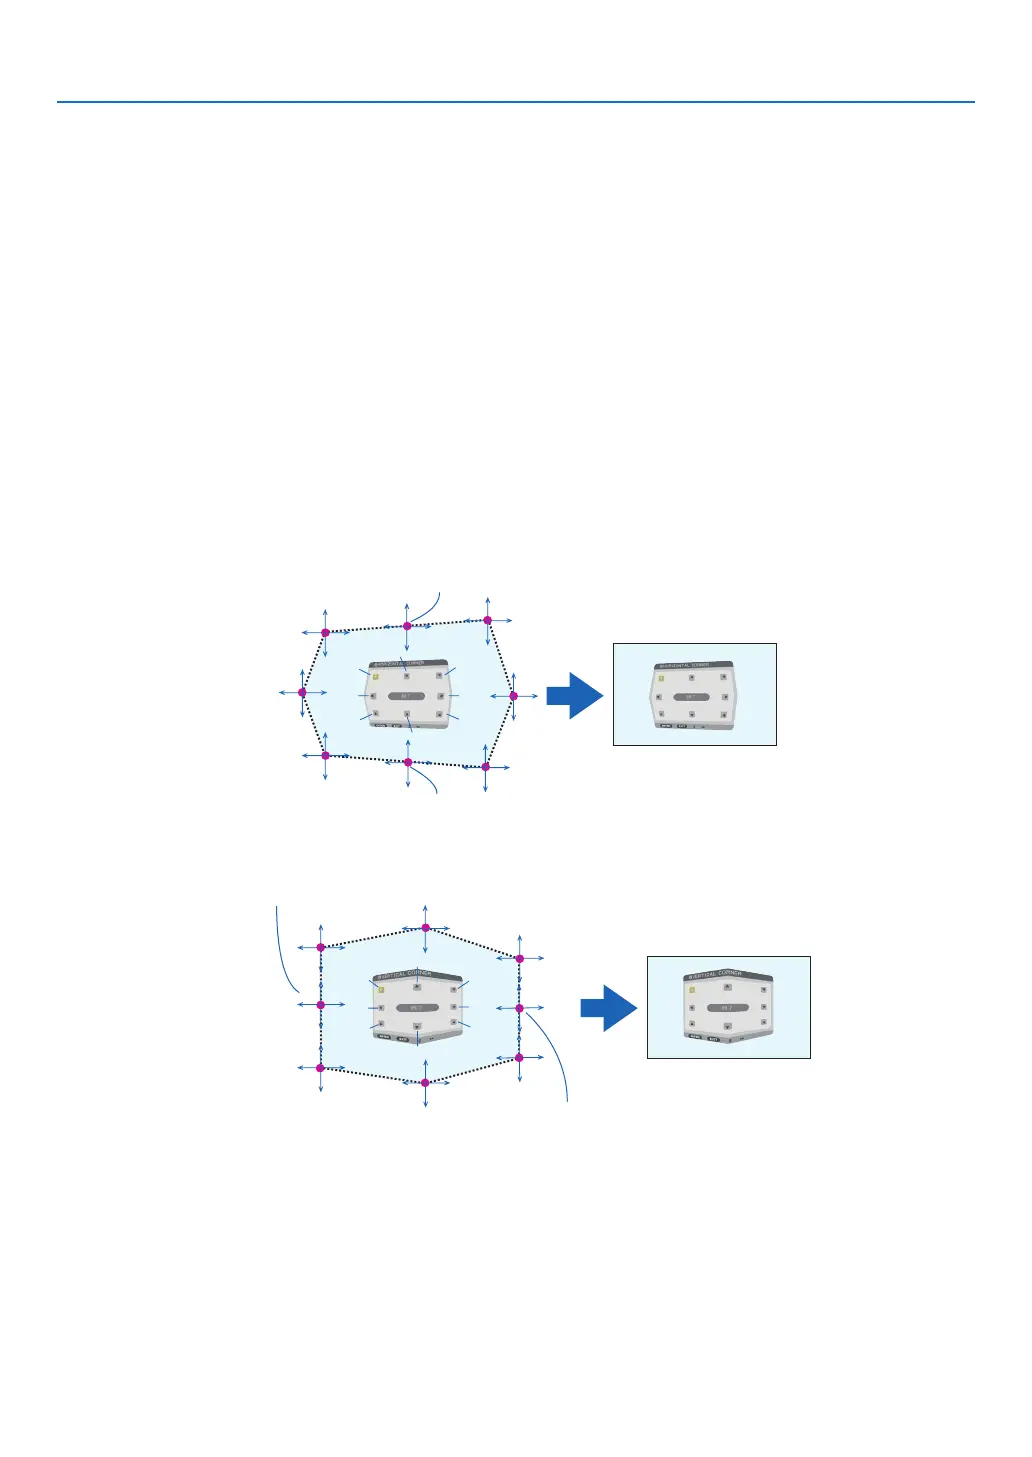
[Adjustmentpointsofthe[HORIZONTALCORNER]screenandmovementpointsoftheprojectionscreen]
PointbwillbedisplacedinaparallelmanneratthesametimeasPointsa,b,c
PointgwillbedisplacedinaparallelmanneratthesametimeasPointsf,g,h
[Adjustmentpointsofthe[VERTICALCORNER]screenandmovementpointsoftheprojectionscreen]
PointdwillbedisplacedinaparallelmanneratthesametimeasPointsa,d,f
PointewillbedisplacedinaparallelmanneratthesametimeasPointsf,g,h
4. Start from Step 2 onwards to adjust the other points.
5. When the adjustment is completed, press the ▼▲◀▶buttonstoalignthecursorwiththe[EXIT]in the
adjustment screen and then press theENTER button.
• Switchtothe[GEOMETRICCORRECTION]menuscreen.

 Loading...