176
7. Maintenance
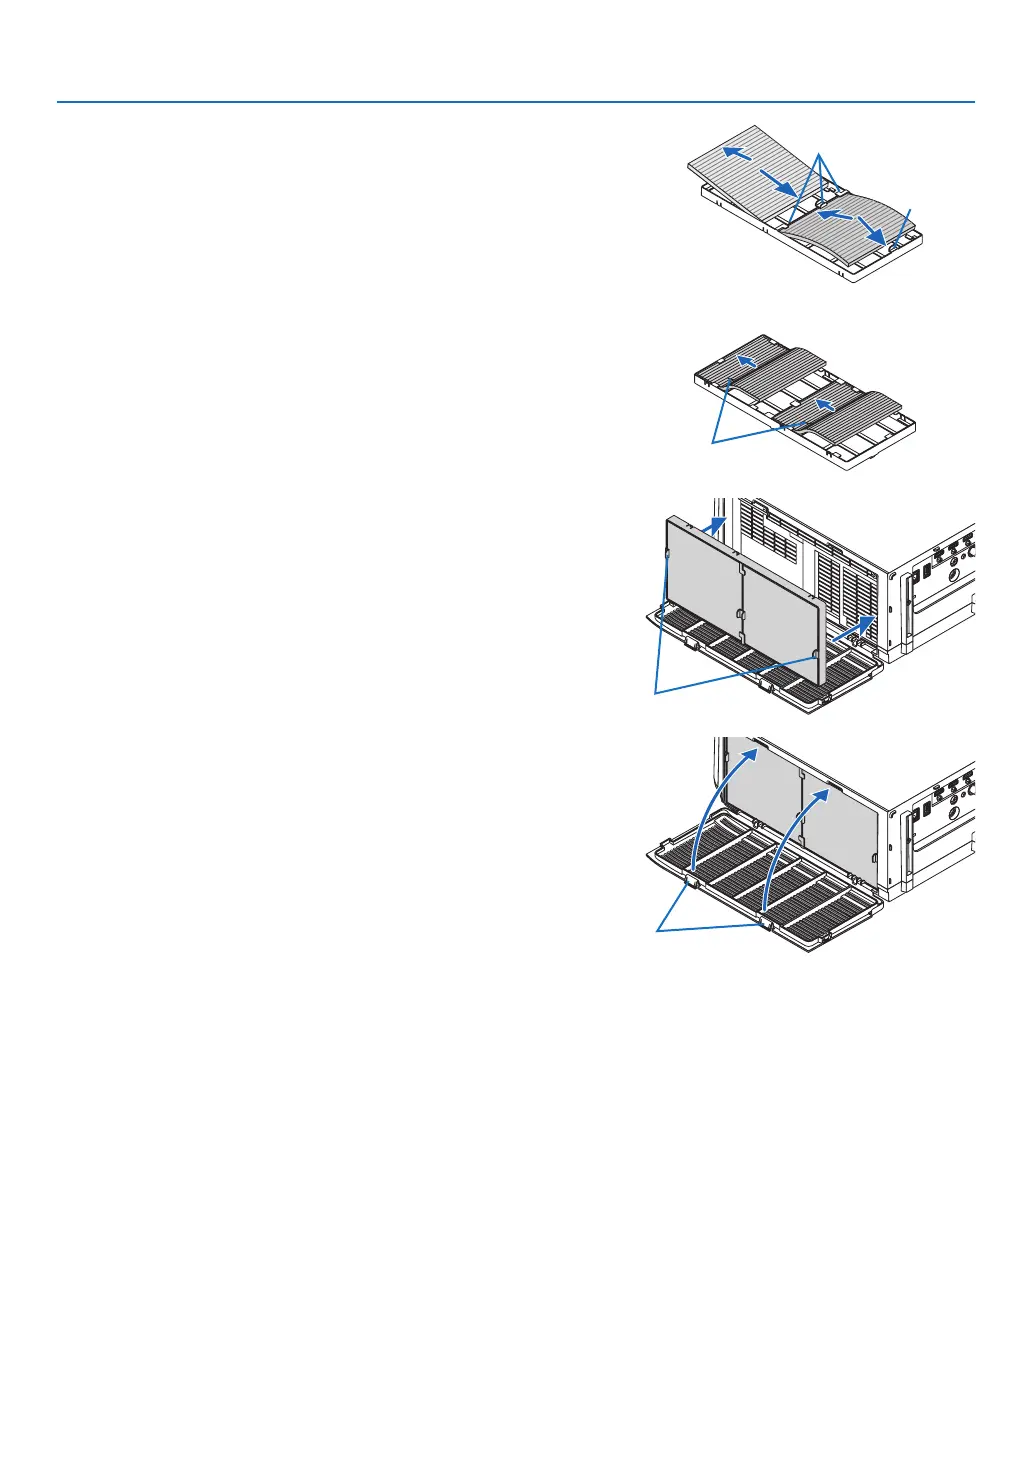
6. Attach 4 new filters to both sides of the filter unit.
The installation locations of the lters are differentiated by
whetherthereareanyslits(notches).Installthelterunderthe
angearoundthelterunitasfollows.
(1)Attachthe2lterswithtransparentframesttedtothegrips
tothesideofthelterunitwheretheknobislocated.
• Turnoverthesideofthelterwiththetransparentbox
andtheninstallit.
(2)Attachthe2lterswiththeblacklinestothesideofthelter
unitwherethereisnoknob.
• Turn over the side of the lter with the blackline,and
theninserttheslitsintotheprotrusionsonthelterunit
toinstallit.
Flange
Knob
Slit
7. Mount the filter unit back onto the projector cabinet.
Insertthelterunitontotheprojectorwiththesidesonwhich
theleftandrighthooksarelocatedontheoutside.
Hook
8. Closetheltercover.
Afterclosing,pushtheltercovernearthebuttonsuntila“click”
soundisheard.Theltercoverwillbesecuredinposition.
Button
9. Clearthelterusagehours.
Plugthepowercordintothewalloutlet,andthenturnonthe
projector.
Fromthemenu,select[RESET]→[CLEARFILTERHOURS].
(→page132)
Theintervaltimetocleantheltersissetto[OFF]attimeof
shipment.Whenusingtheprojectorasitis,youdonotclear
thelterusage

 Loading...