SECTION 4
SOFTWARE SETUP INFORMATION
6
5
9.
Click on OK to close the “Printer Driver Printing Preferences” window.
1
0. Close the “Devices and Printers” folder.
11. Open MS-Word 2007.
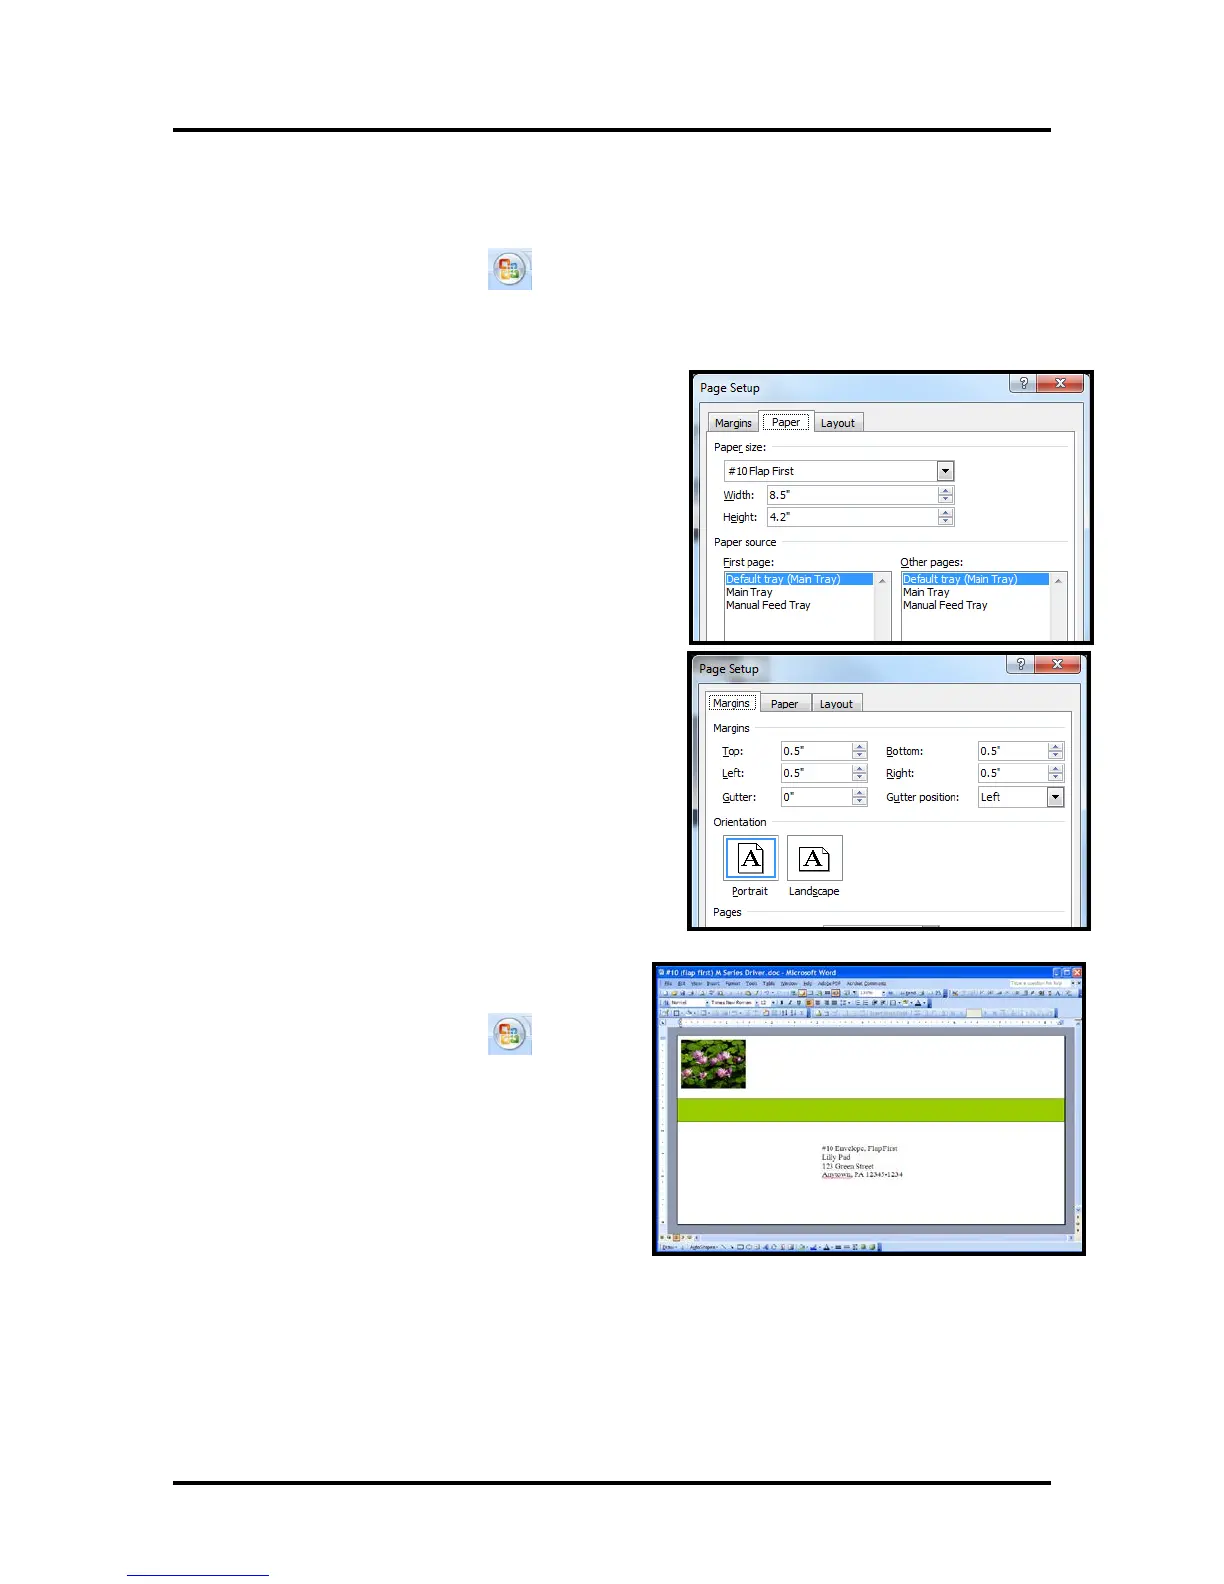
12. Click on the “Office Button”
and then select “New”, to create a new “blank document”.
13. Click on the “Page Layout” Tab.
14. Click on “Size” and select “More Paper Sizes”. The “Page Setup” window will open.
15. Within the “Page Setup” window; click on the
“Paper “Tab and select the “custom size (#10 Fla
p
F
irst), predefined in steps 4 & 8 above, from the
pull-down list
.
1
6. Within the “Page Setup” window; click on
“Margins” Tab and set the “Orientation” to
“Landscape”.
1
7. Set the margins to the minimum values, or to your
desired values.
18. Press OK.
Tip: If you should get a warning that “one or more
margins are set outside the printable area of the
page…”; Click on the Fix button.
1
9. Insert the items (text, graphics, etc..) you want
on the document.
20.
Click on the “Office Button”
and then
select “Print”.
Make sure the “Prin
ter Driver” is showing as
your printer name.
2
1. Click on the “Properties” button.
22. Under the General Tab set the following:
Orientation = “Portrait”
Media Size = “custom page” (#10 Flap First
)
d
efined in steps 4 & 8
.
23.
Click on OK to exit from the “Printer Driver Pro
perties” window.
2
4. When you are ready to print, Click on OK to send the document(s) to the printer.
Important: If you close out this document and you try to reopen it at a later time; it may print in the wrong
orientation. In this case; after re-opening the document; start from step #11 in this procedure to reset the
orientation.