78
Reference section 4 — Creating waypoints and routes
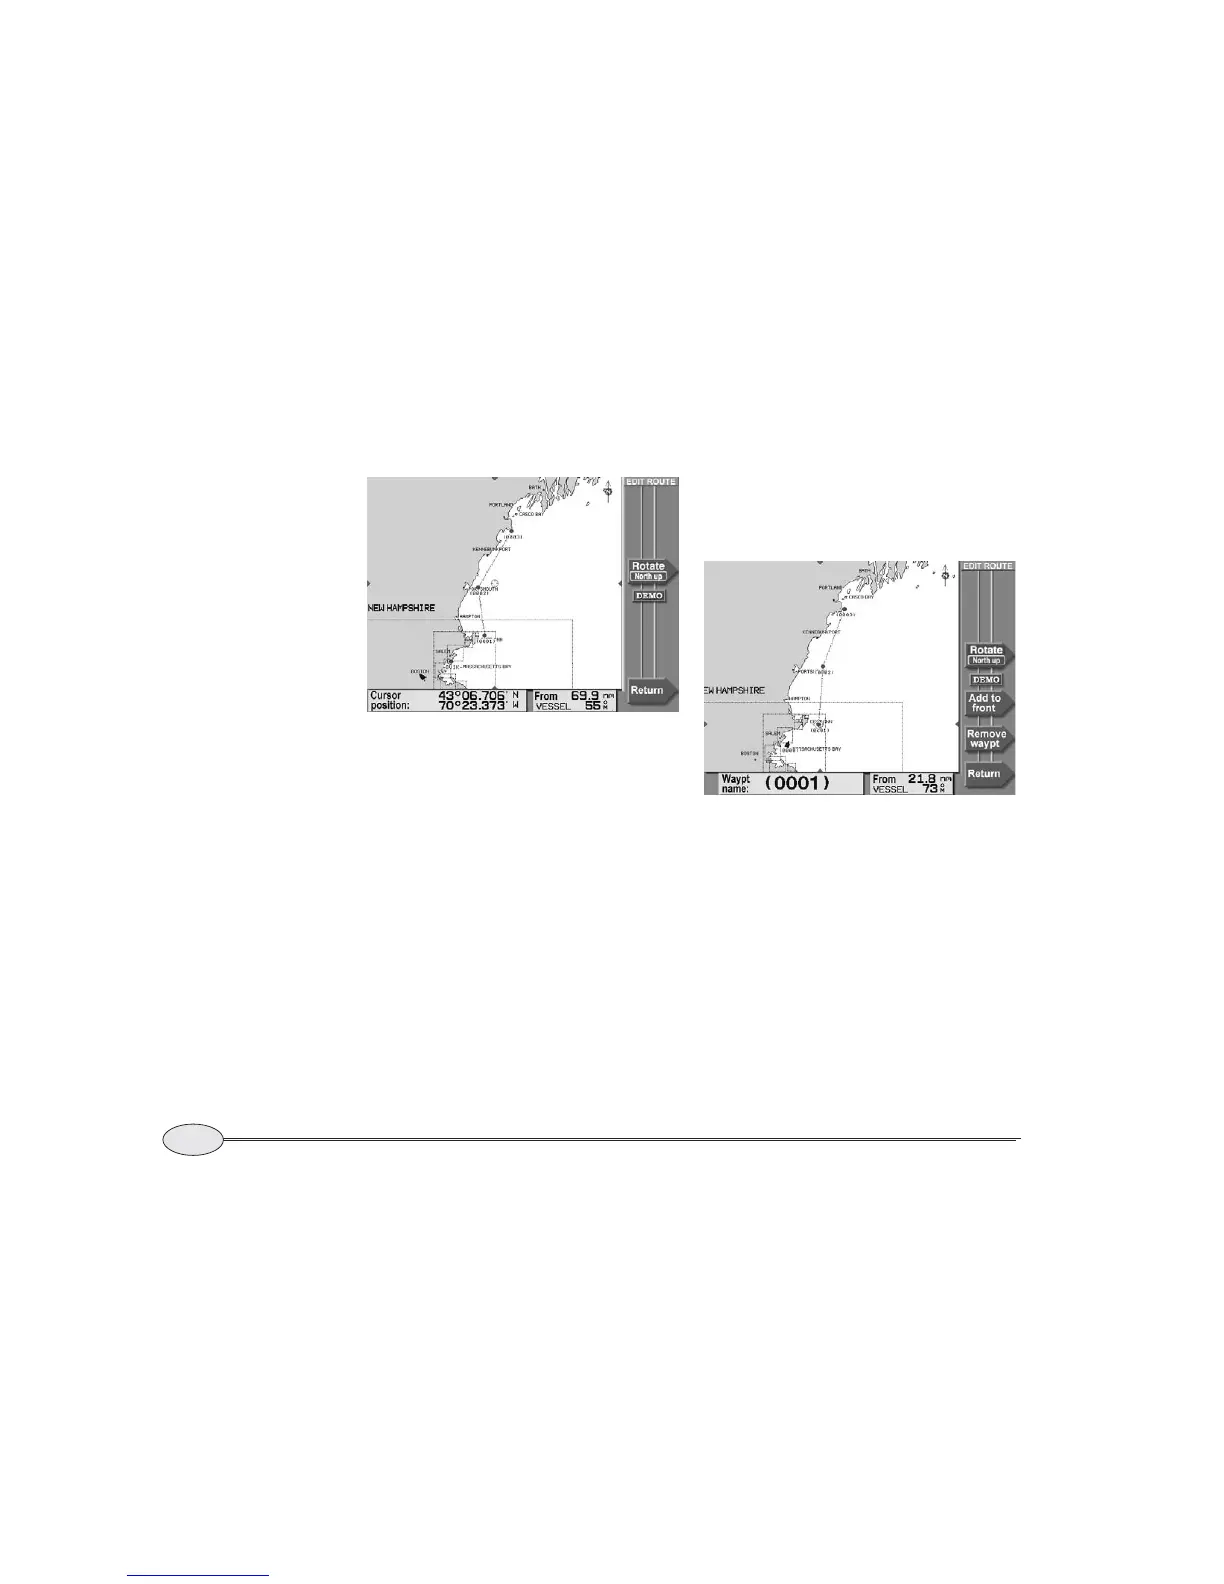
Editing a route
Northstar 6000i
The direction of the route is indicated by
a series of small arrows in each leg, and
the cursor is in the middle of the screen.
Editing from the chart is described below;
editing from a list of waypoints is described
in Editing a route using a waypoints list,
starting on page 79.
Editing a route using the chart
After you have accessed a route as
described above, you can add or remove
waypoints using the chart as follows:
Adding waypoints to a route
You can add waypoints to the end of a
route, or to the beginning, or the middle,
depending on the choice you make in step
one below.
1. Press the cursor pad to move the cursor
onto the route’s last waypoint (or first
waypoint, or a leg).
2. Press Add to end (or Add to front or
Split leg).
3. Move the cursor to the location that you
want to add to the route (either an existing
waypoint, or any other spot).
As you move the cursor, the 6000i dis-
plays the new route leg as a dotted line to
the cursor position.
4. Press a menu key once to add the way-
point:
• If you selected an existing waypoint,
the key is marked Add waypt.
Editing a route on the chart


 To Next Page