CHAPTER 15
PROFILE CHANGEOVER PROCEDURE
53
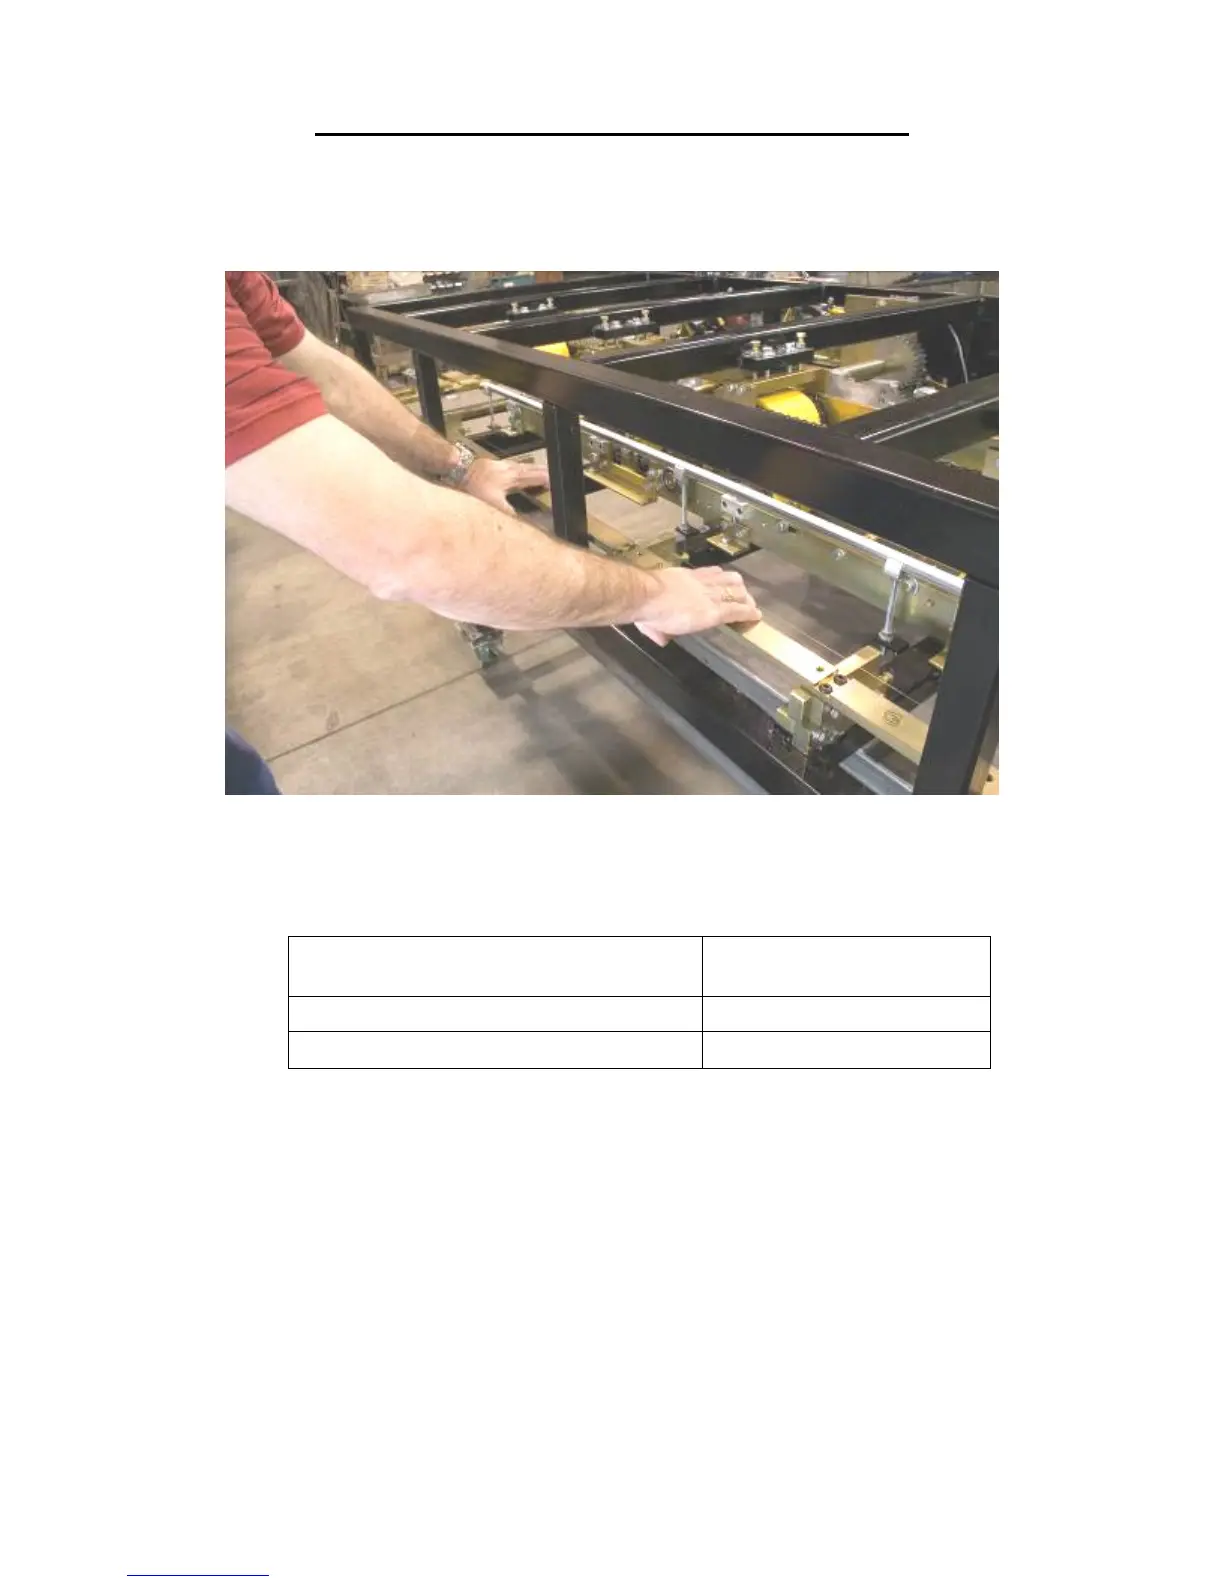
5. Once all 4 bolts are loose, slide the Right Side Fixed Mount Rail #1 to the correct
position (Figure 43), either “inboard” or “outboard". Make sure that it is fully in
position and then tighten the “C” bolts (Figure 41 or Figure 42).
Figure 43: Right Side Fixed Mount Rail
6. Locate your profile in the chart below to see what position the Left Side Fixed
Mount Rail #1 needs to be in.
PROFILE
LEFT SIDE FIXED MOUNT
RAIL #1 POSITION
SS200/210A, SS550, SS675 POSITION "A", OUTBOARD
SS100, SS150, SS450, FF100, FF150, BP POSITION "B", INBOARD
Figure 44: Profile Chart
Now look at the machine to see what position the Left Side Fixed Mount Rail #1
is currently in. The stamped letter closest to the mounting bolts "C" indicates the
position (Figure 46). If it is in the correct position proceed to Step 7, otherwise,
loosen the four mounting bolts "C", slide the Left Side Fixed Mount Rail #1 as far
as it will go in either the "inboard" or "outboard" direction, and re-tighten the
bolts.